A32NX: Help with calculations (part 3: descent)
As indicated in tutorial #1, the EFB (flypad) of the A32NX offers a "Performance" page ("calculator" icon) with two tabs:
- the landing length calculator (Landing) – tuto n°1
- the descent calculator (Top of Descent) – this tutorial
(We have added an additional tutorial for calculating take-off speeds – tuto #2)
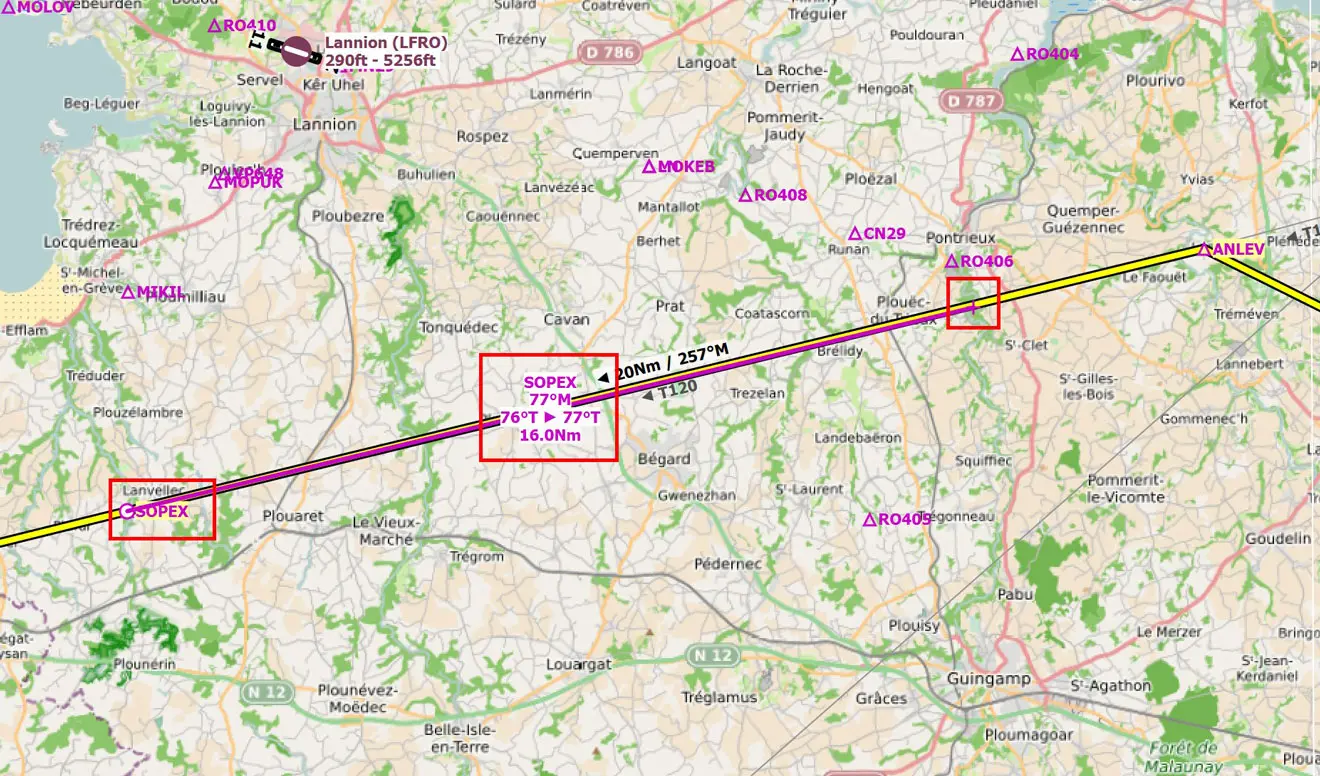
The descent of an airplane is done in several phases. To simplify the tutorial, we have taken as an example a short flight between LFRN and LFRB with a first descent at point SOPEX and a second descent at point BODIL.
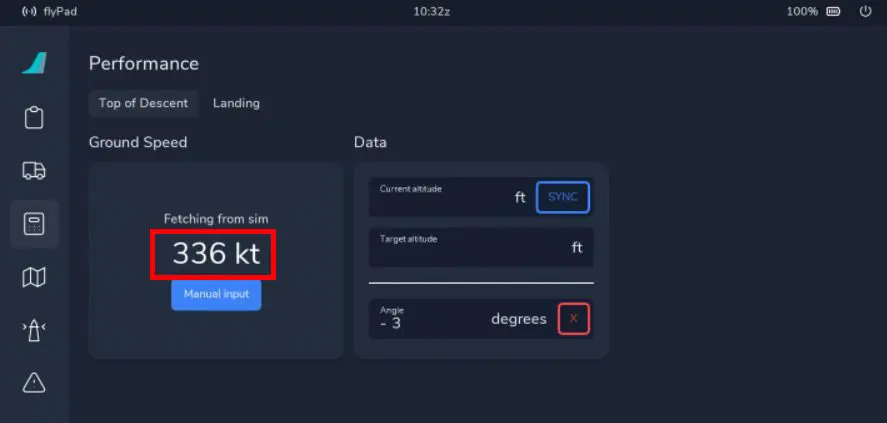
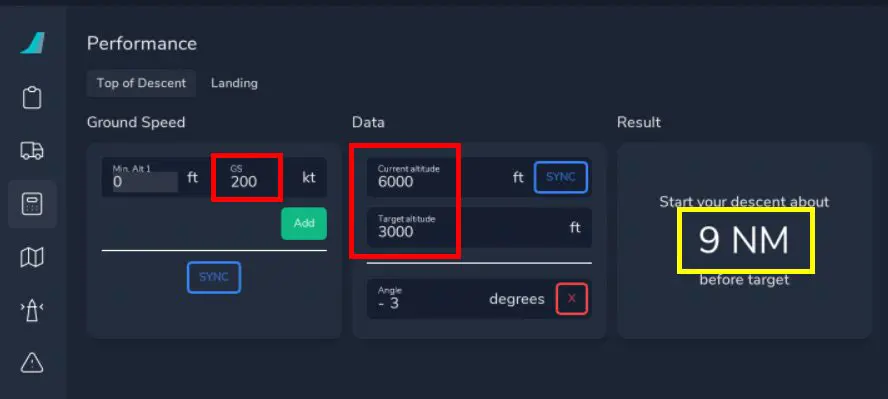
Once in flight, altitude (11000 ft) and speed stabilized (250 kt), we go to the "Performance – Top of Descent" page of the EFB.
The ground speed is displayed, but it can be modified ("Manual input" button).
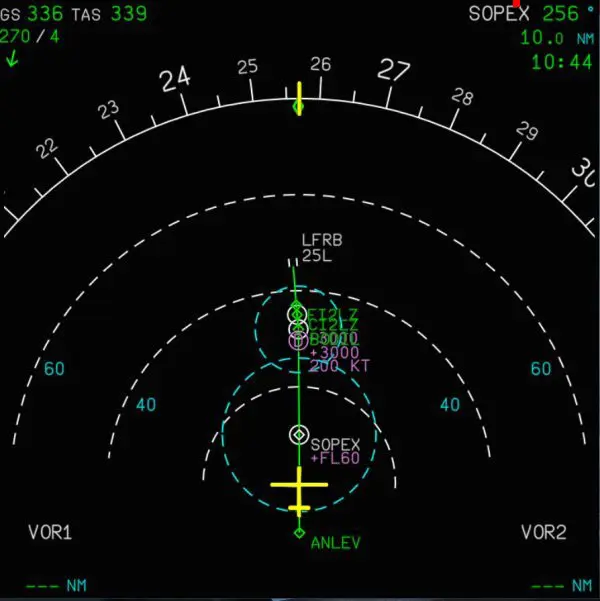
The first objective is to be at the minimum authorized altitude at the SOPEX point: 6000 ft.
We therefore complete the "Current altitude" data (by clicking on the "SYNC" button) and "Target altitude".
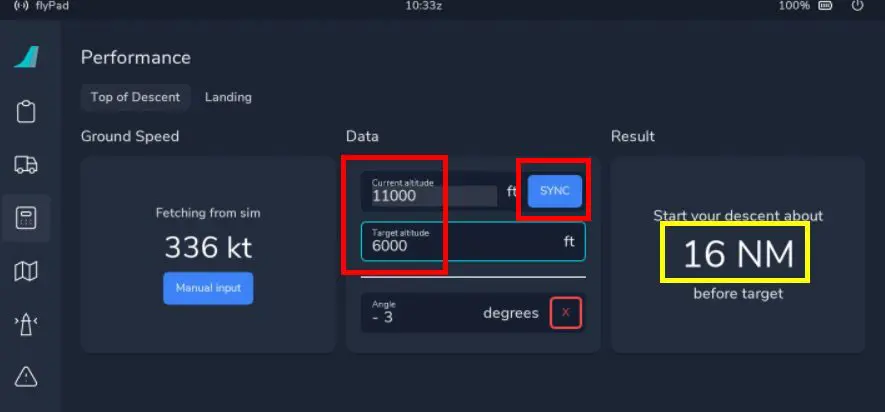
The distance is displayed immediately, so you can transfer it to a map like Little Navmap for example.
It can also be visualized on the ND of the aircraft in the form of a blue dotted circle.
Here's how (with the DEV version of the A32NX as of 4/6/2022):
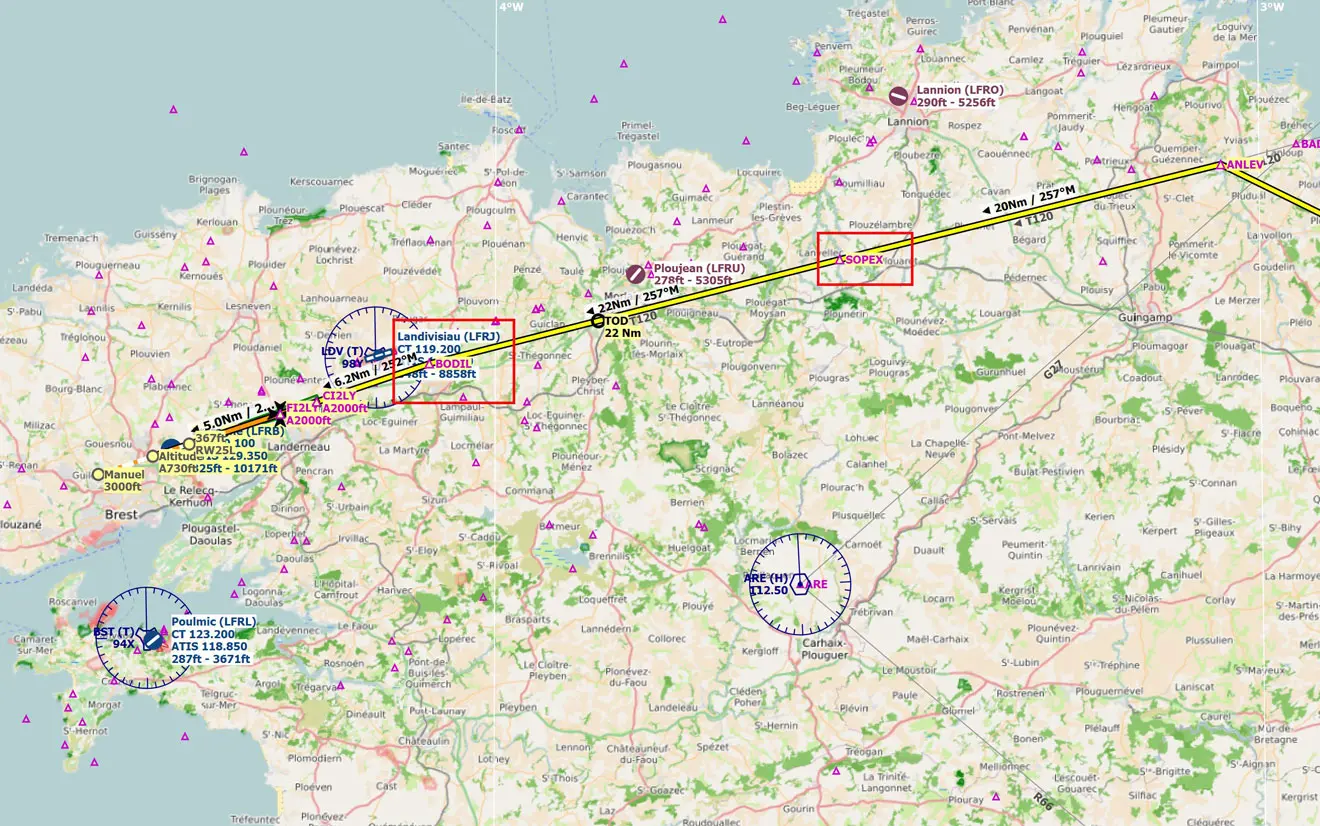
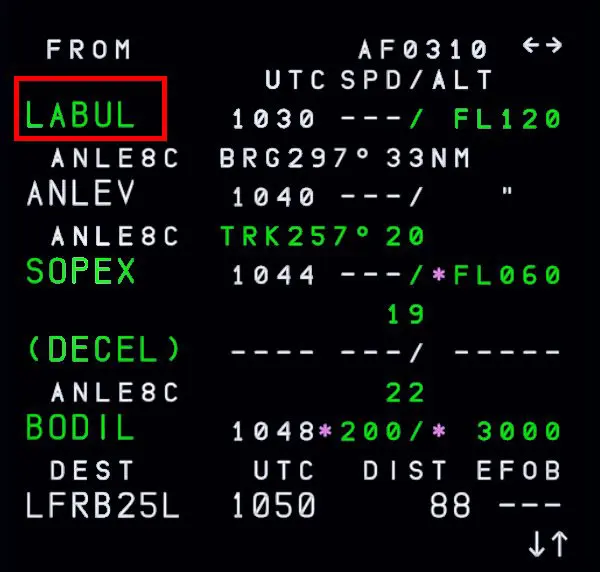
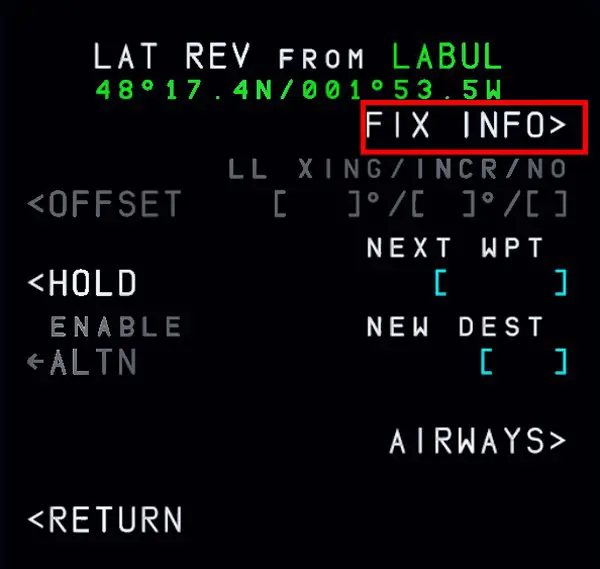
1 - On the MCDU, display the flight plan and click on the topmost point of the window. Then click on "FIX INFO".
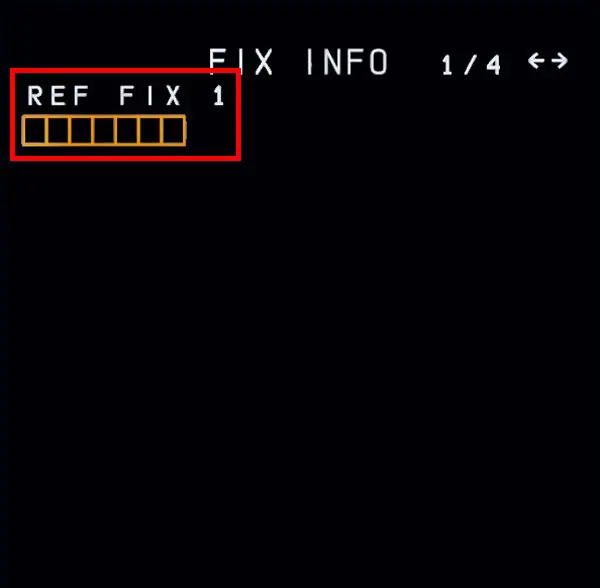
2 - Enter the name of the waypoint "Target" (SOPEX) and the distance indicated by the EFB page (16 NM) in the "RADIUS" box
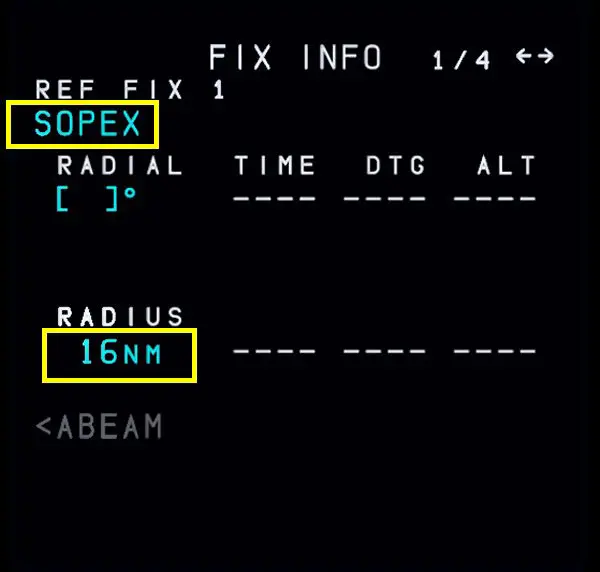
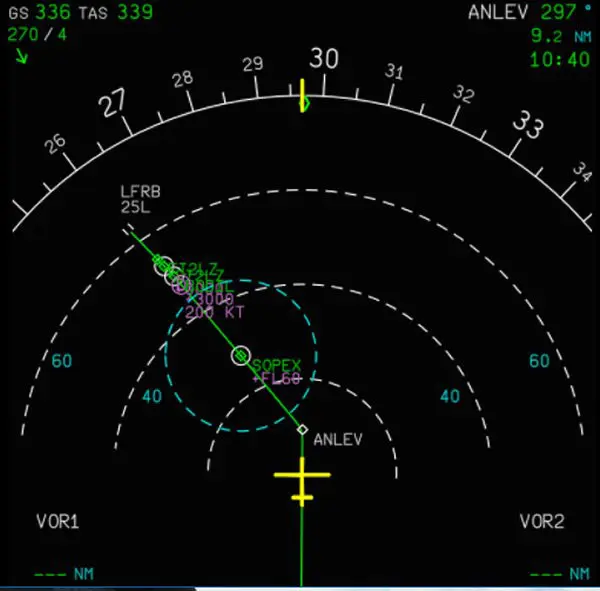
3 - WE can now visualize on the ND (by applying the correct zoom factor) a circle with a radius of 16 NM around the SOPEX point. Crossing the circle will be the descent indicator.
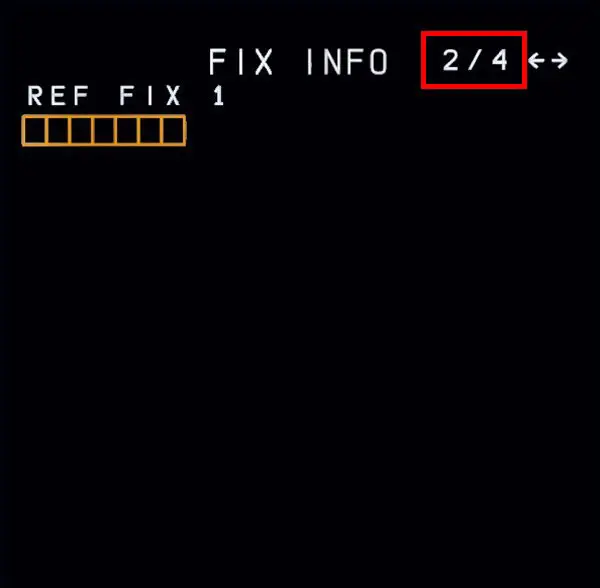
4 - We can also plan the next descent from SOPEX to BODIL, the approach entry point.
Go back to the EFB to enter the new parameters. You can also change the speed.
The method is the same but on the FIX INFO page with the right arrow of the MCDU keyboard, you go to the entry of an additional point since you can enter up to 4 points.
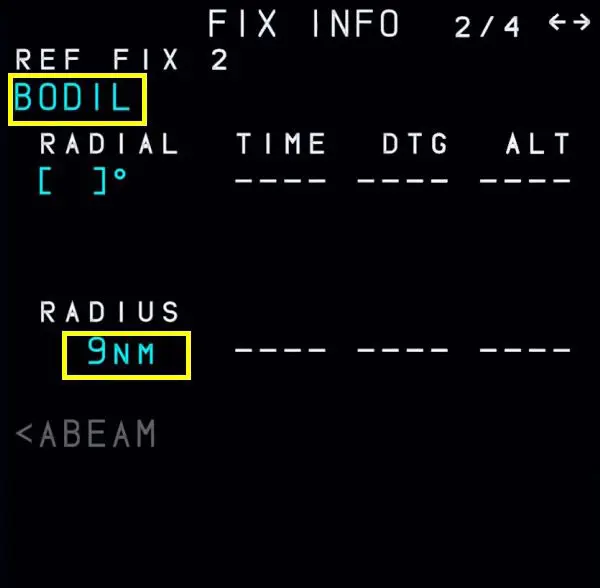
5 - A second circle is thus obtained, the crossing of which will indicate the start of descent towards 3000 ft.
This use of the FIX INFO function is particular and is not the most used by airline pilots.
Concrete example: 15 min circles around airports located on either side of the road: 15 min is the time during which the cockpit is supplied with oxygen.
NB: a detailed explanation of the possibilities of the Fix Info function is given on this page:
https://docs.flybywiresim.com/pilots-corner/advanced-guides/flight-planning/fixinfo/
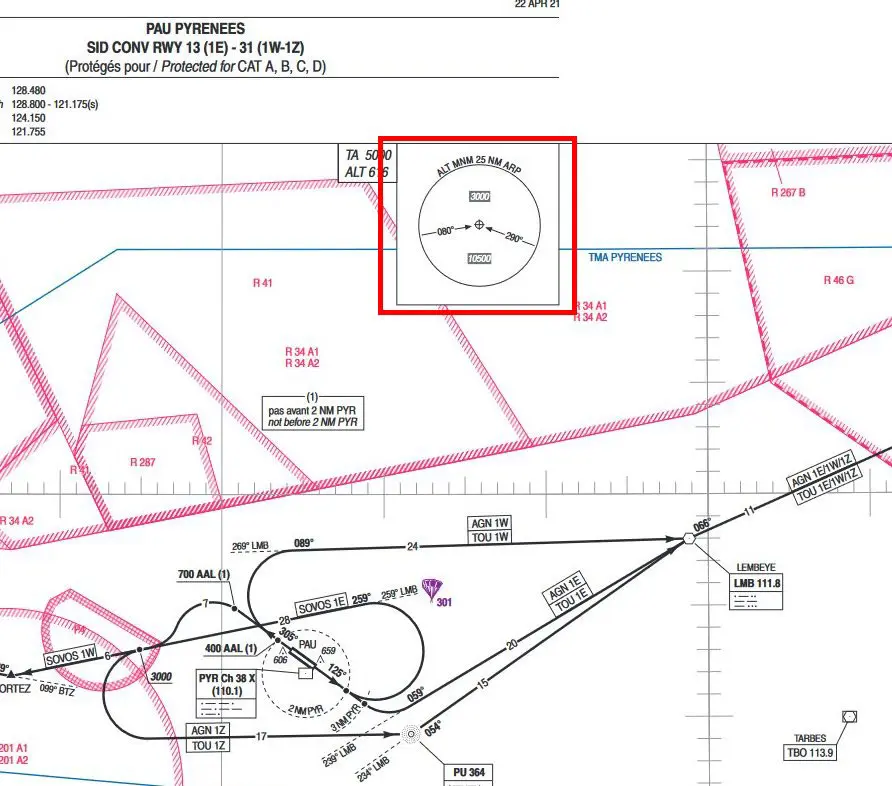
Example of using FIx Info with one Radius value and two Radial values to plot MSA (Minimum Safe Altitude):
- Arrival in Pau (LFBP) from Montpellier (LFMT).
- from Pau airport, draw a circle of 25 NM and two radials, one at 260°, the other at 110°.
ATTENTION: the cards give headings, not radials, they must be converted (180+80 = 260 and 290-180 = 110)
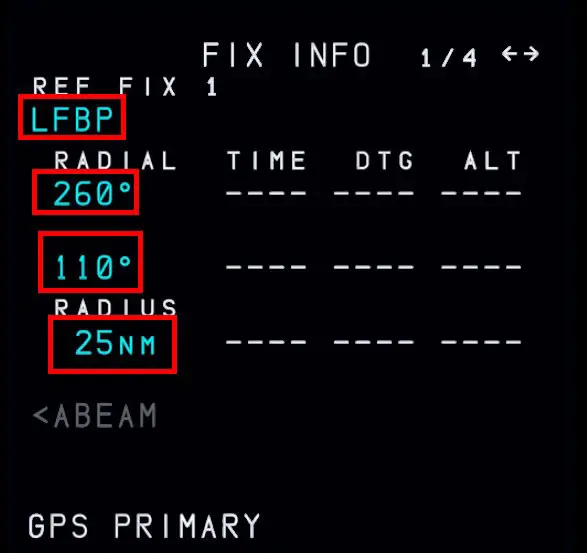
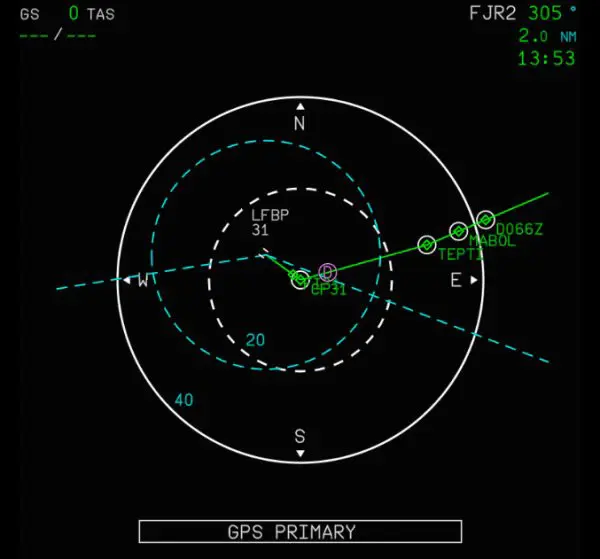
We thus visually obtain the sectors indicated on the SIA map which indicate the minimum safety altitudes to be followed inside the 25 NM circle.