How to set up a joystick (SAITEK X52 Pro)
There are plenty of joysticks and many are compatible with the simulator at launch. This tutorial explains how to setup and save a joystick profile by taking the Logitech (Saitek) X52 Pro HOTAS as example. It is very important to have the controllers connected before starting the simulator.
Process
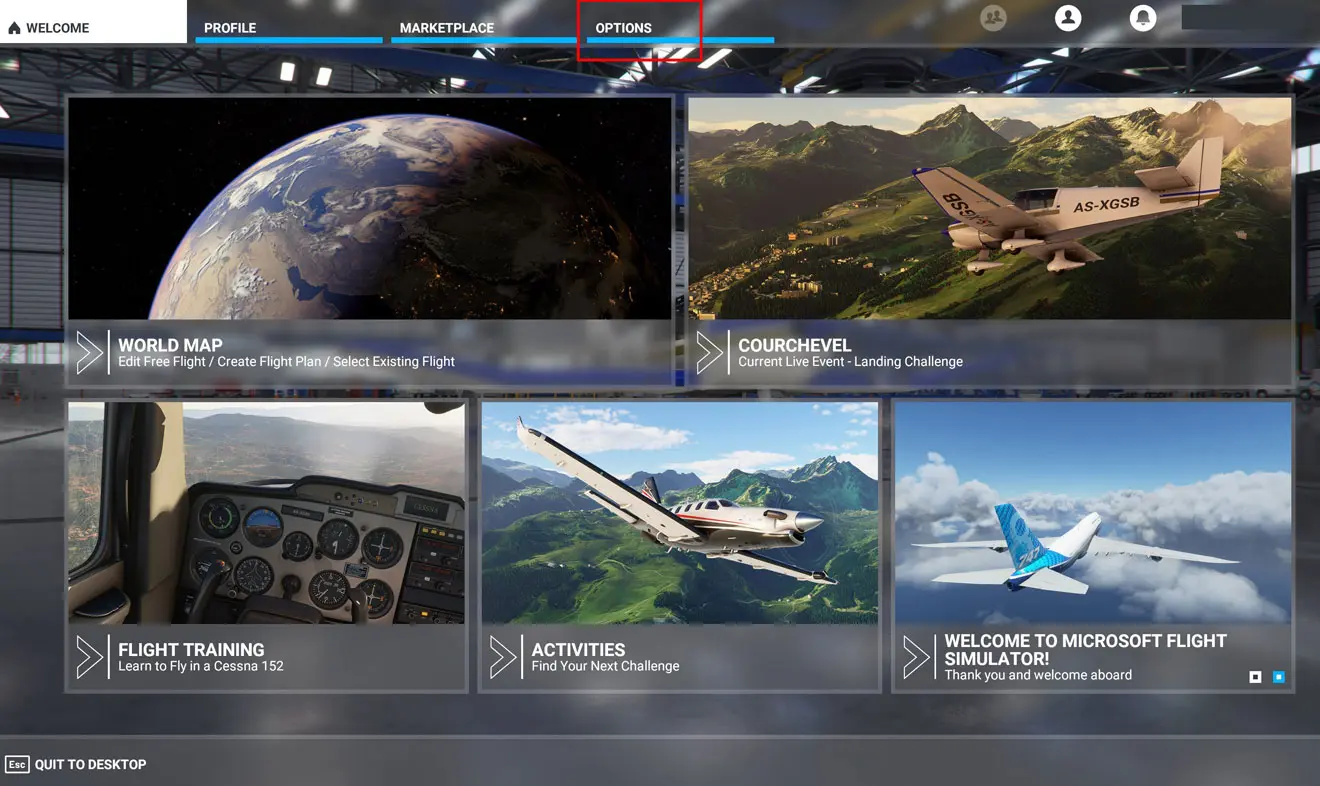
Once FS2020 loaded, you have the following home screen. The setup of the keyboard, mouse and controllers can be done by clicking on the "OPTIONS" tab.
Then on "CONTROLS"
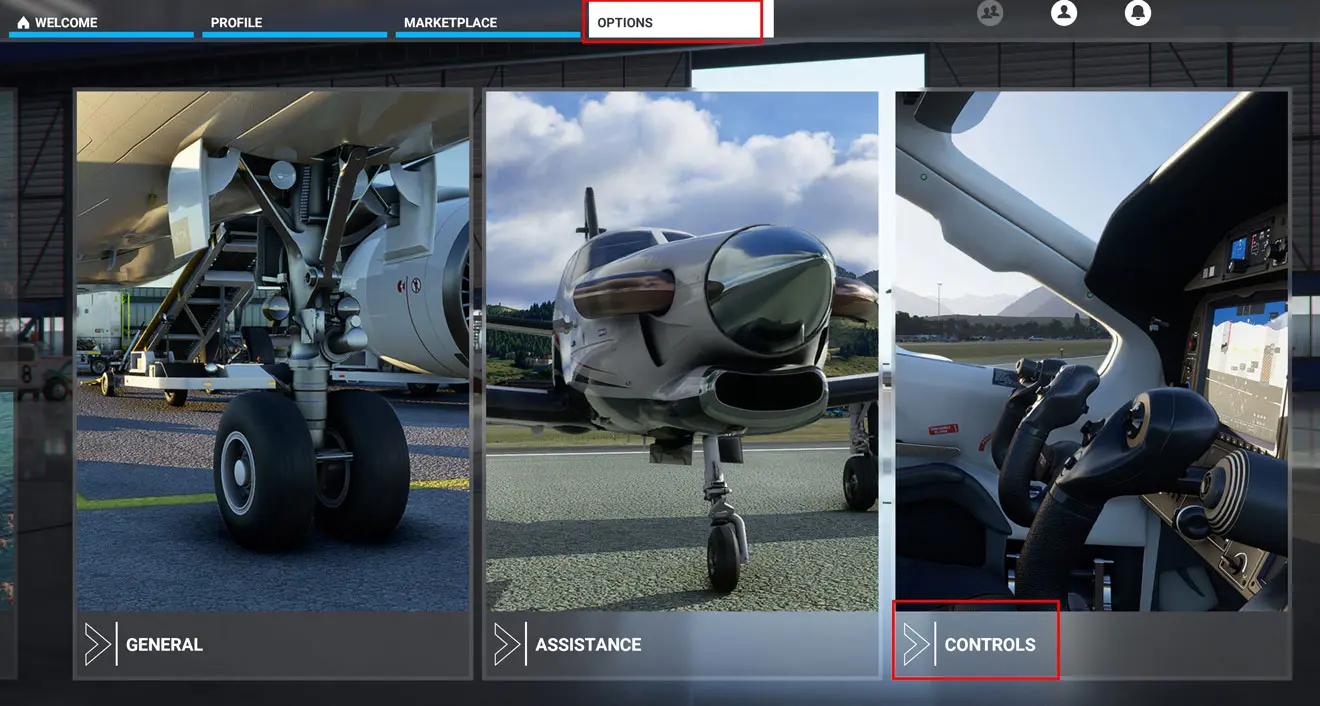
It will give access to the controls panel of the controllers.
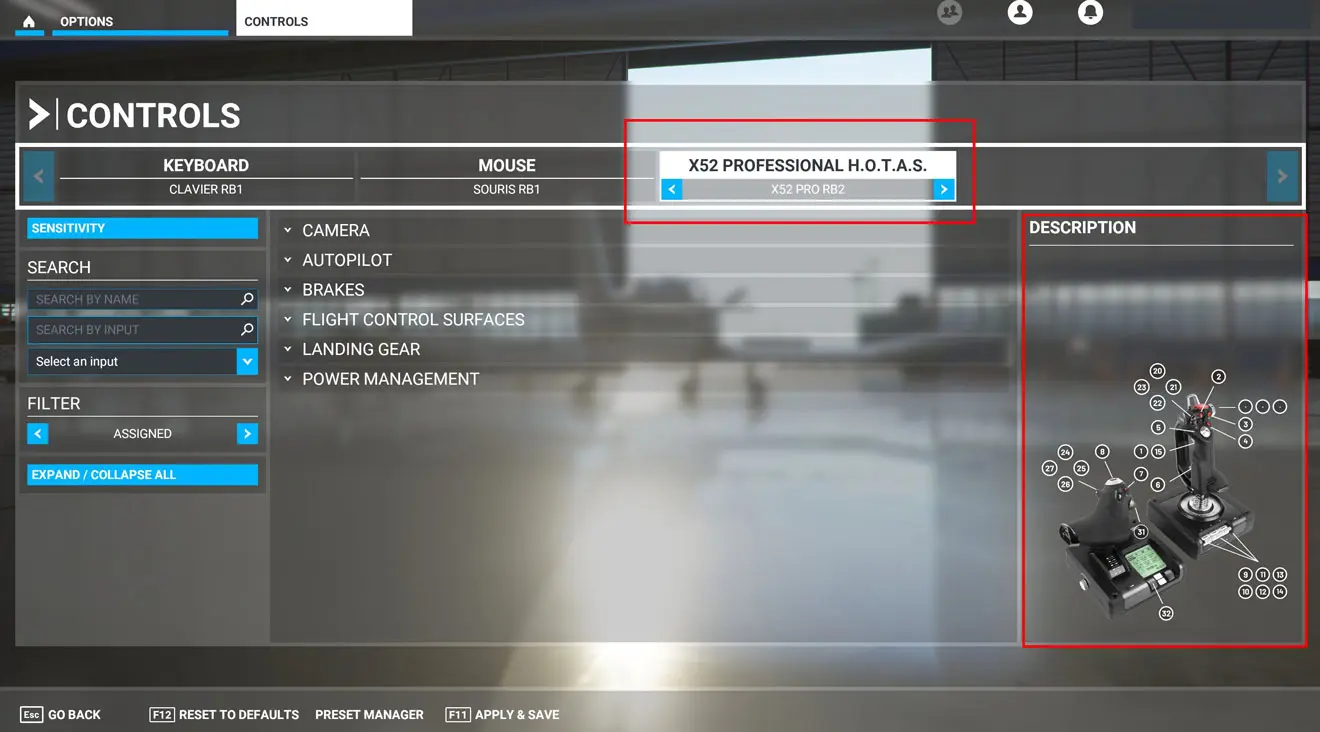
At the first use, we can see if the joystick is compatible. If only the tabs KEYBOARD and MOUSE are displayed, no luck, you will have to invest in another joystick.
If everything is OK, these are the DEFAULT settings which are displayed and, more often, an image of the joystick with the numbers assigned to buttons, knobs and axis by the simulator.
In the left panel, we will select the filter to visualize the content:
- ASSIGNED: this is what's assigned to the joystick right now
- ESSENTIALS: what FS2020 recommends (meh!)
- ALL: all the available settings will be displayed to make your selection. That's the option which will be chosen to setup your joystick.
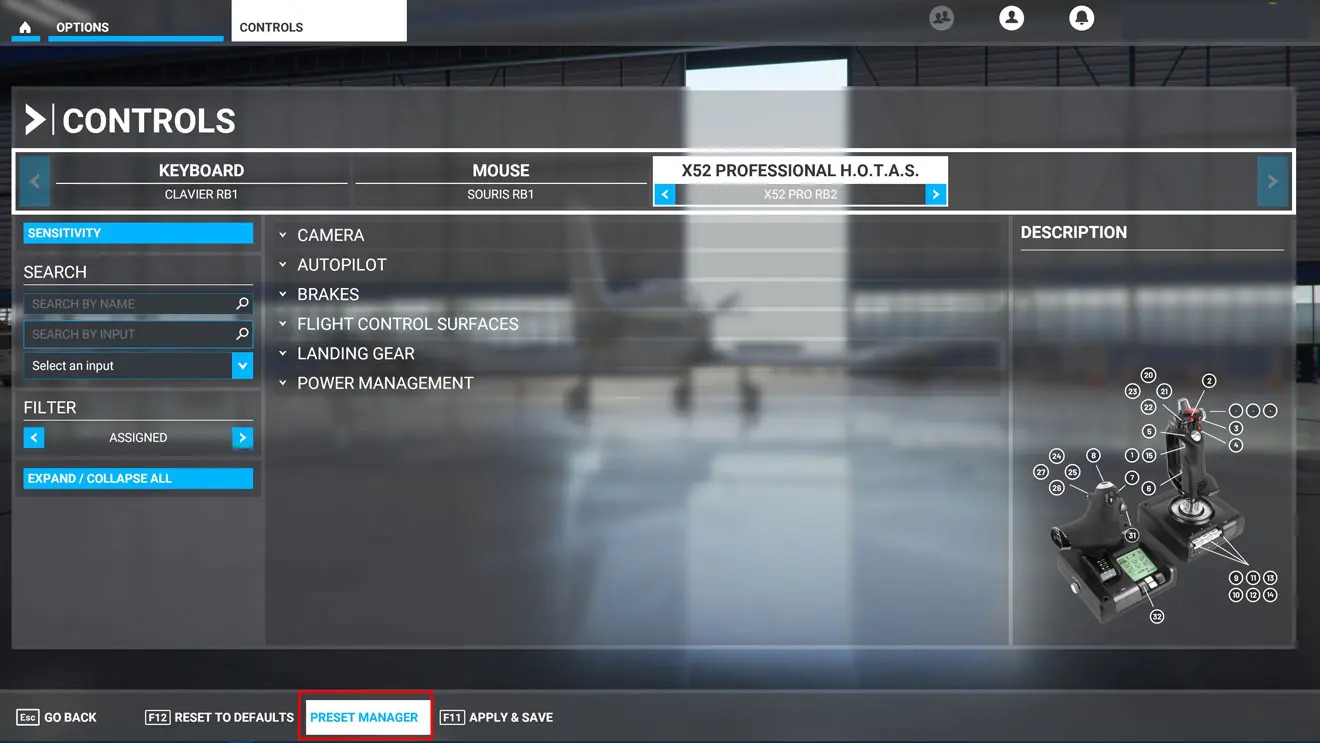
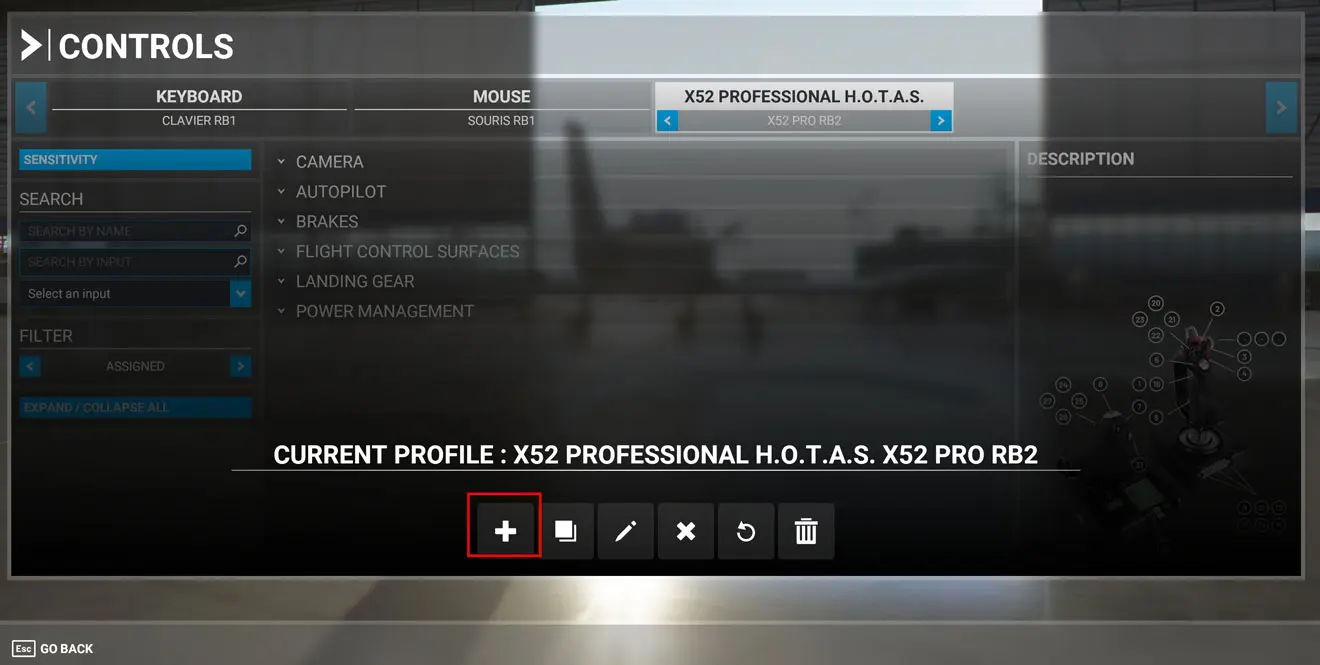
But first of all, you must save the file which will contain the settings by creating a PROFILE.
So let's click on the PRESET MANAGER tab at the bottom of the window.
The following window allows, among other things, to add a new profile by clicking on the + sign
Below the title of the joystick, let's enter the name of the profile that will be used later.
Be careful, a profile can be selected to be used with any aircraft, it is not linked to a specific one.
We can create as many profiles as we want to adapt the joystick to a specific type of plane (single engine, commercial jet, ...).
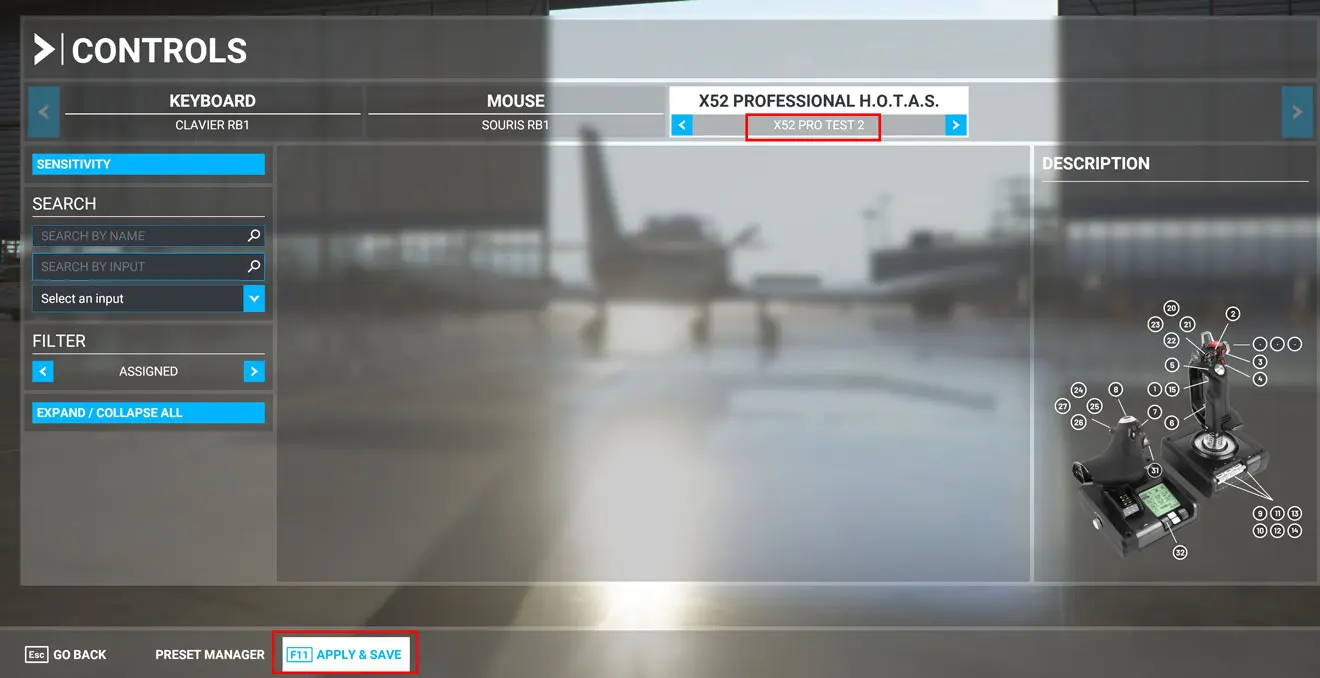
The validation of the profile can be done by clicking on the F11 key.
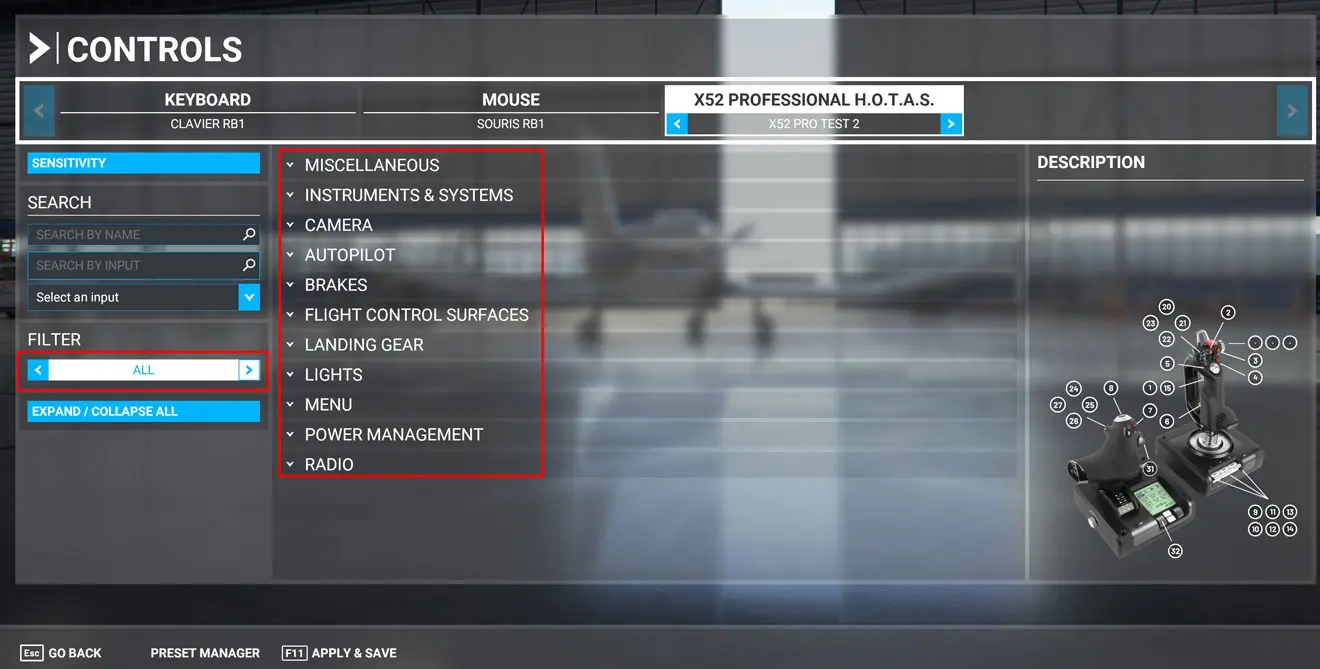
Back to the settings window, you have to select the "ALL" button to have all the possible choices.
Clicking on the "EXPAND/COLLAPSE ALL" button will show all options, it is recommanded to expand them one by one by clicking on their title
(MISCELLANEOUS, INSTRUMENTS AND SYSTEMS, CAMERA...) then on the subtitles when there are some.
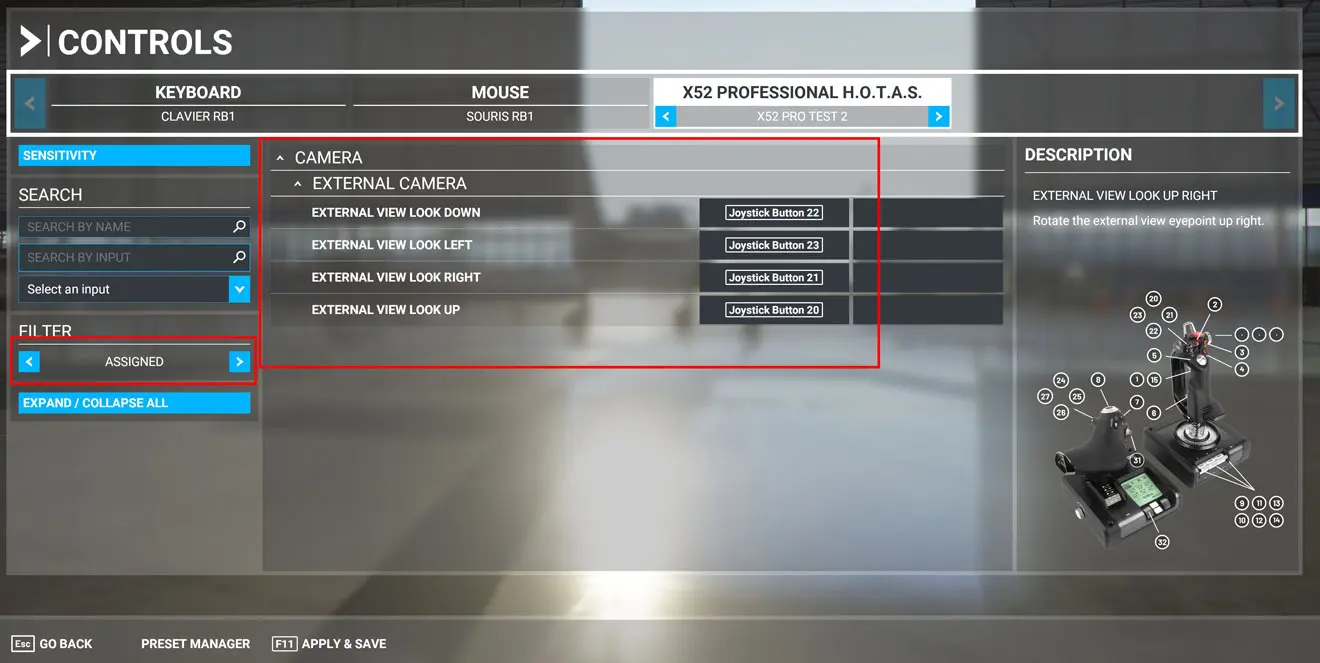
To finalize the setup of the joystick, let's take as example the setting of the 4 positions of the HAT for the external views.
You have to select the "CAMERA" menu then the "EXTERNAL CAMERA" submenu.
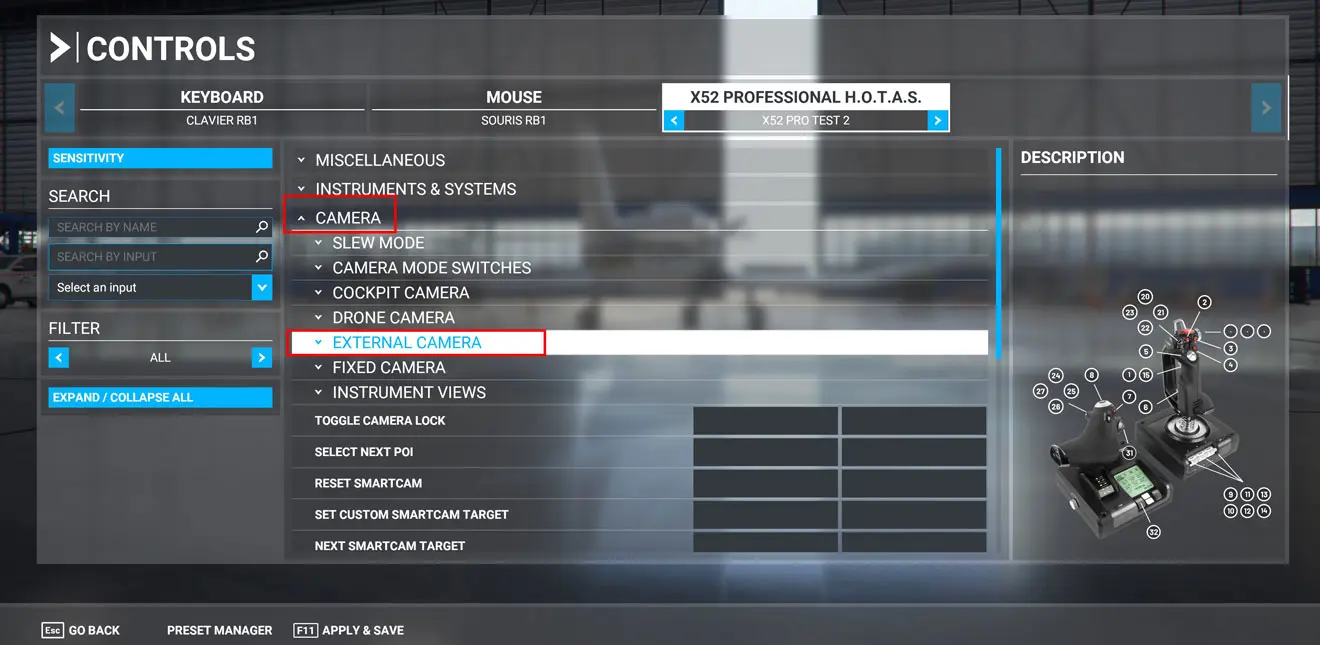
To assign a button (or other) on the joystick to a function in the simulator, let's click on the function.
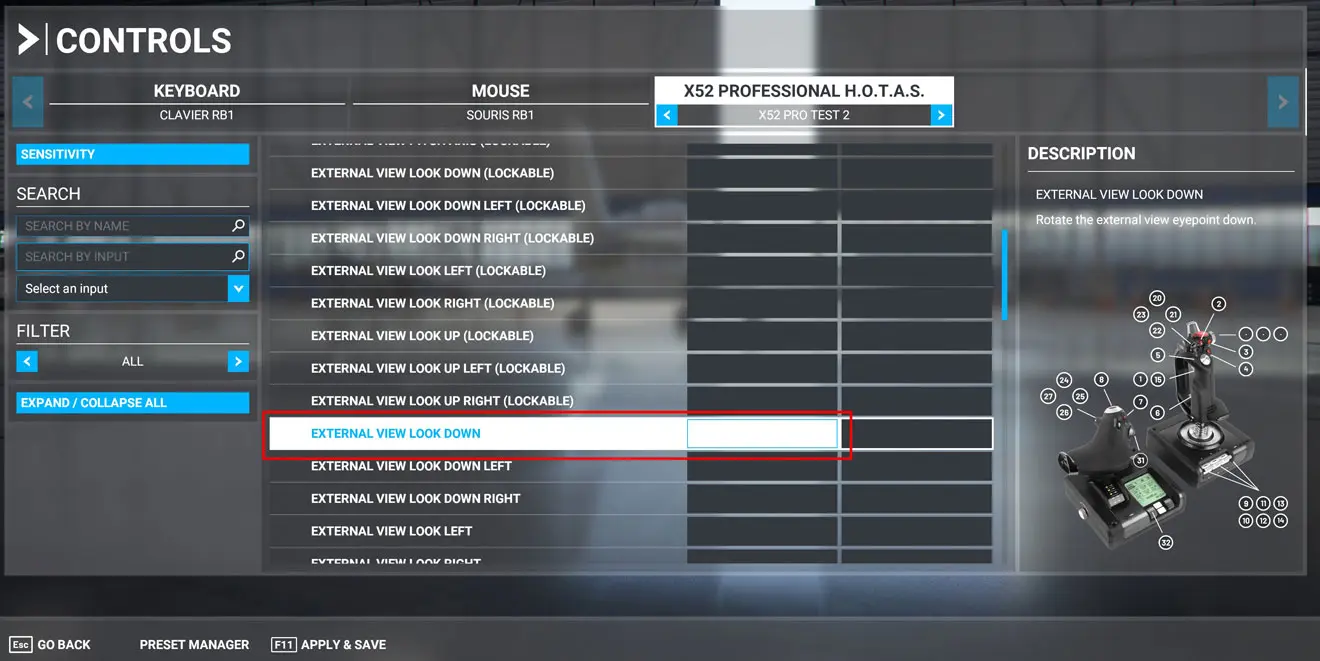
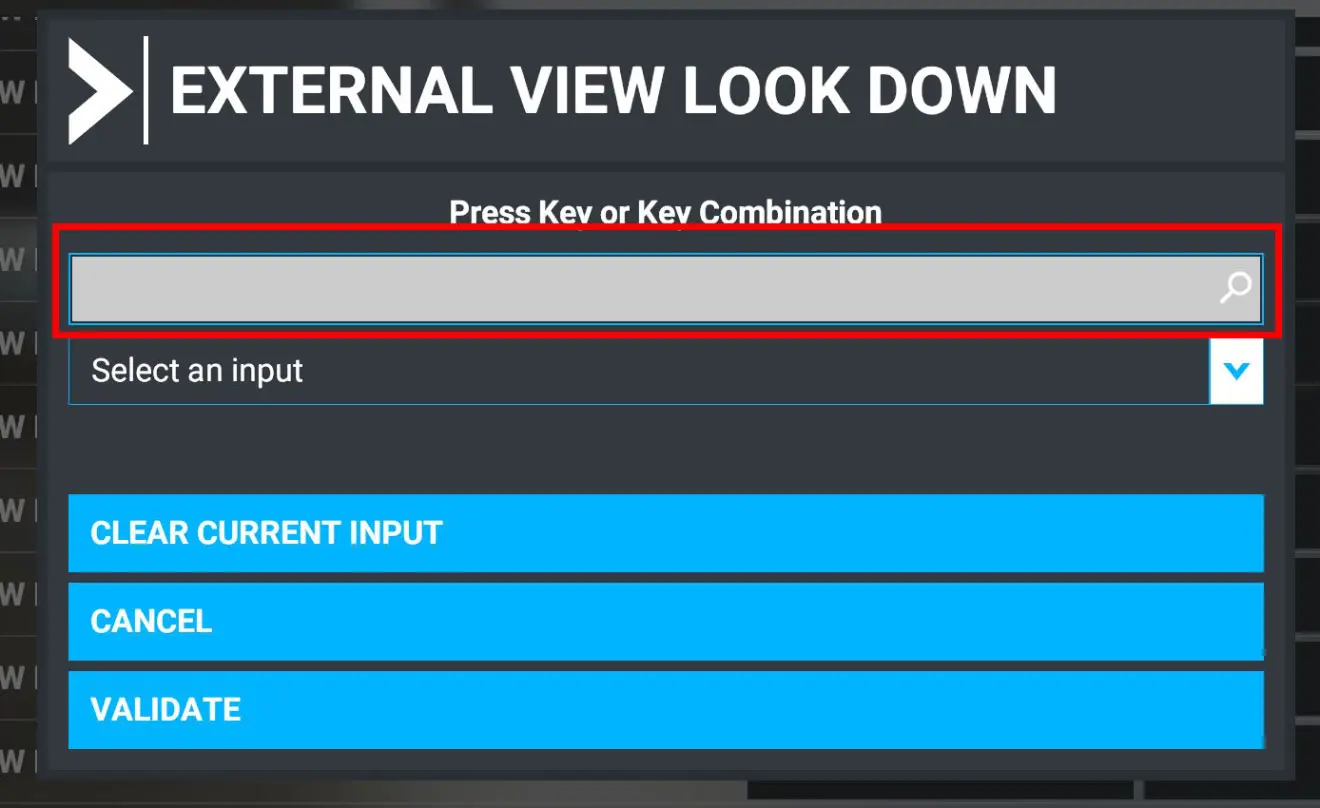
A panel will open then select the "Press Key or Key Combination" textbox and finally select the corresponding button on the joystick, here the HAT down button.
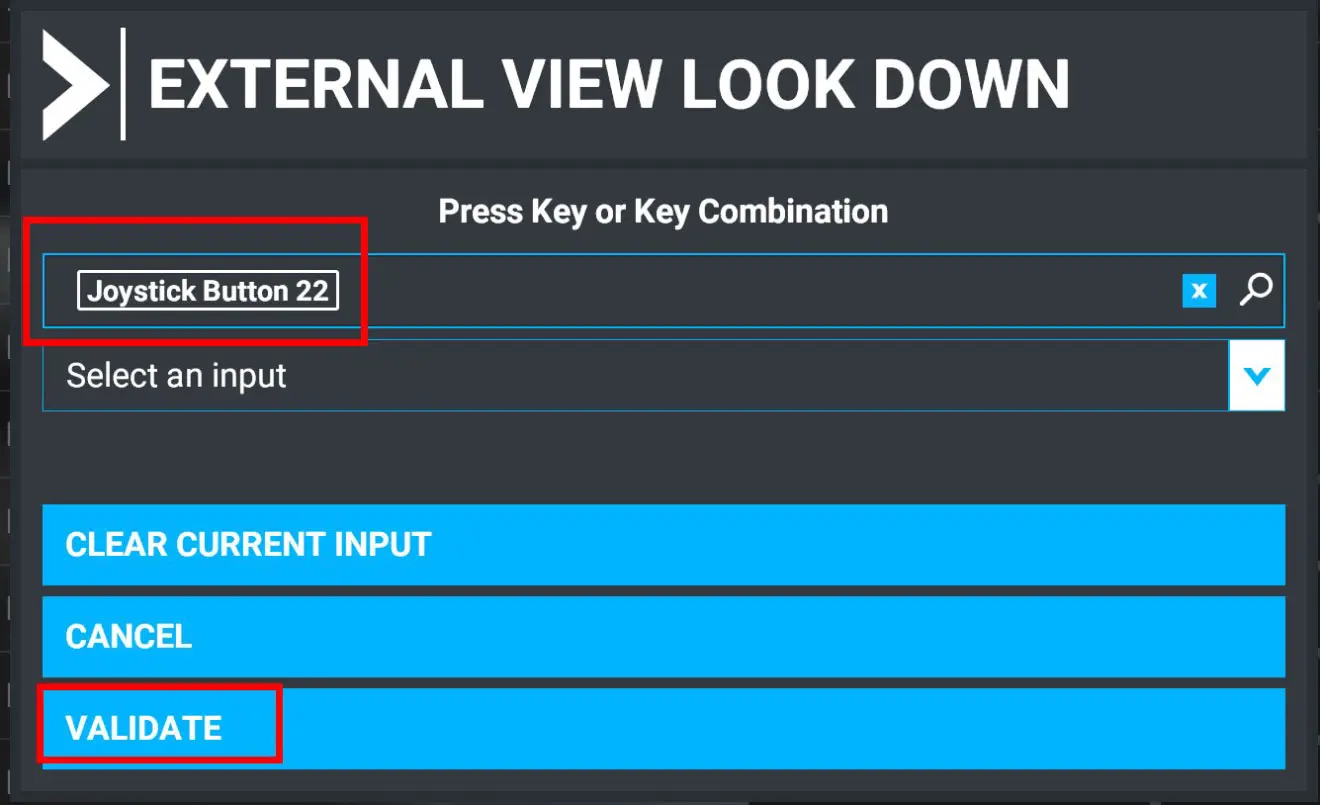
The button will be displayed (here the number 22 that we can see on the picture of the joystick).
Finally click on "VALIDATE" to come back to the setting window for the next button.
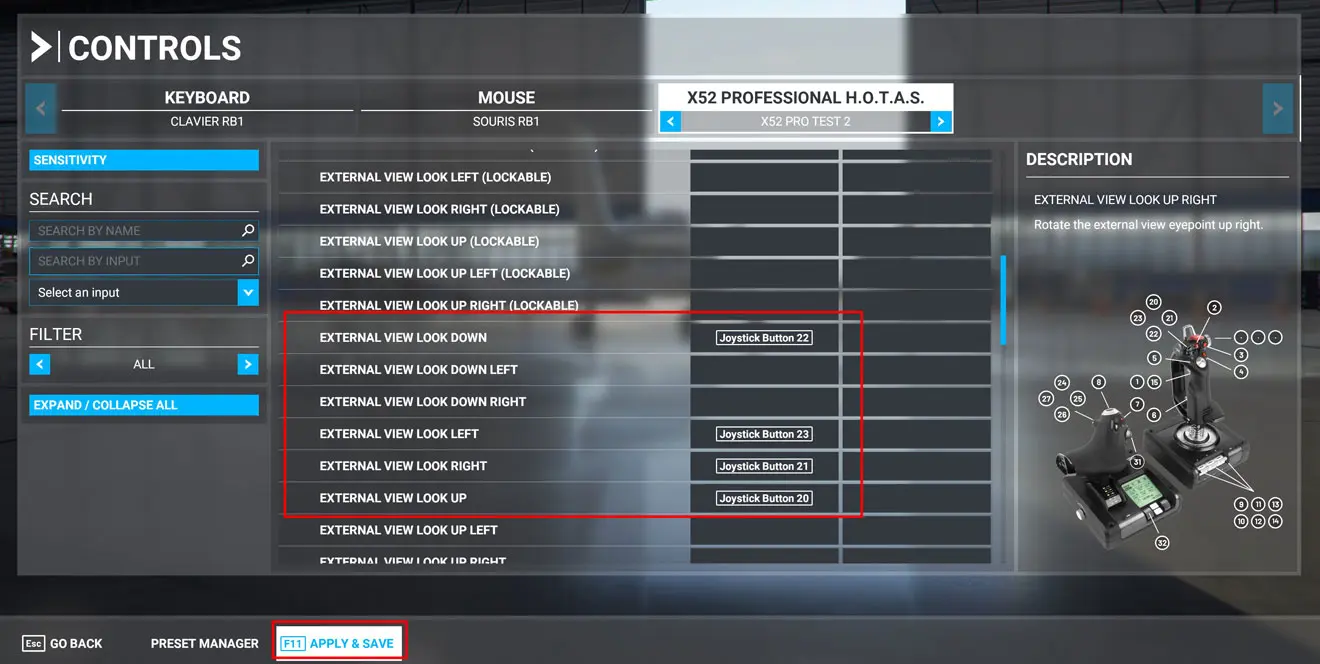
We repeat these actions to assign all buttons, axis and knobs of the joystick.
The following image shows the assigned function to the main HAT of the X52 PRO (joystick).
VERY IMPORTANT: Don't forget to hit "F11" then "ENTER" to update the profile (we can do it for each setting or per group).
By clicking on "ASSIGNED" in the left panel, we can visualize the saved settings in the selected profile and check them out.
IMPORTANT: regarding the CAMERAS, we can assign the same buttons to external and internal cameras. They will be used depending on the selection of the camera mode (assign a key on the keyboard).
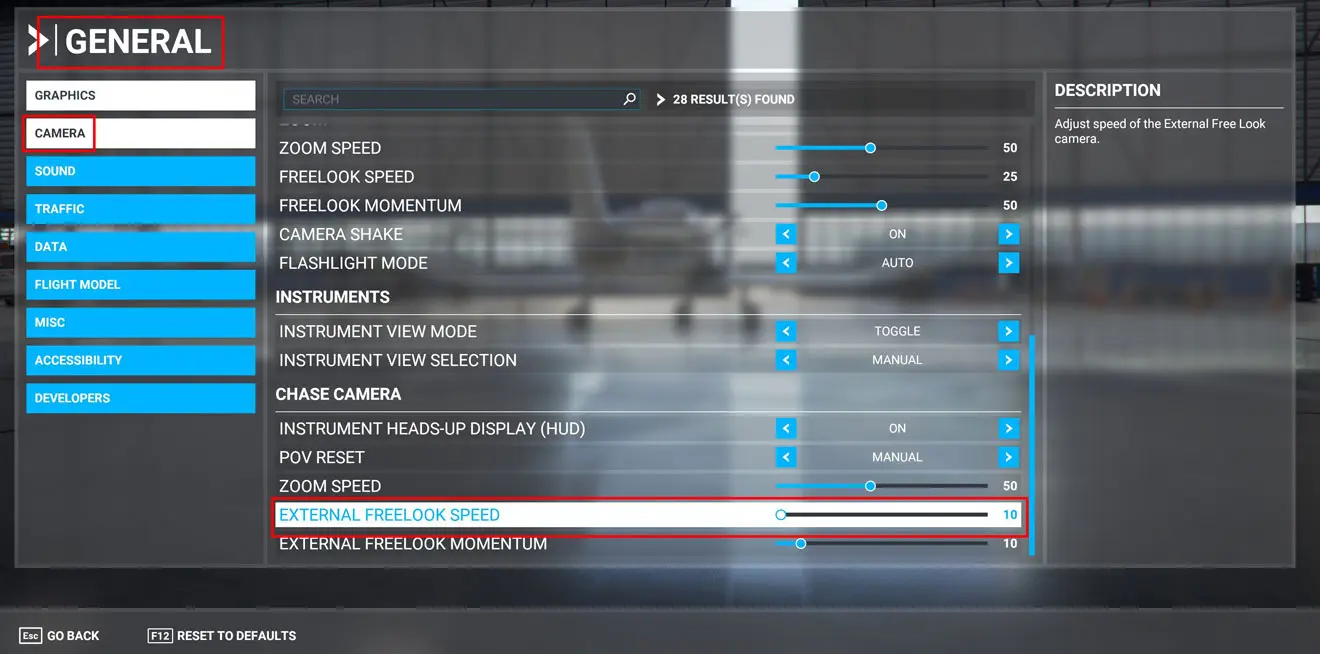
BONUS: the external views are not very smooth natively. To have a smooth rotation around the plane, you have to use a setting in the CAMERA menu of the GENERAL tab under OPTIONS:
- EXTERNAL FREELOOK SPEED which needs to be pretty low (10% in the example)
NOTE: to set up your keyboard (we cannot memorize all the default keyboard assignments), you need to build a profile following the same procedure as the joystick.
It can be done also for the mouse.
Enjoy setting up your joystick!