Pilatus PC-12/24: Loading a flight plan into the Honeywell Primus Apex GPS
The Pilatus PC-12 and PC-24 are the rare FS2024 aircraft that are not equipped with the Garmin avionics system. Here we'll see how to manually enter a flight plan into this GPS. Here we'll see how to manually enter a flight plan into this GPS.
As shown in the image below, the instrument panel consists of five Honeywell screens.
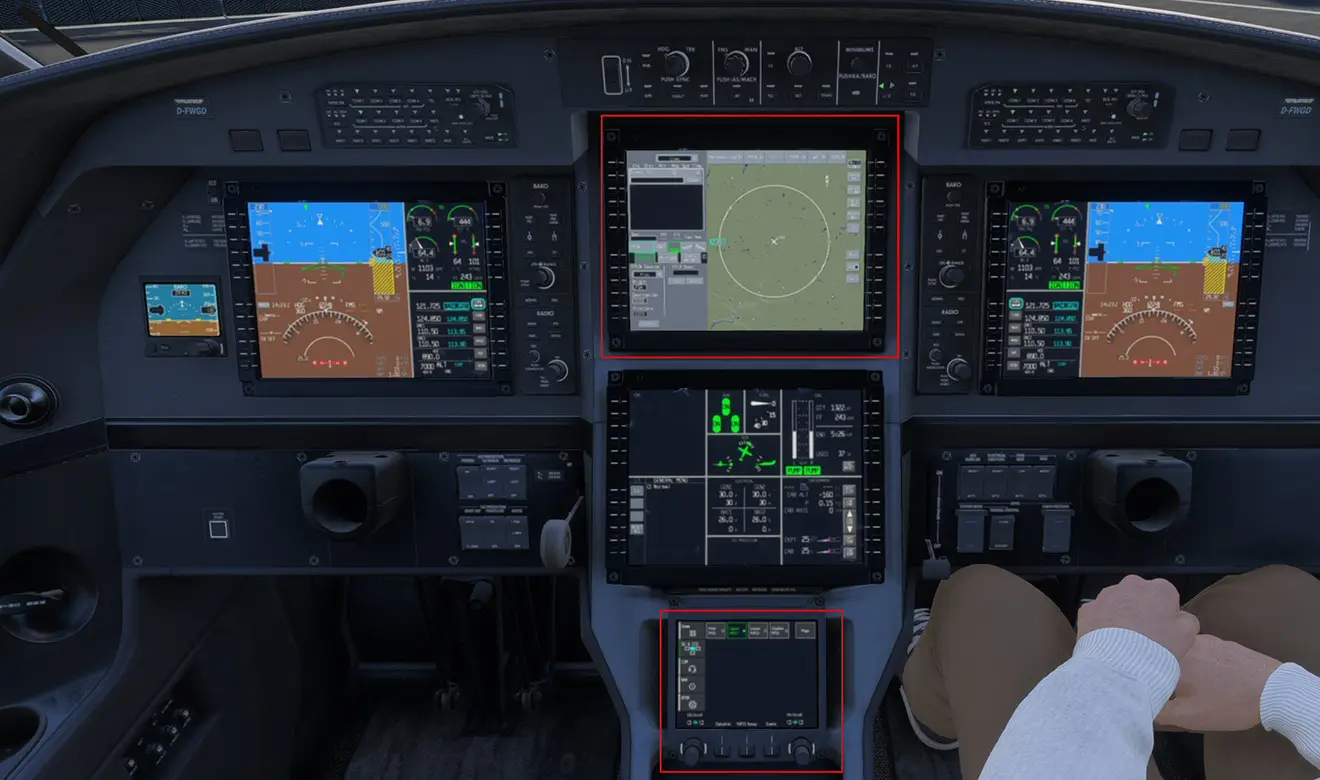
To load the flight plan, we'll focus on the two screens outlined in red: the GPS and the CCC (bottom screen), which can be used (among other things) as a keyboard for entering flight data. They've been placed side by side to simplify the tutorial.
We start by selecting the starting points by clicking on the aircraft icon on the ground, then on the "Home" box, which opens the CCC keyboard.
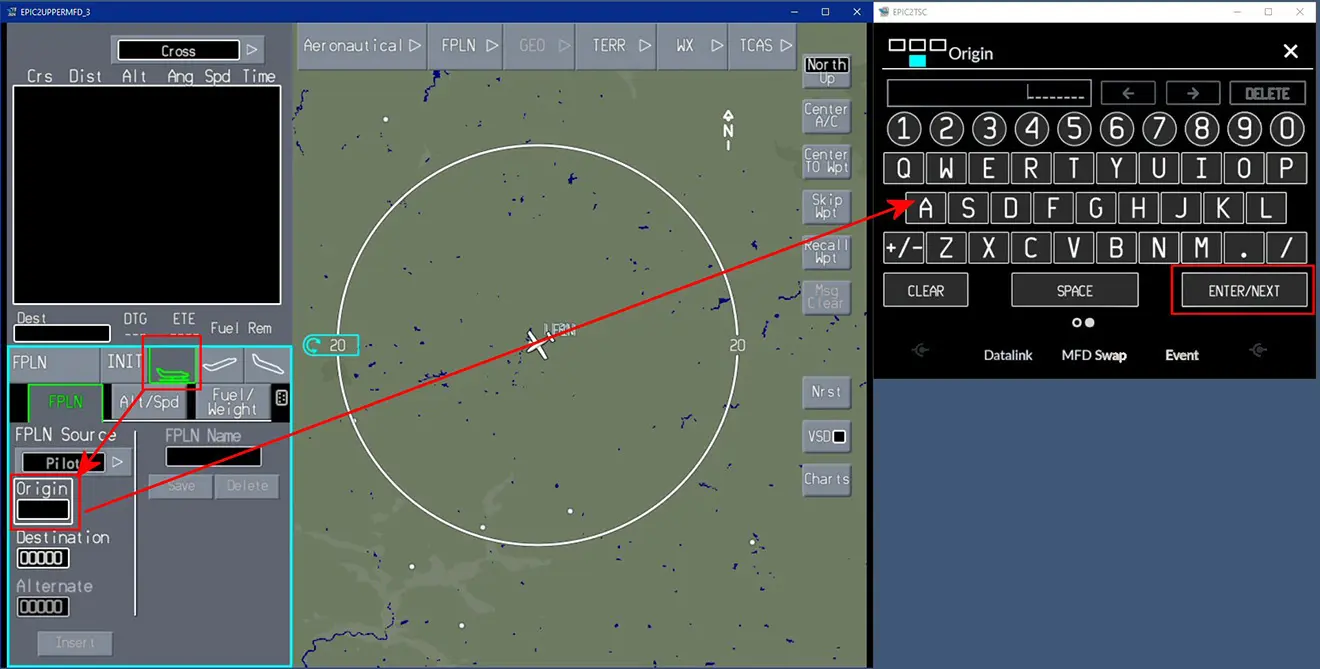
Enter the ICAO code for the departure airport, confirm with "ENTER/NEXT" from the CCC, and do the same for the arrival airport. Then confirm by pressing the "INSERT" button.
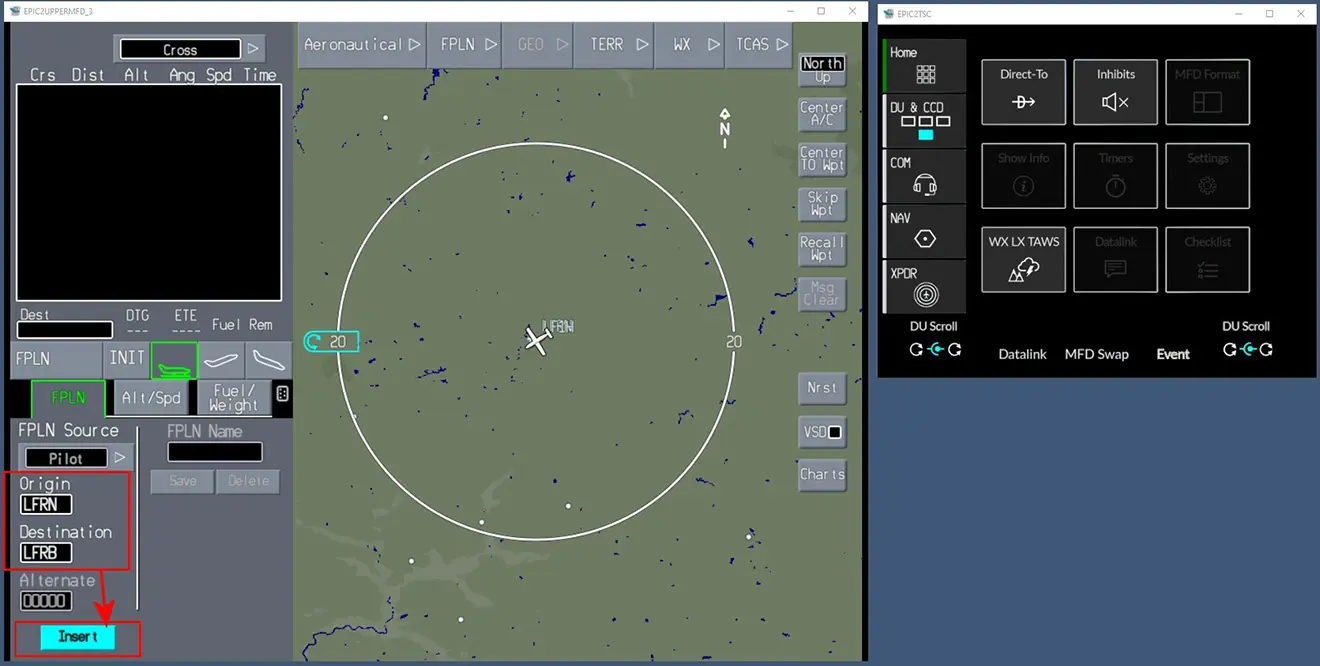
The flight plan is initialized and we're about to activate this phase of its construction.
To see the full route on the GPS map, move your mouse along the circle from the outlined area.

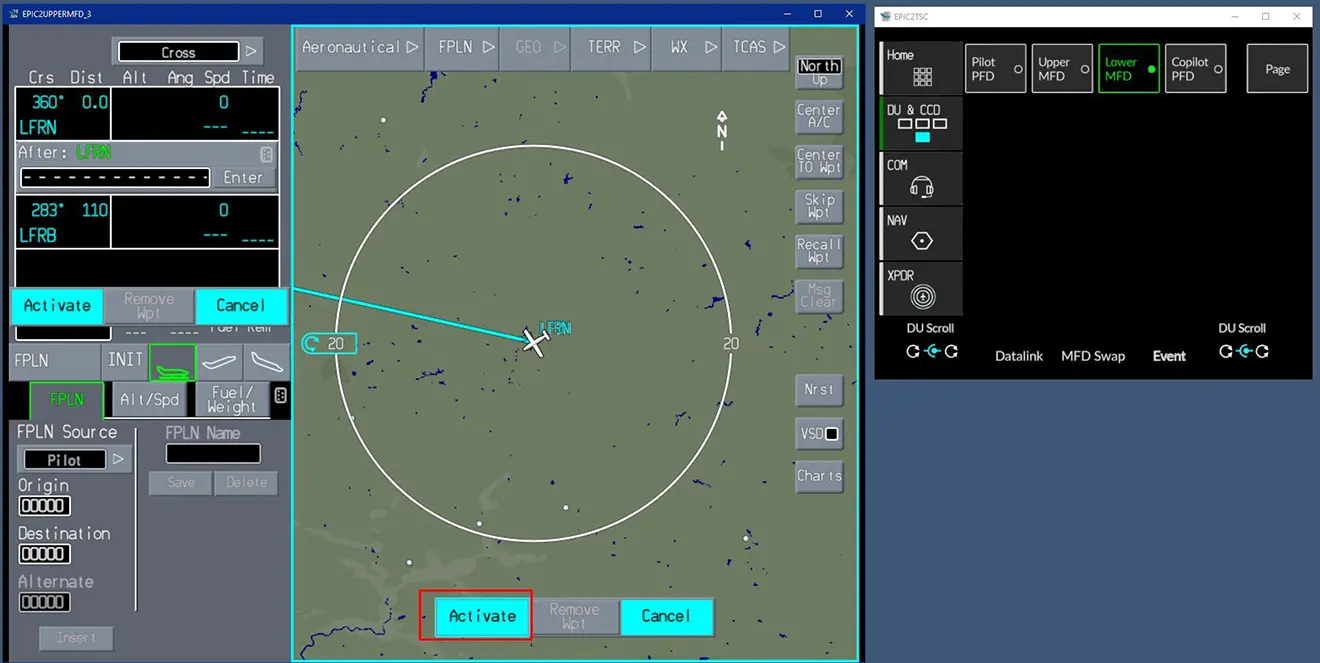
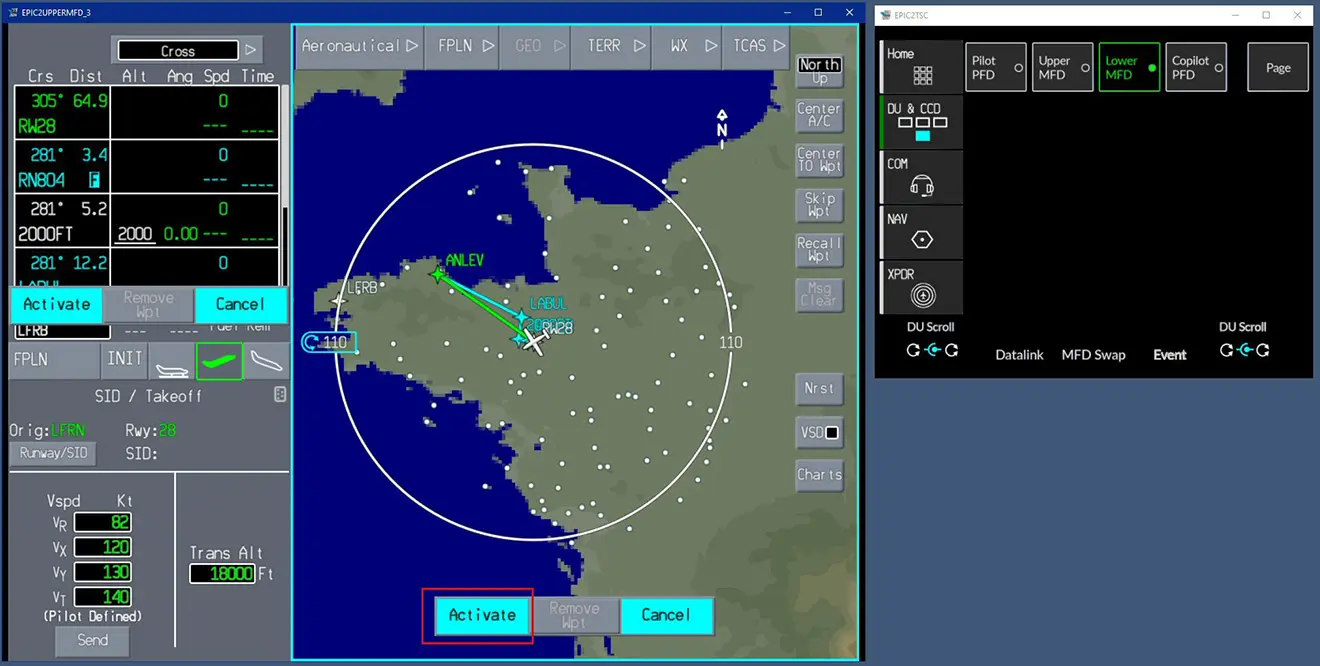
We will now enter a waypoint located after the departure airport or after another existing waypoint (in the example, it's the first and only one). Click on the preceding waypoint and on the "AMEND ROUTE" button.
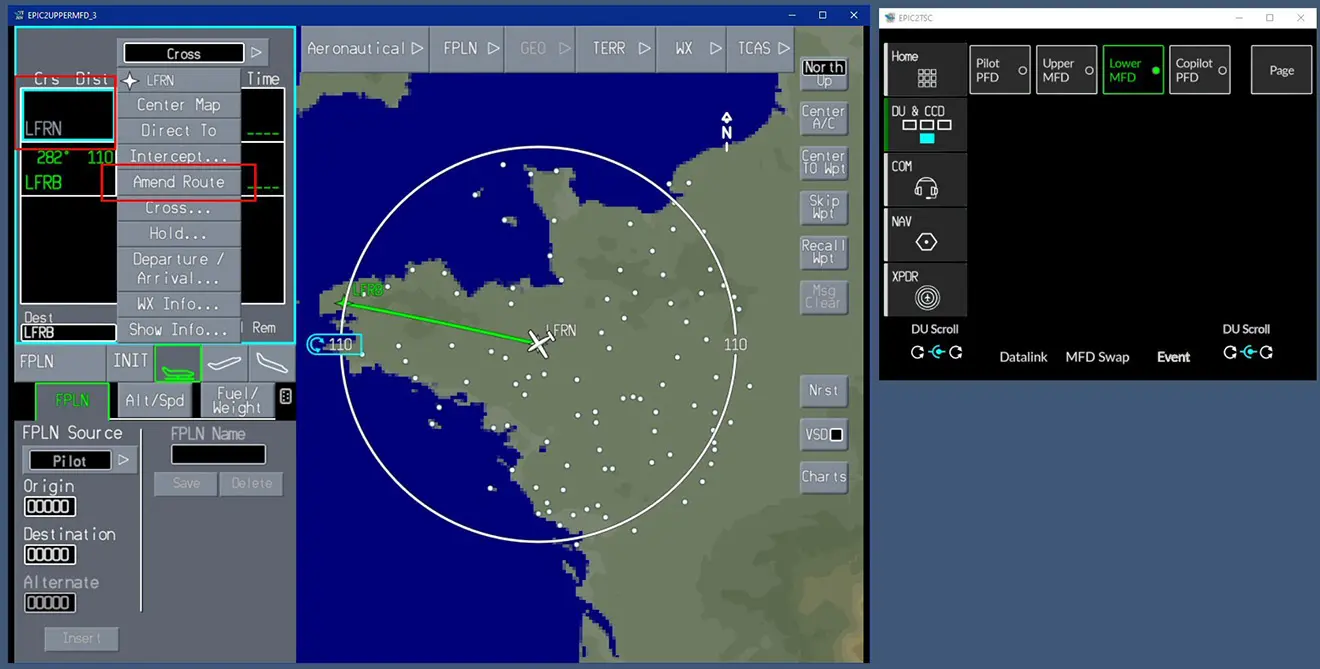
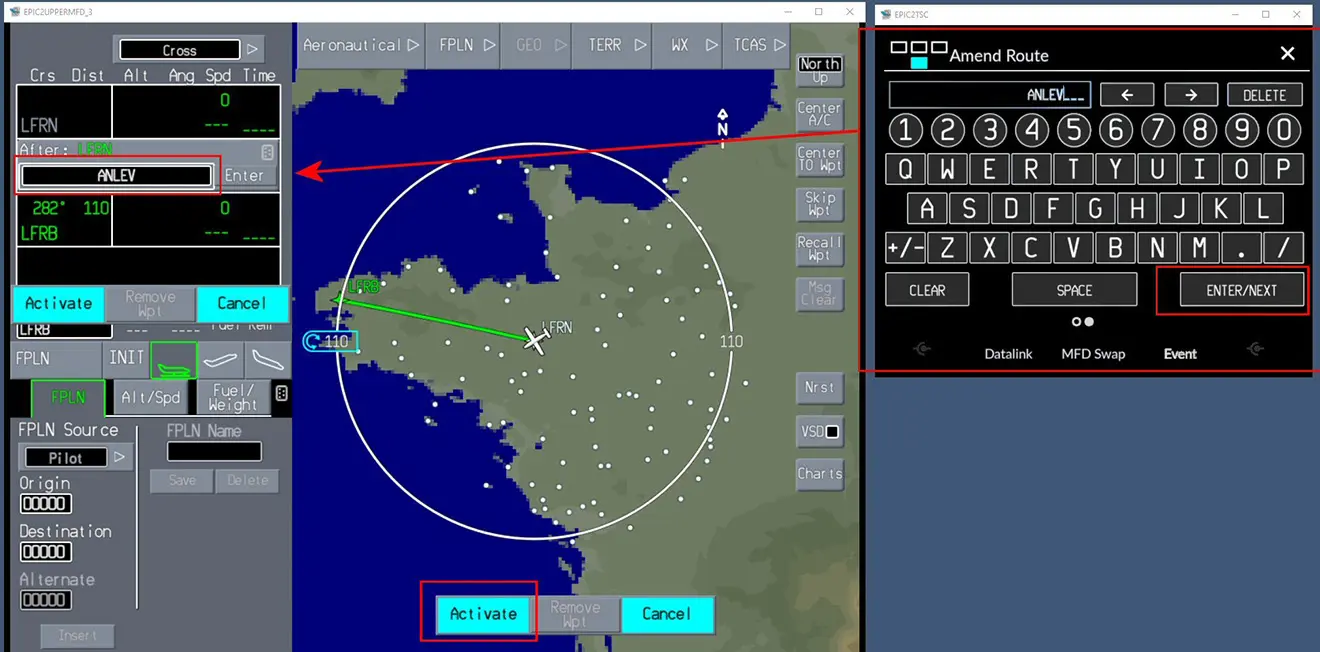
Using the CCC keyboard, we'll enter the "ANLEV" wp and confirm it with "ACTIVATE" (twice if necessary).
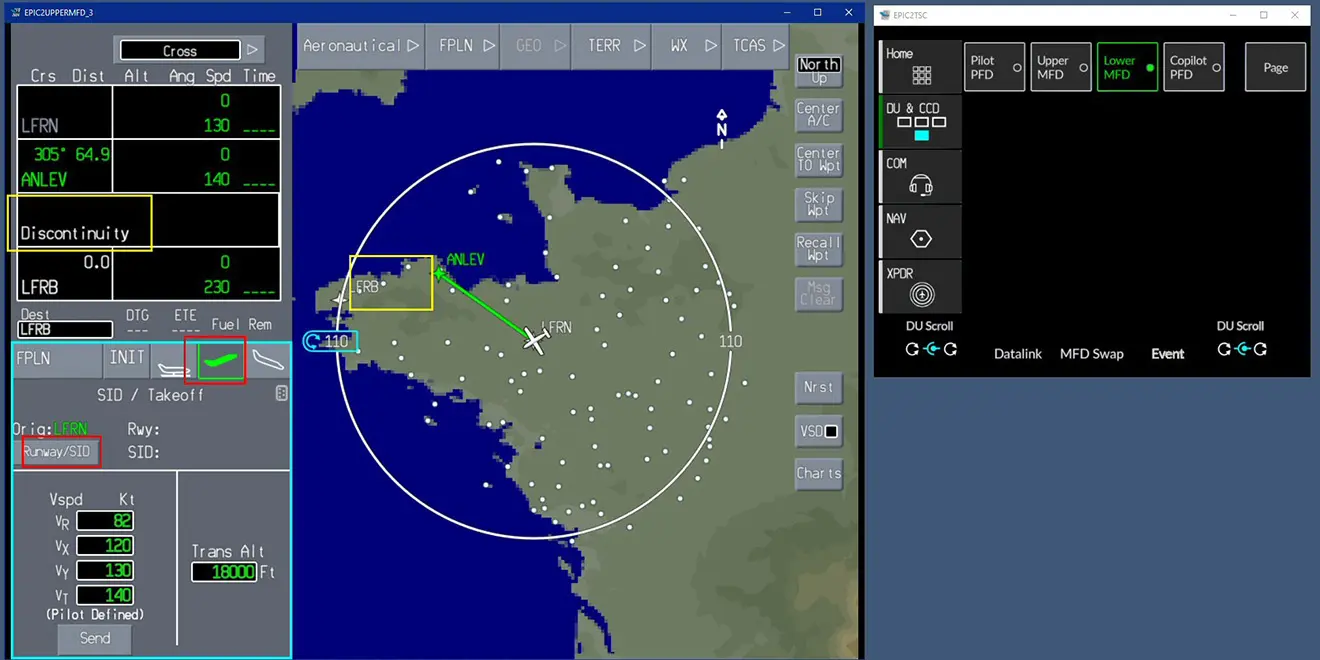
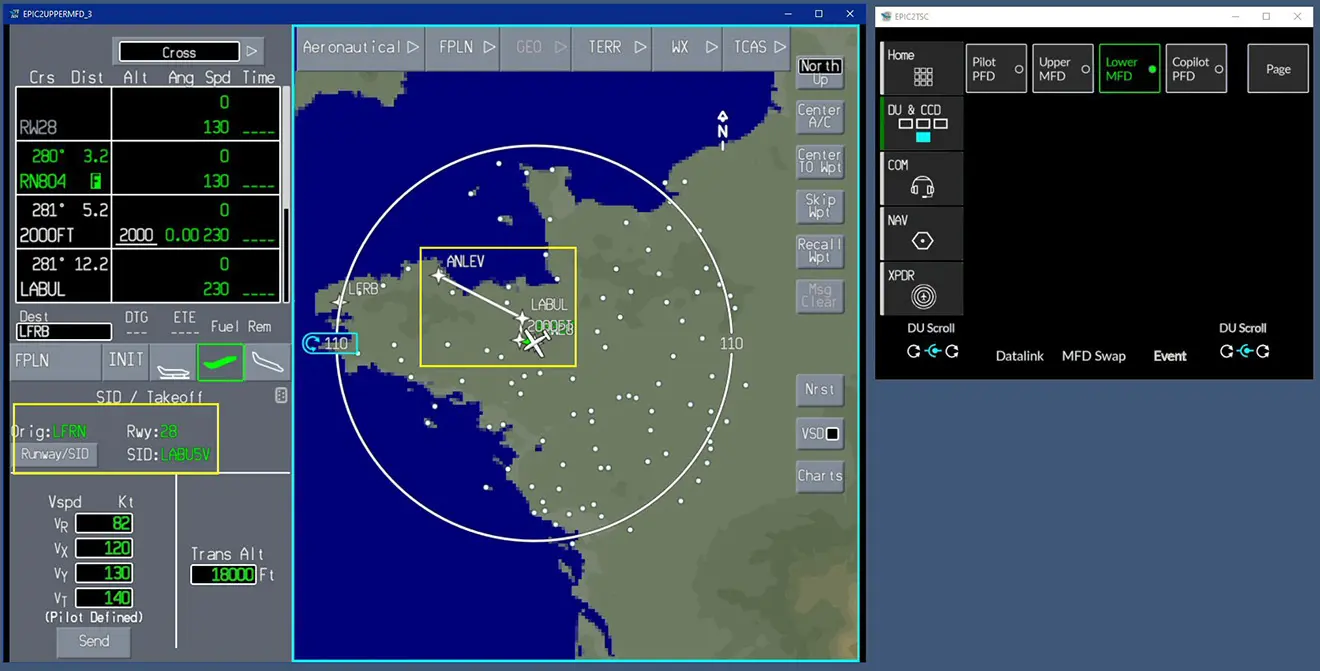
In our case, a "Discontinuity" (yellow boxes) appears, which we'll leave as it can be erased by entering other WPs or departure/arrival procedures.
We'll now click on the climbing aircraft icon to enter the runway and departure procedure.
These elements do not require keyboard input because they are taken from the simulator's AIRACS. Once selected, confirm with "INSERT".
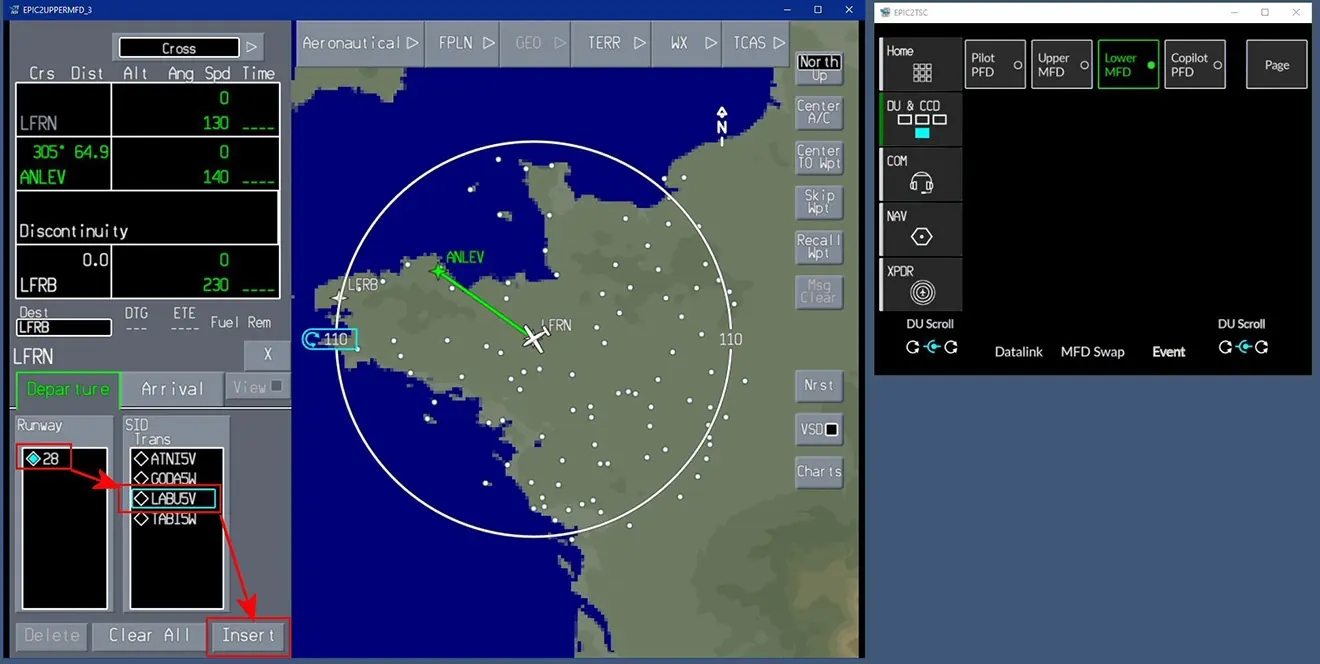
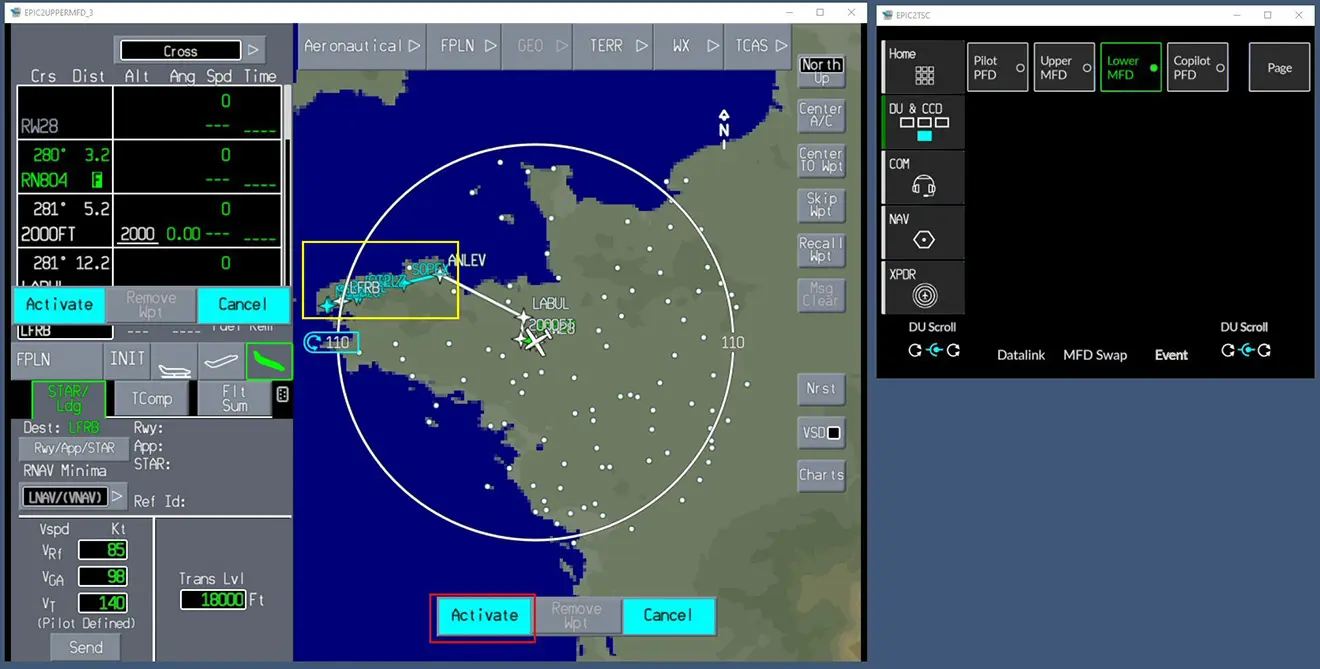
The procedure appears in blue on the map, and you confirm with "ACTIVATE."
We will then enter the arrival procedure by clicking on the icon representing a descending aircraft.

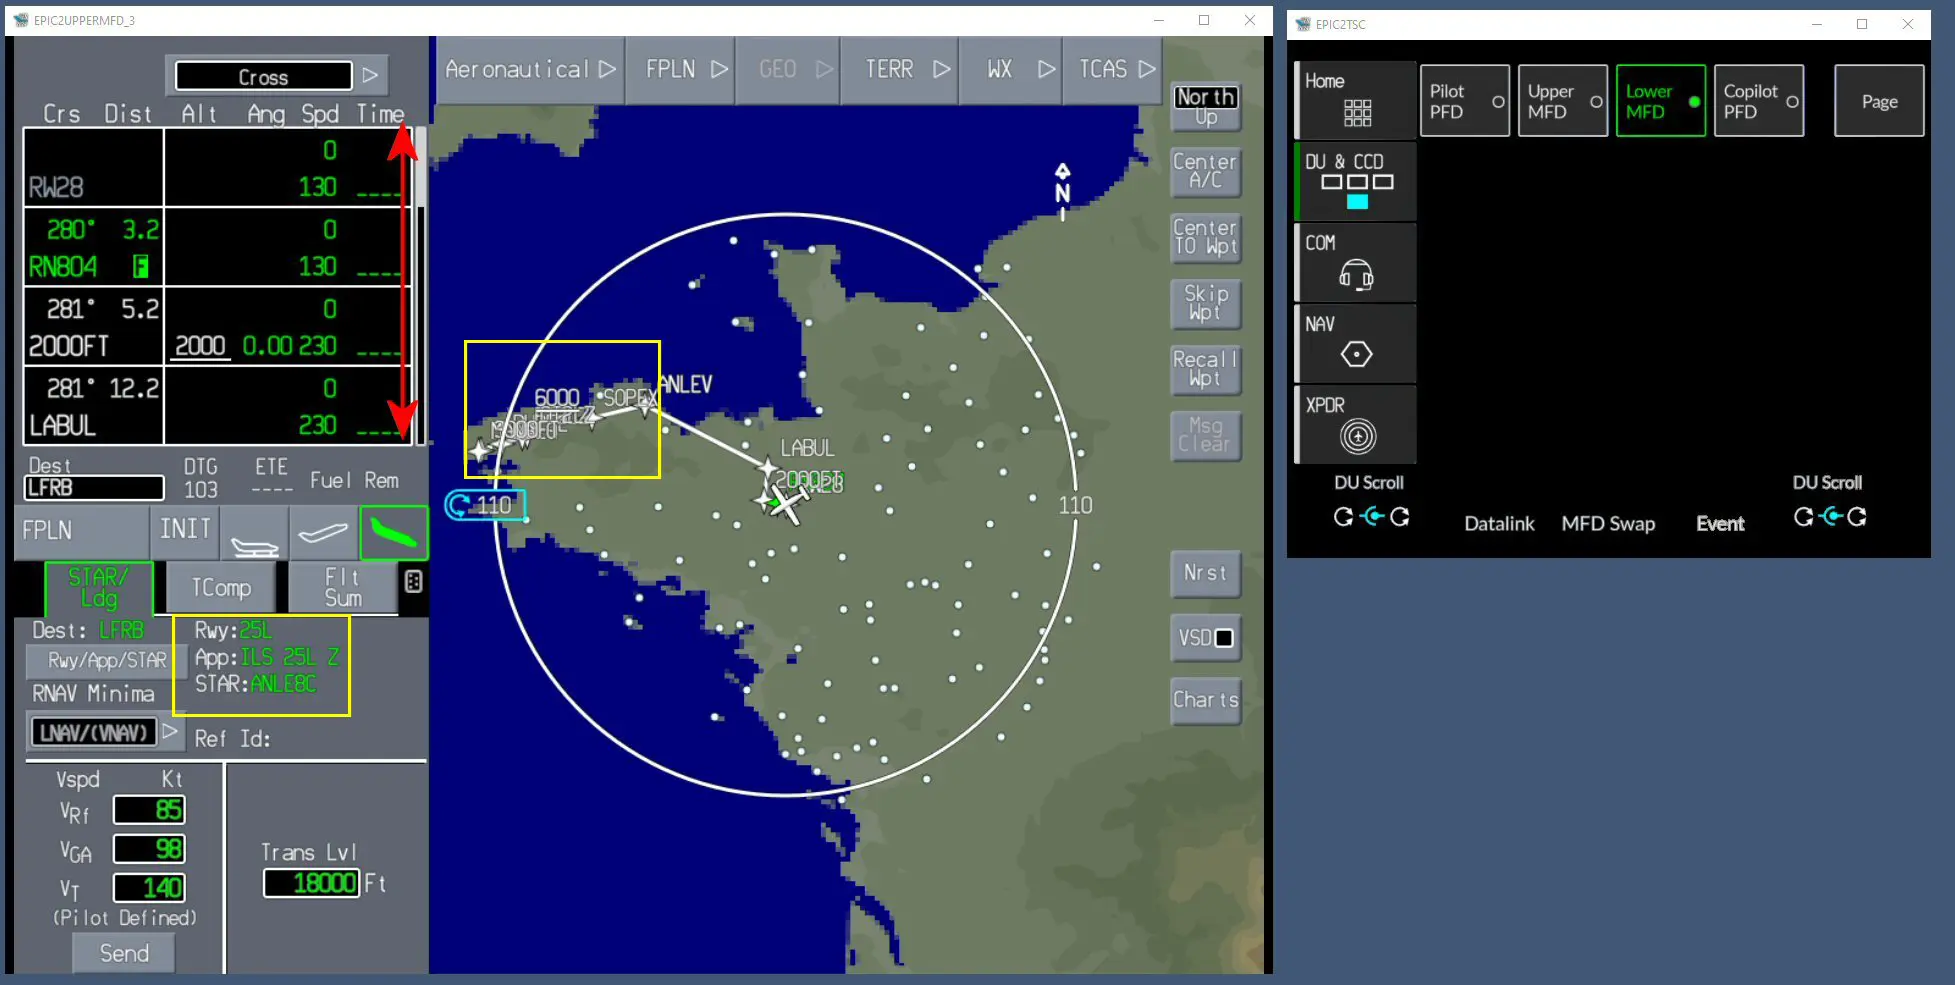
Here too, we use AIRAC data; the input process is the same as for the start. Don't forget to click the "INSERT" button, which will display the trajectory in blue on the map.

And we validate the approach with "ACTIVATE".
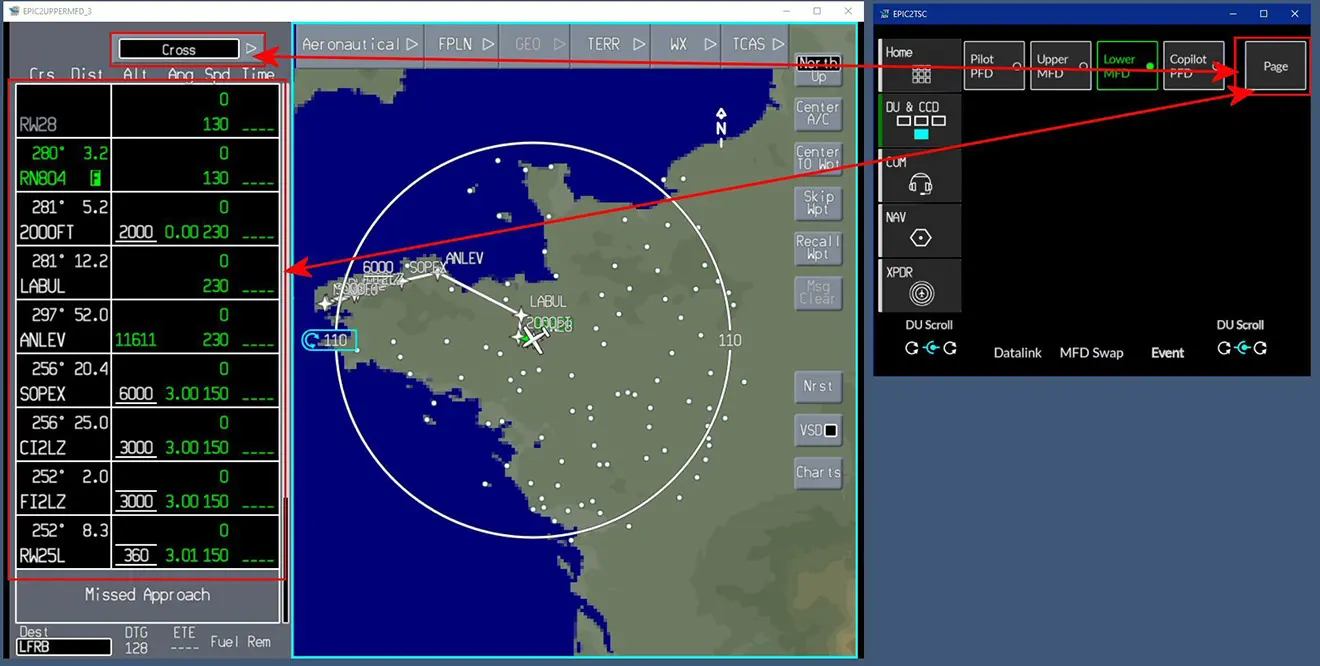
The trajectory is now complete. We'll check for any discontinuities by scrolling the flight plan by dragging the mouse along the right edge of the flight plan, as indicated by the red arrows.
There's a gap left, which we'll remove by clicking on it and then clicking the "Delete Wpt" button.
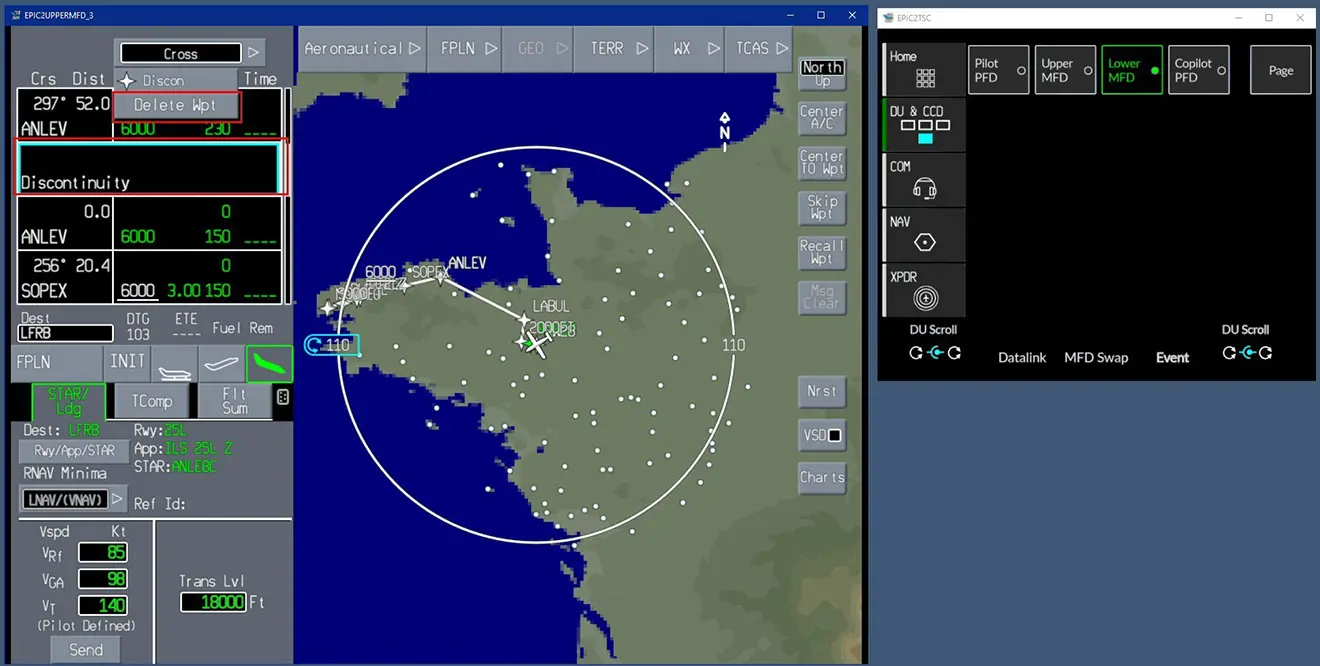
Confirm the flight plan modification with "ACTIVATE".

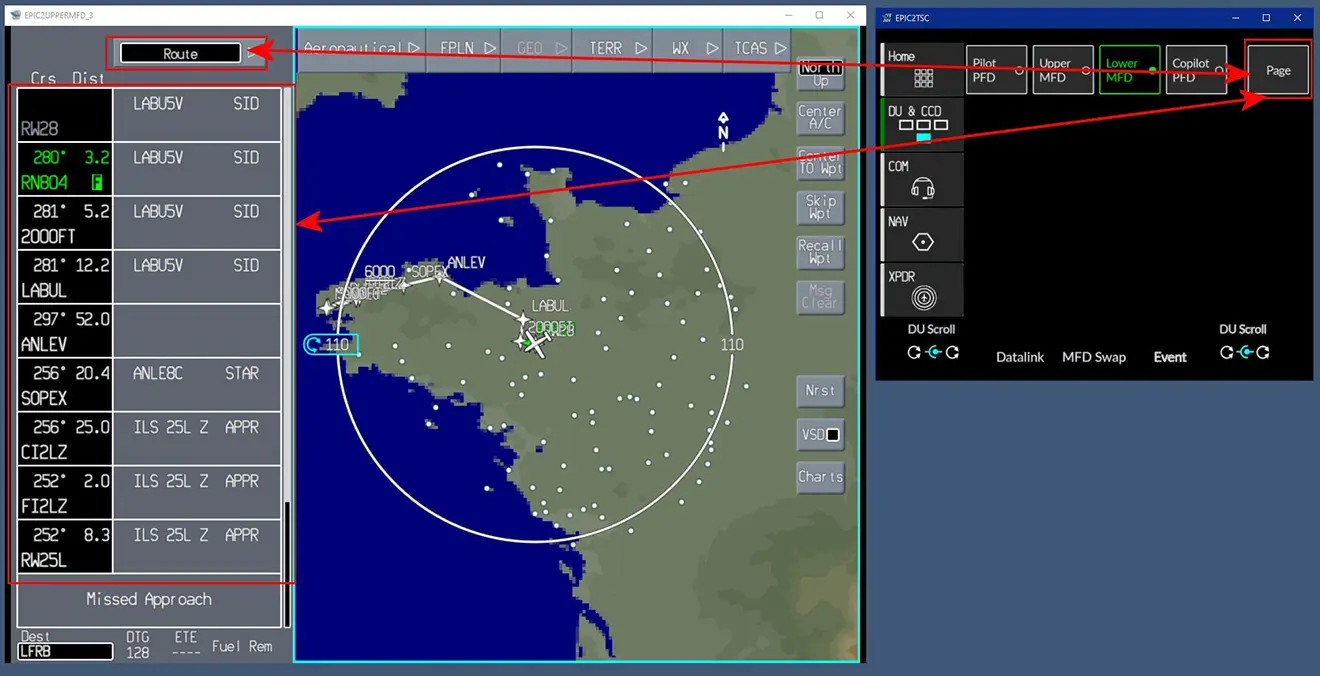
The discontinuity is removed, and we check that there are no others: the flight plan is complete and ready to be used.
We won't cover all the CCC functions here, but here's one that allows you to view all the altitudes of the flight plan passages.
And another to detail the entire flight plan.
It's up to you to discover its many other possibilities.
FS2024 Specific: Via the EFB integrated into all FS2024 aircraft, this GPS can be loaded with a flight plan saved or created using Simbrief or Little Navmap. This will be the subject of another document.