MiniFCU - Mobiflight: test of the TBM850 with the generic V10 profile from vinKaiZen
The miniFCU was designed to take over, including design, the FCU of the A320. It is therefore perfectly suited to this aircraft.
As it integrates all the functions of a complete autopilot, it is obvious that it can also be used for other aircraft, but its use remains to be adapted. This is the purpose of Mobiflight profiles.
There are some for certain aircraft, but for others, we tested the generic profile created by vinKaiZen, the author of the A320 Fenix profile: GENERIC AP-V10_ASOBO PLANES_9_4Rq (flightsim.to).
(NB: this profile is useless with the V2B2 version of the A320 Fenix which integrates the miniFCU in native firmware).
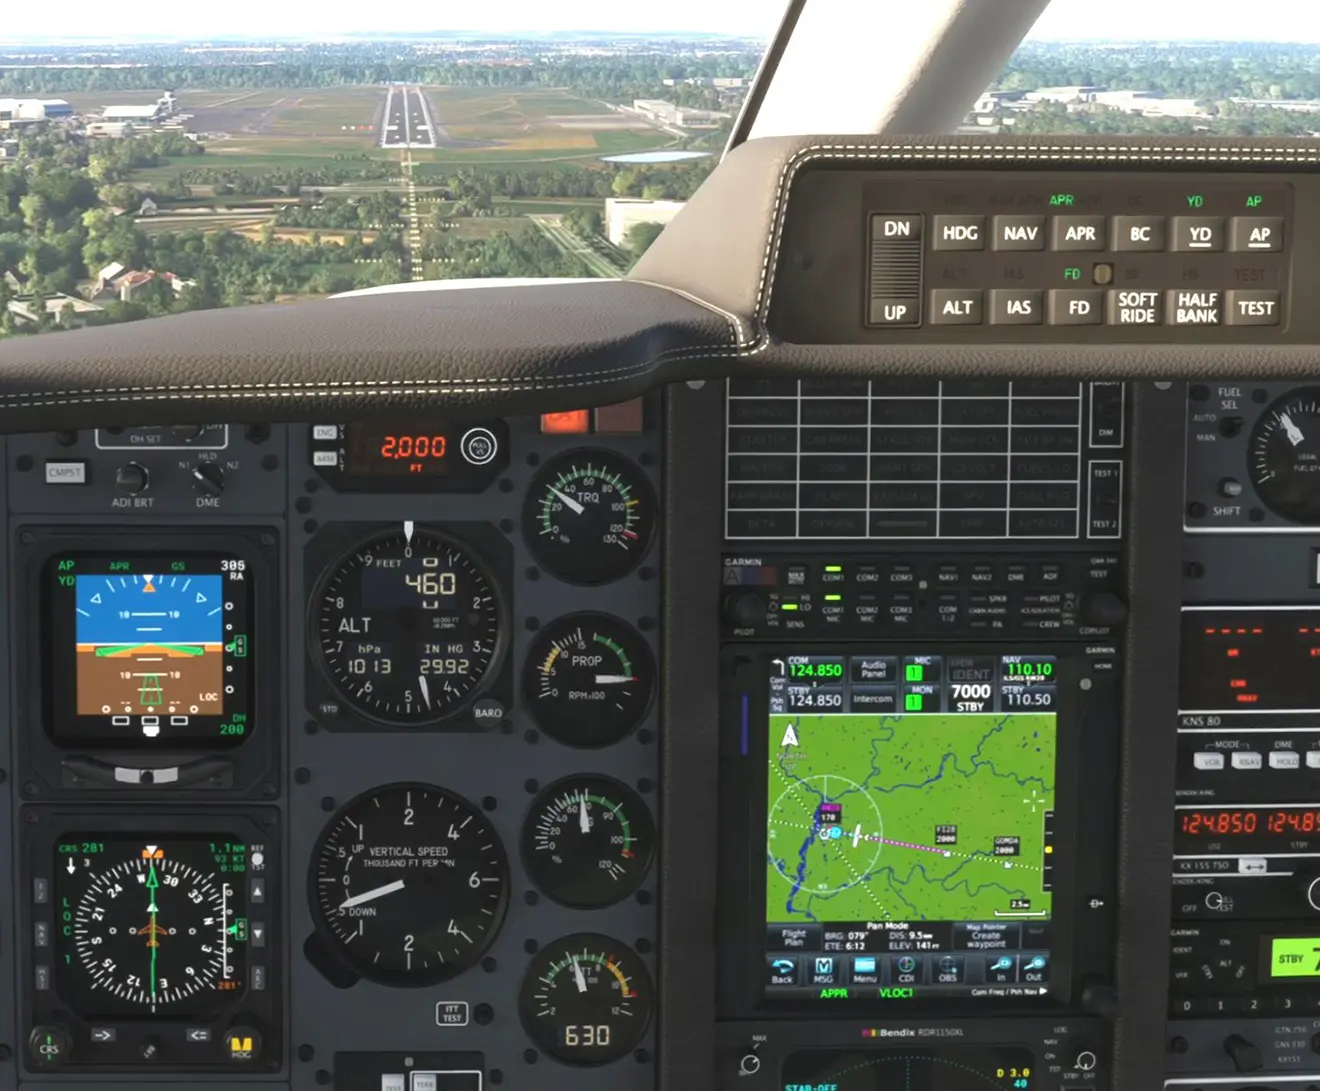
To test it, we used the TBM850 from Black Square equipped with the GTN750 from PMS50.
Software prerequisites:
- Mobiflight version 10.1.1
- miniFCU firmware version 1.0.0
- the profile indicated above (follow the attached installation document carefully).
General description of the V10 generic profile
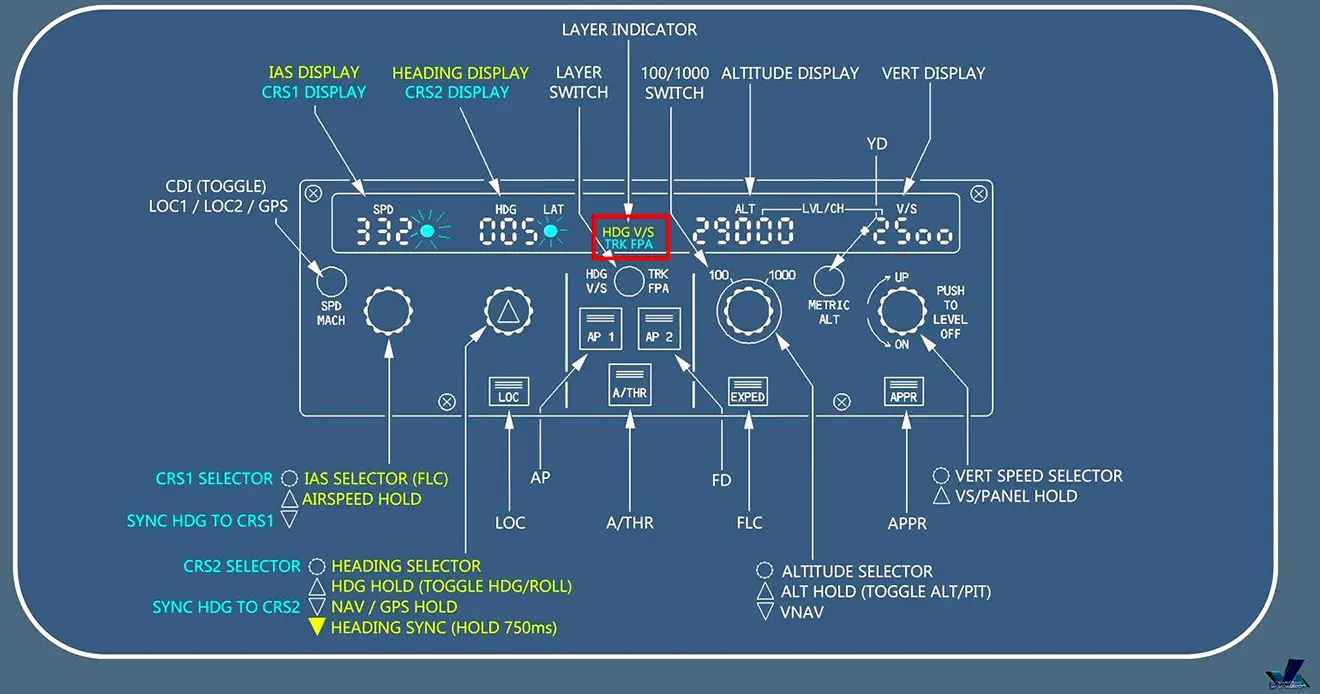
By construction, each rotator of the miniFCU allows access to two different functions by pushing/pulling the control. Using the HDG V/S - TRK FPA switch provides access to two additional functions.
- HDG-V/S: these are the yellow functions of the HDG and SPEED rotators/pushers which are used
- TRK-FPA: these are the functions in blue that are used.
The transition from one to the other is made according to the flight situations under autopilot. We will see this in the description of our test flight below.
The elements of flight
Flight in TBM850 between Dinard (LFRD runway 12) and Rennes (LFRN runway 28) with ILS28 approach SEMPO transition. The flight plan is loaded into the GTN750.
Preparing the plane
1 - Starting the plane
- loading the flight plan into the Garmin (GTN750 in this plane),
- switching on the miniFCU,
- launching Mobiflight, opening and launching the GENERIC V10 (or later) profile
NB: at startup, the miniFCU is in "HDG-V/S" which is perfectly suitable (otherwise set it by pressing the corresponding button).
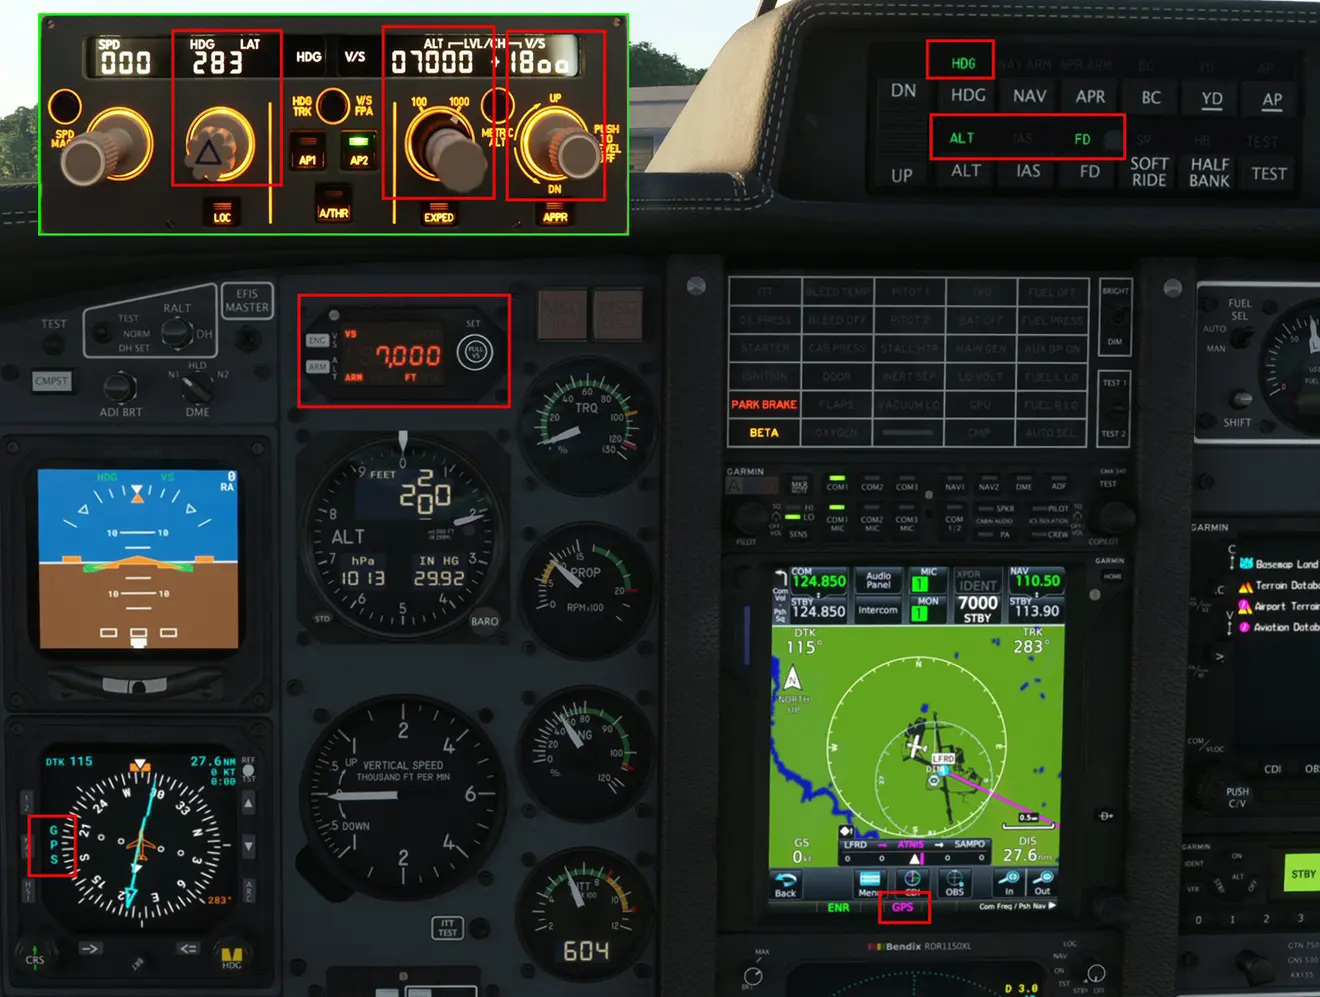
- Positioning on GPS by pressing the “SPD/MACH” button on the miniFCU and GTN750,
- Setting on the miniFCU of the cruising altitude (no SID on this flight and no IVAO control), the V/S and the current heading (press the HDG button).
Press the METRIC button to turn on the YD indicator. The ALT, HDG, YD and FD lights are lit on the AP (if FD does not light, press the AP2 button once).
2 - Rolling and alignment
- display of the heading to take on the HSI with the HDG rotator which moves the pin of the HSI

3 - Takeoff
- positive vario, gear retracted, speed acquired, flaps retracted
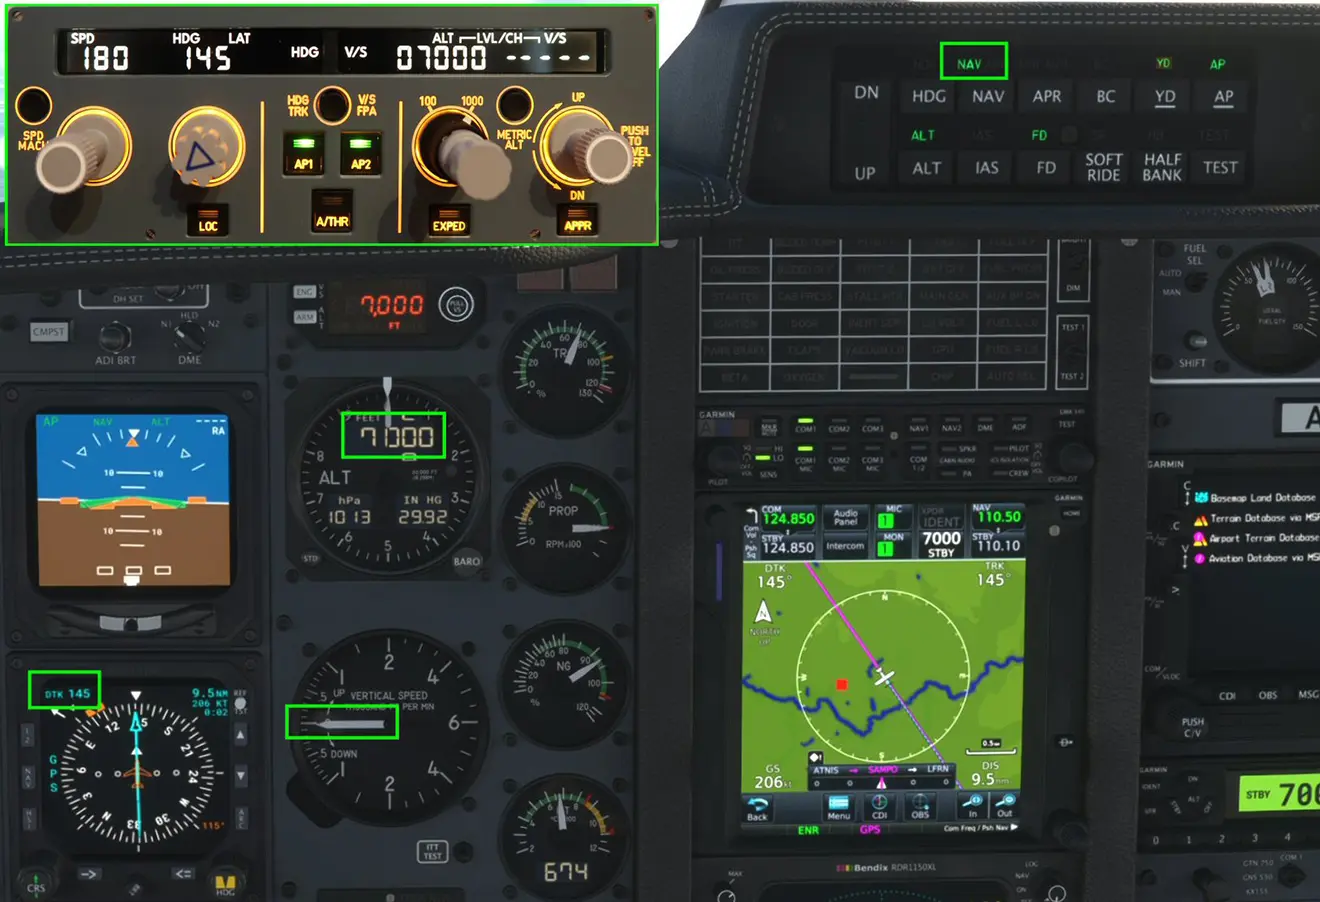
- press AP1 to engage the autopilot
- pull the HDG button to position yourself in NAV mode
4 - Cruise flight
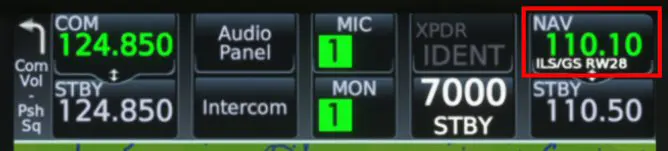
The autopilot took over the climb and followed the flight plan loaded into the GTN750. The cruise is under control. We prepare the frequency of the ILS of the arrival field in
the GTN750 by putting it on "stand by".
5 - Descent
Still in "HDG-V/S" mode, the new altitude and the chosen V/S value are displayed. The aircraft begins its descent towards the defined altitude while following its route (AP and NAV on).
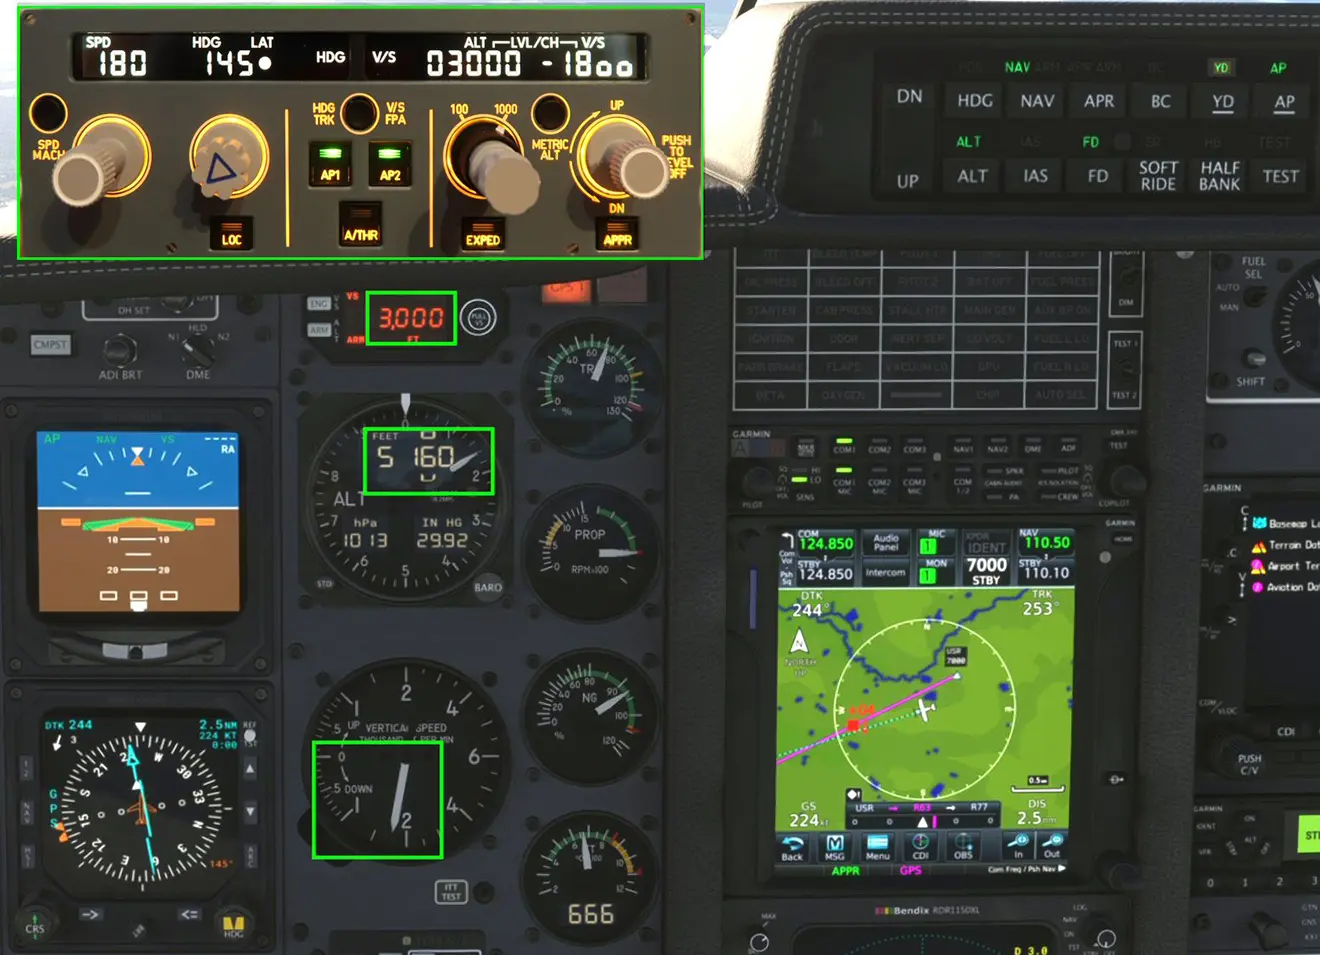
When the descent is almost complete, we reduce the thrust to prepare for the extension of the flaps and then the landing gear during the approach phase.
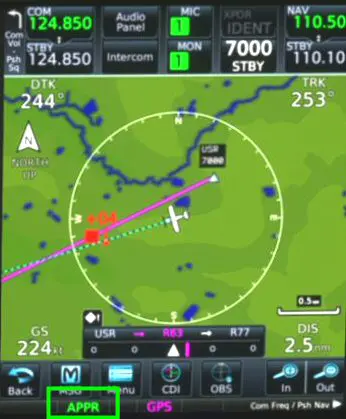
6 - Approach
The GTN750 begins to approach at the start of the transition. This has no effect on the plane.
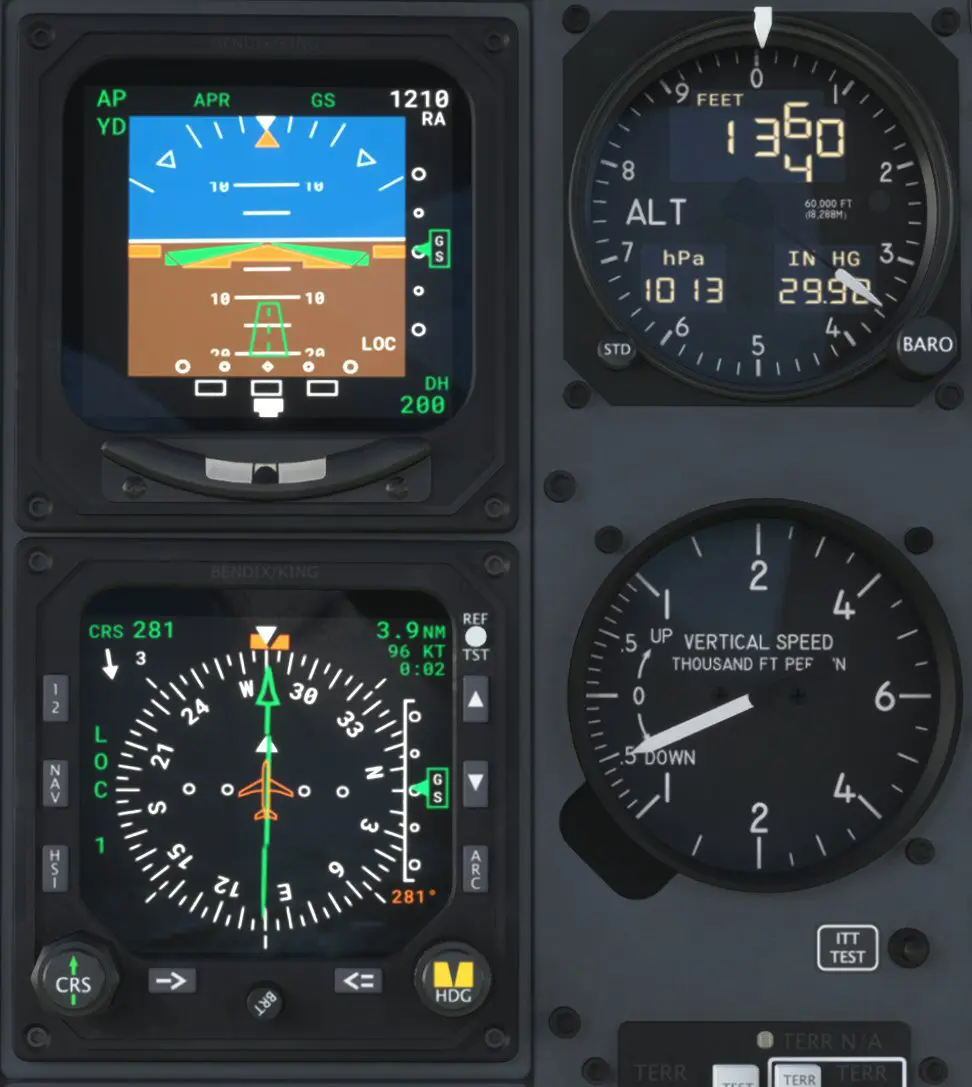
You must change the frequency of the ILS which was in "stand by" to active (NAV on the GTN750, is done by clicking on the active frequency). This frequency will be used by the HSI to display the "localizer" and the "glide" approach.
Before arriving at the approach entry point, position the HSI in "LOC 1" mode by successive presses of the "SPD-MACH" button. Set the localizer needle to the runway heading while passing in "TRK-FPA" mode then by turning the HDG rotary. Once the locator is positioned, return to HDG-V/S mode and press the APPR button.
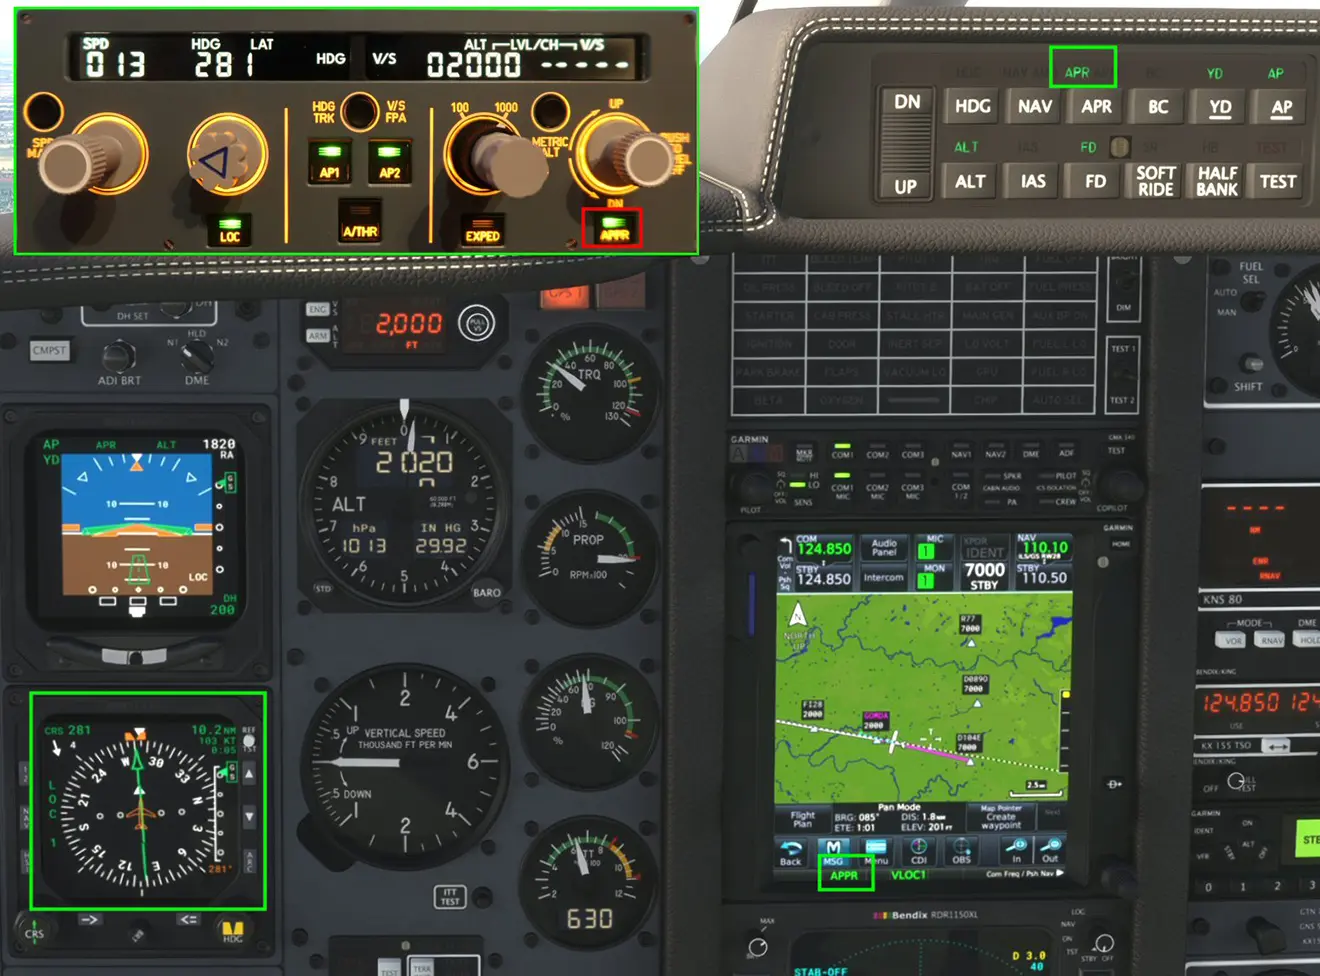
The approach is active and the aircraft positions itself on the locator and descends on the glide.
7 - Landing
Check that all parameters are correct (speed, flaps and gear extended) and regain control at the required height indicated by the procedure by cutting the PA by pressing the AP1 button
and if necessary stopping the approach with the APPR button.
Note: With the miniFCU and the generic profile for Mobiflight, the mouse was only used once to toggle the ILS frequency on the GTN750.