Load a flight plan into the Garmin G3X Touch
The evolution going towards touch screens, here is the Garmin G3X Touch. It is found on many dashboards, alone, in duplicate and even in triplicate.
It comes in several forms depending on the aircraft and the years of manufacture. In the aircraft available as standard in MSFS, these are the ones we have listed:
The "classic"
The "full Touch" found especially in multi-screen format.
We will, as with the other tutorials in the series, show you how to load a flight plan into this GPS. To simplify the tutorial, we will take the "classic" form of this G3X knowing that the manipulations are identical for the "full Touch", except for one detail for access to the FPL page (see end of tutorial).
Manually loading a flight plan into the Garmin G3x "Touch"
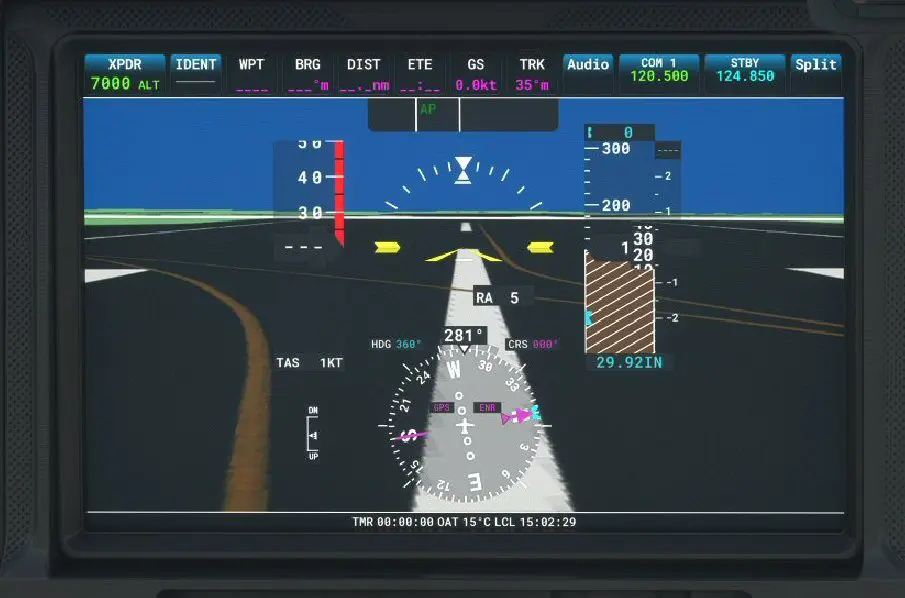
When switched on, the screen is as follows:
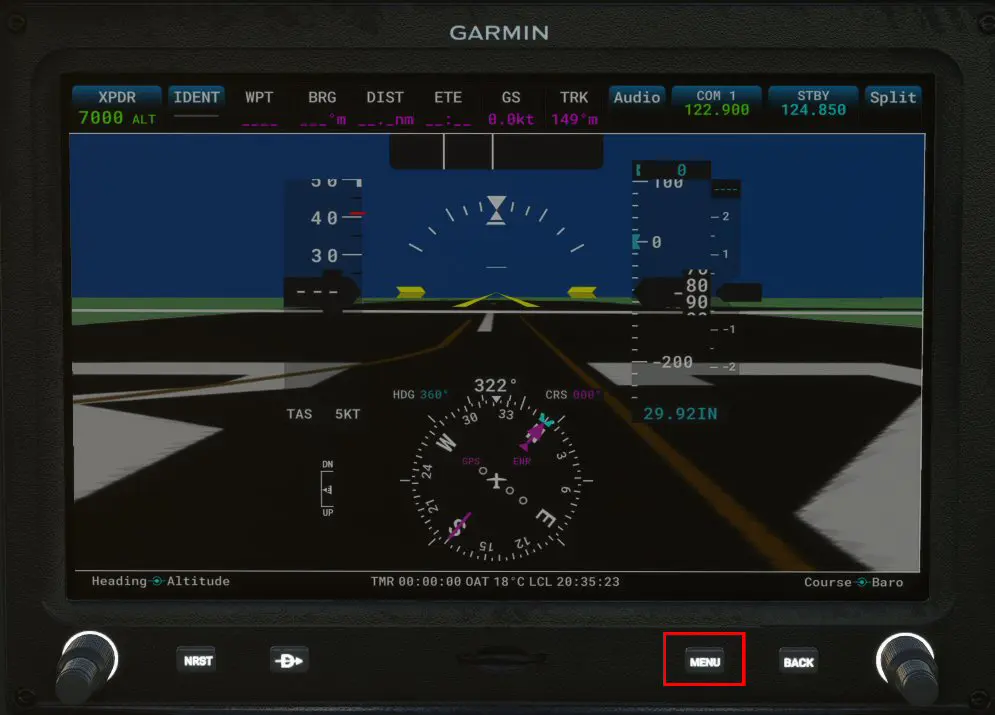
Pressing the MENU key opens the window for selecting possible actions. This will be the only button action for this GPS, all other actions will be done on the screen.
We will enter a simple flight plan:
- departure: LFRN (28)
- SID: LABU5V
- waypoint: ANLEV
- STAR ANLEV8C
- approach: ILS Z 25L
- arrival LFRB (25)
NB: the process is deliberately very detailed to allow beginners in the world of aircraft GPS to follow it step by step.
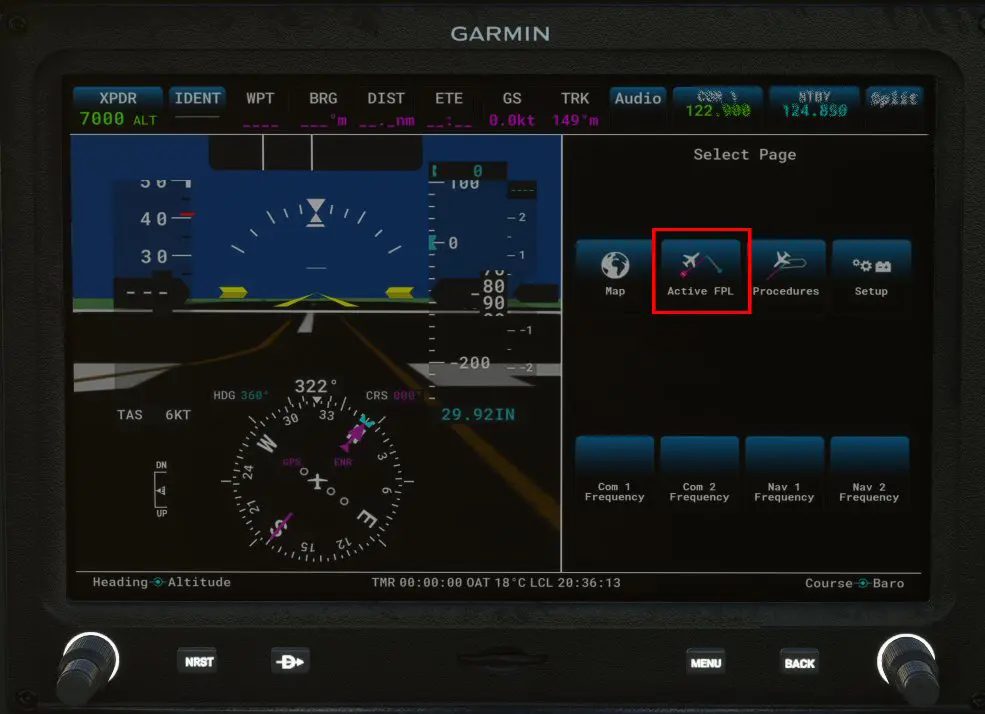
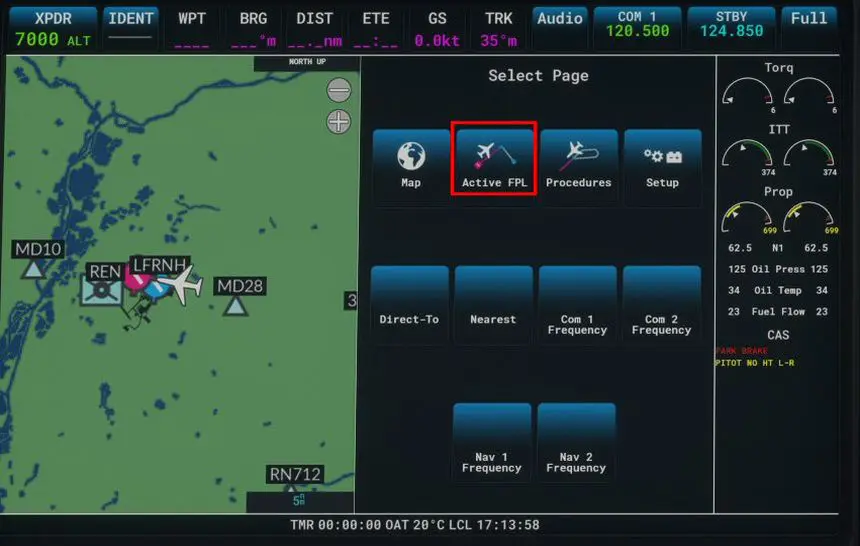
To enter a flight plan, press the Active FPL area:
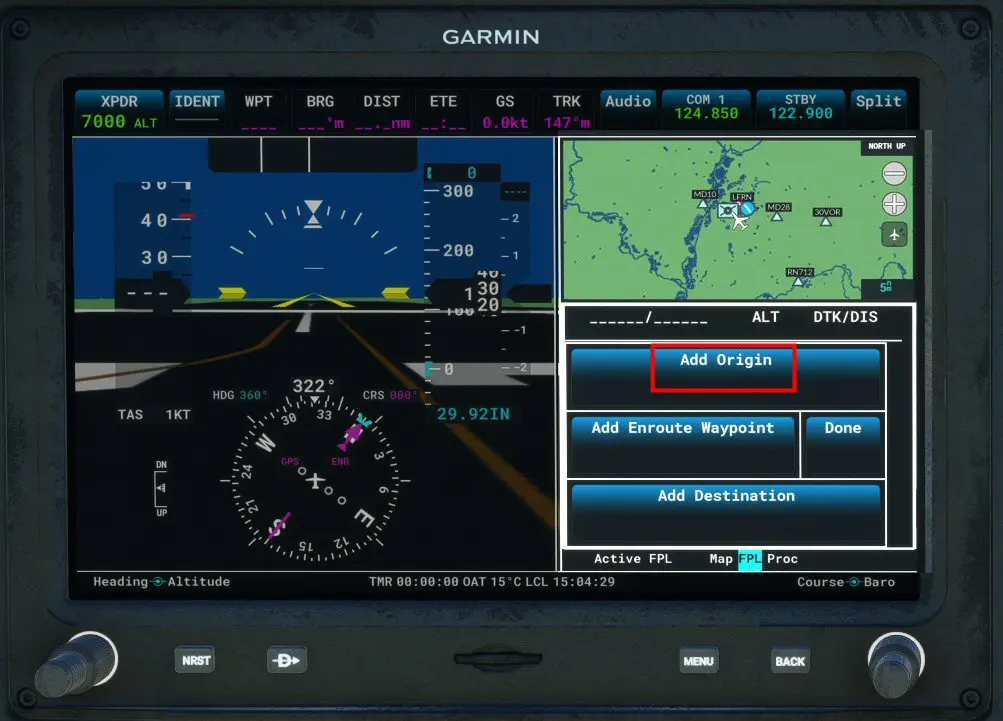
By pressing the Add Origine zone, you can enter the ICAO code of the departure airport with the touch keyboard:

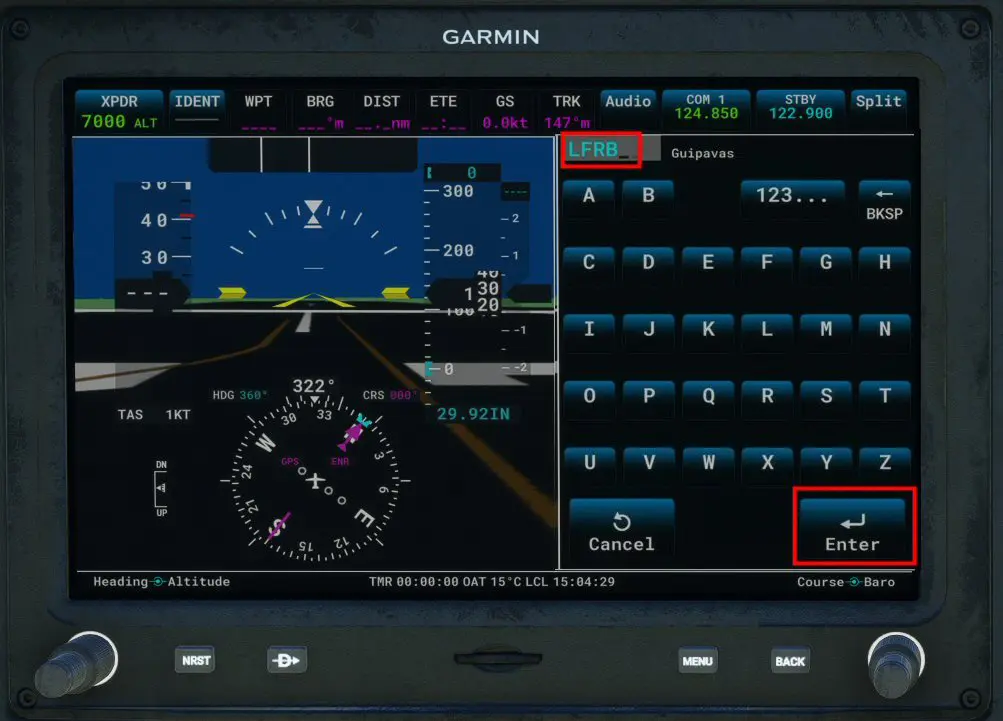
Once this code has been entered, the intro is validated by pressing the Enter zone which brings us back to the selection page:

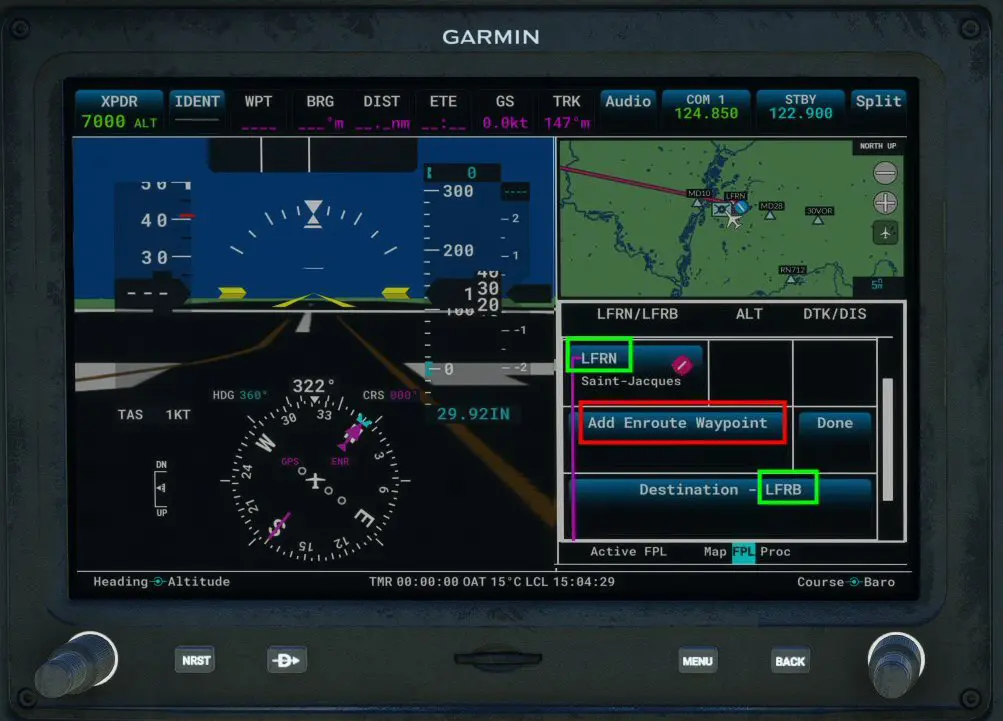
As for departure, enter the ICAO code of the arrival airport:
We now have the trajectory (green frames) we will select the waypoint (ANLEV) to arrive from the north:
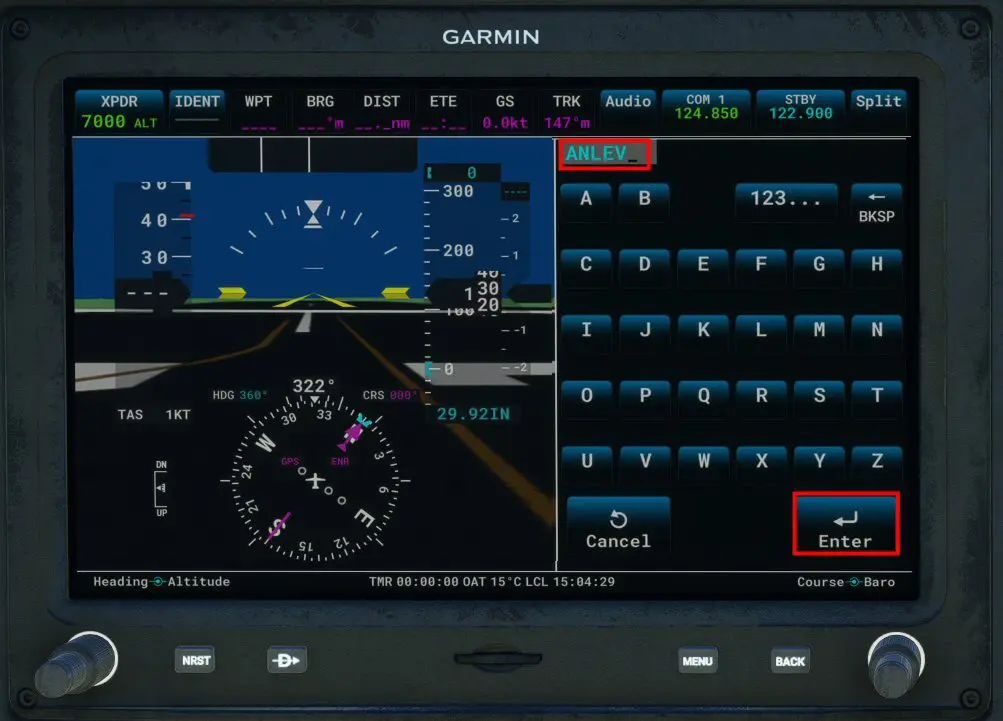
After pressing the Enter area, we will now go to the page allowing you to enter the departure and arrival procedures:
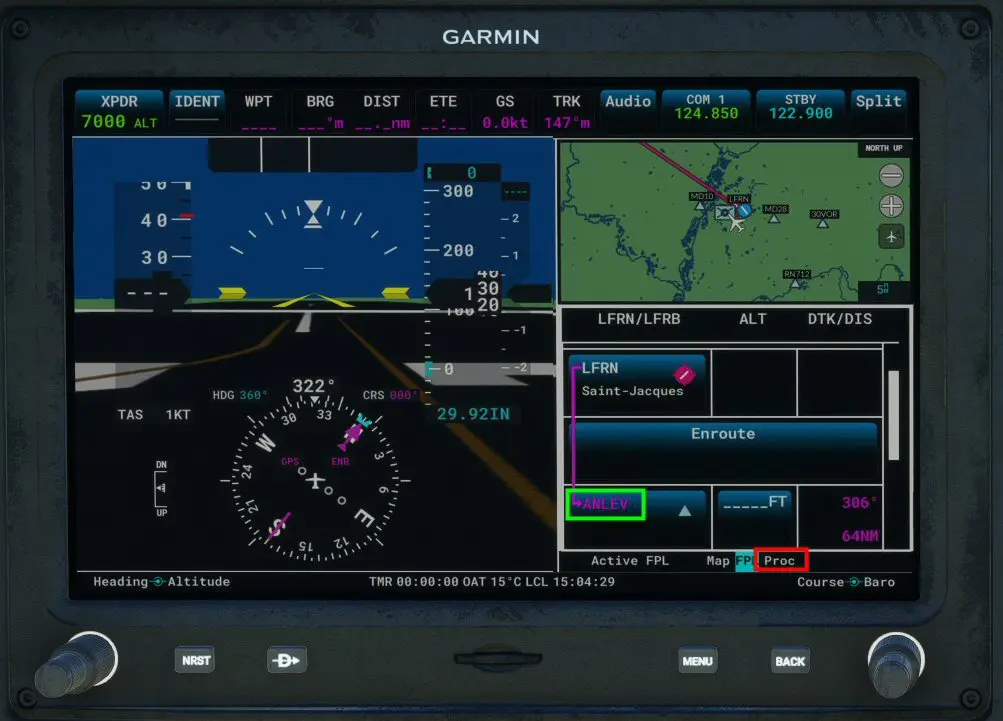
Pressing the Proc zone at the bottom of the screen displays the initial selection page:
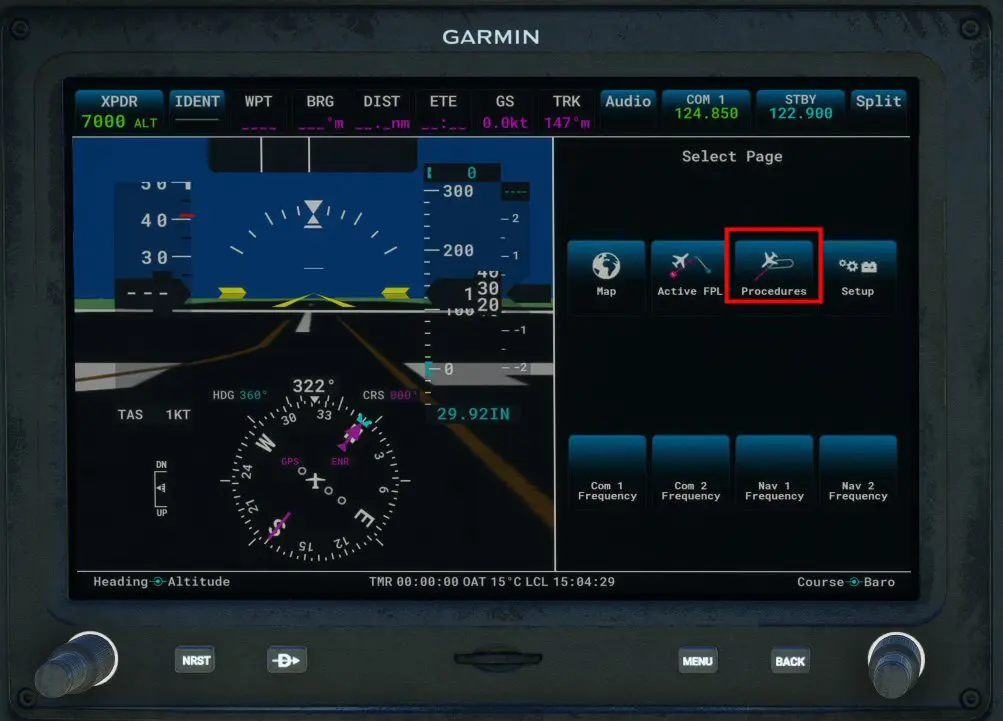
Press on the Procedures area:
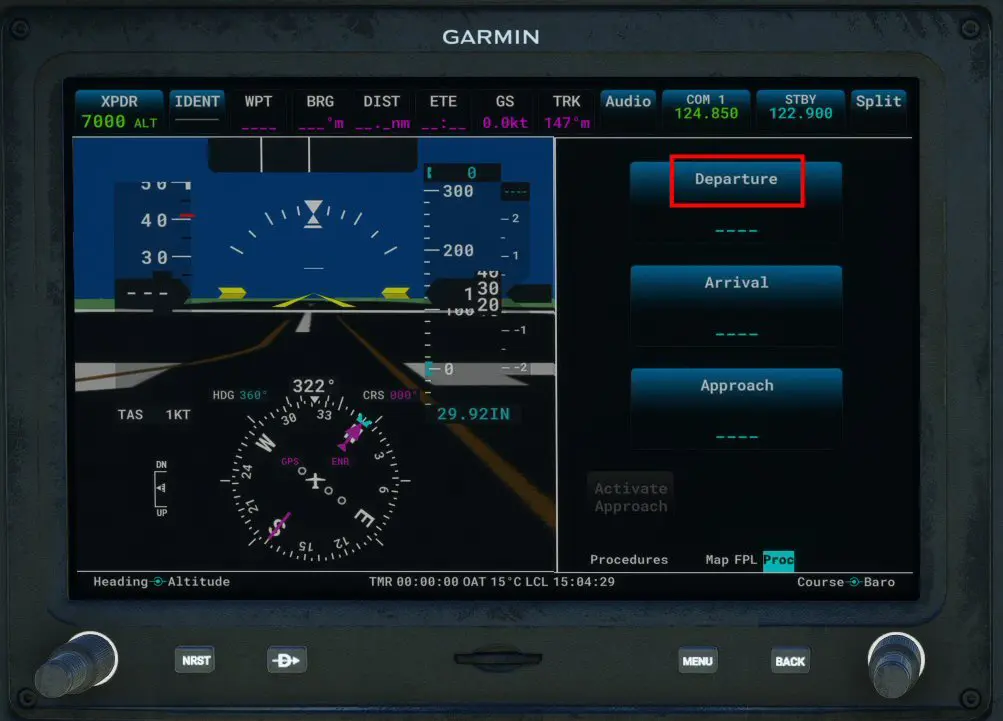
Press on the Departure area to open the corresponding page:
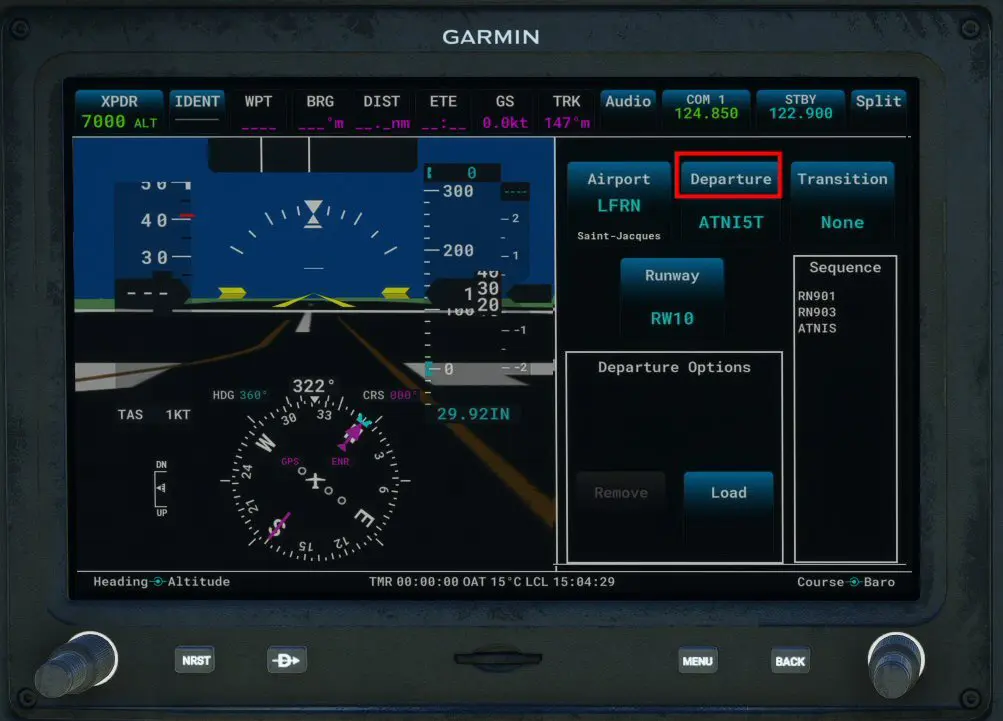
We will be able to select the SID by pressing the new Departure area of this page because the one proposed is not the correct one (it is the first in the list in alphabetical order):
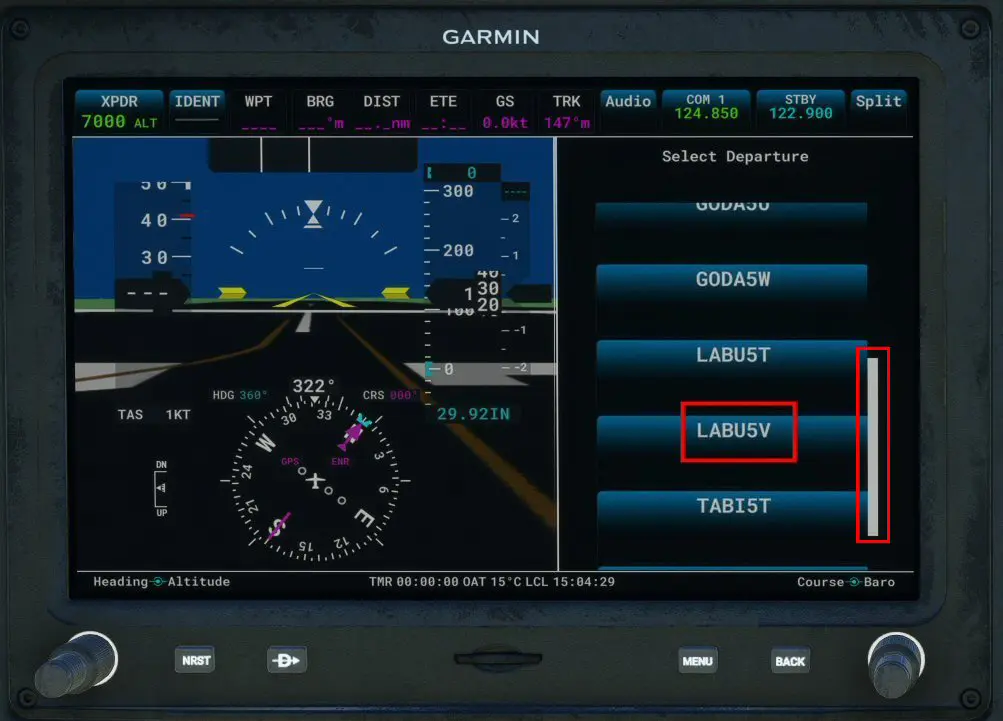
Search and press on the chosen area (here, LABU5V in accordance with the planned flight plan):
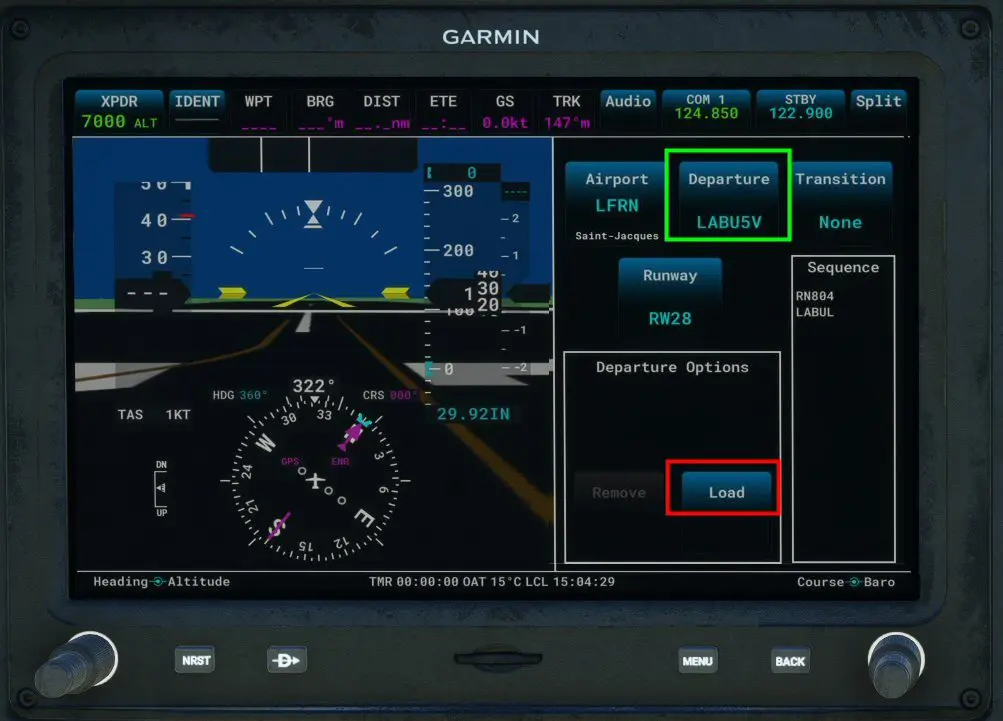
As for the other Garmin GPS, the procedure must be validated by pressing Load which brings us to the page allowing the choice of procedures:
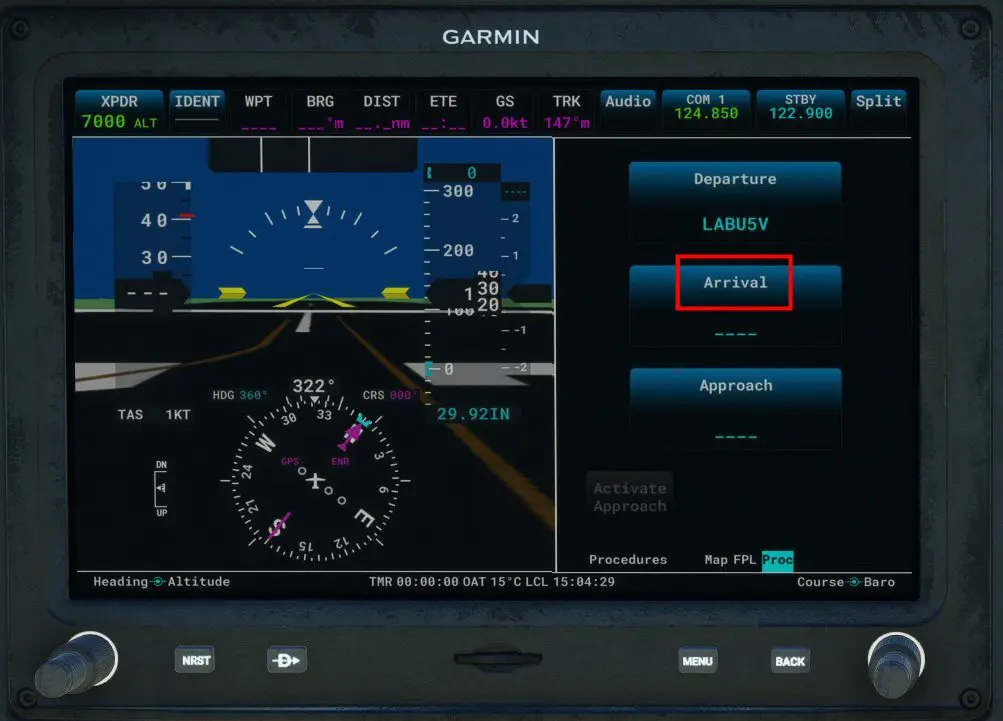
We select Arrival which, on the next page, tells us that for LFRB, the proposed procedure is ANLEV8C (which suits us, we won't have to search for it as we did for SID), that the transition is not chosen (None), that the track is not chosen (Runway All) and that we will go through ANLEV and SOPEX which is fine with us. We will therefore validate this page with Load to go to the page to enter the approach:
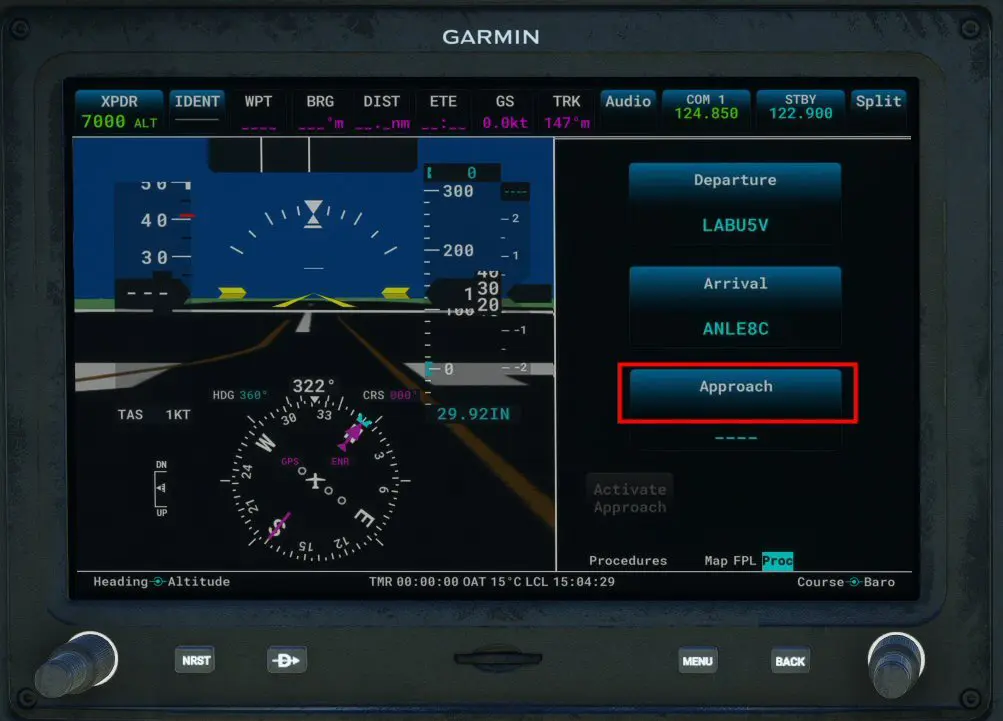
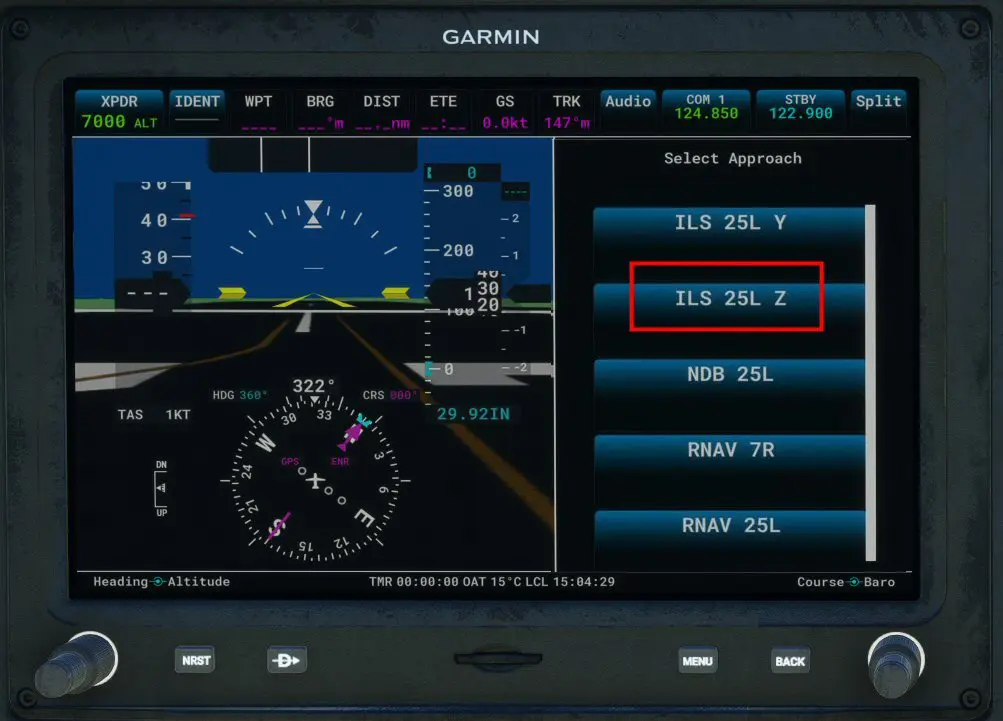
Pressing on the Approach zone gives us the possibility of choosing our approach which will be, as indicated at the beginning of the tutorial, an approach on the ILS of runway 25L (ILS 25L Z). But it's not over yet because this approach allows you to come from the south (ARE) or the north (ANLEV):
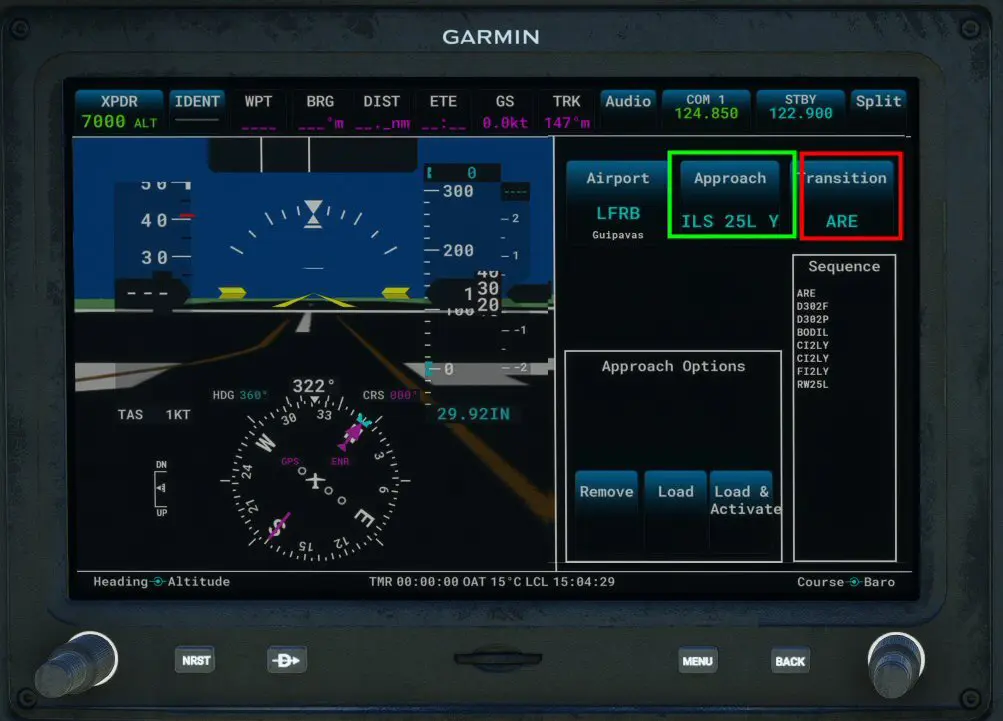
You must therefore, by pressing the Transition area (which offers ARE), modify this value. The arrival will therefore be via the BODIL point that we will select among the only two transitions proposed:
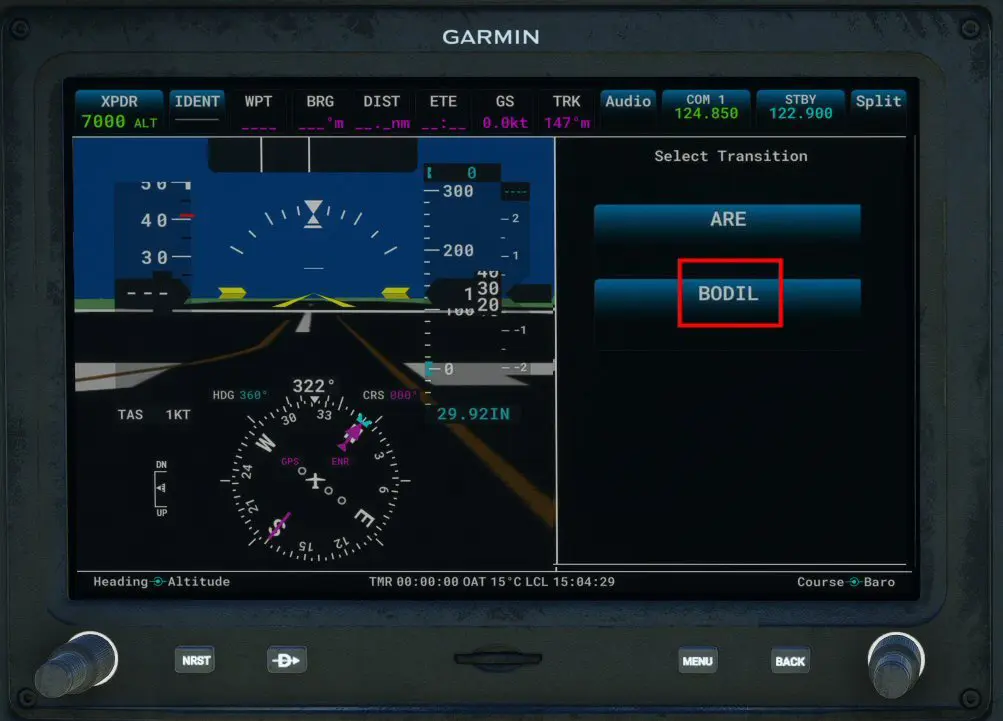
This time, the flight plan is complete and corresponds well to what we wanted. The following page gives all the details (green frames):
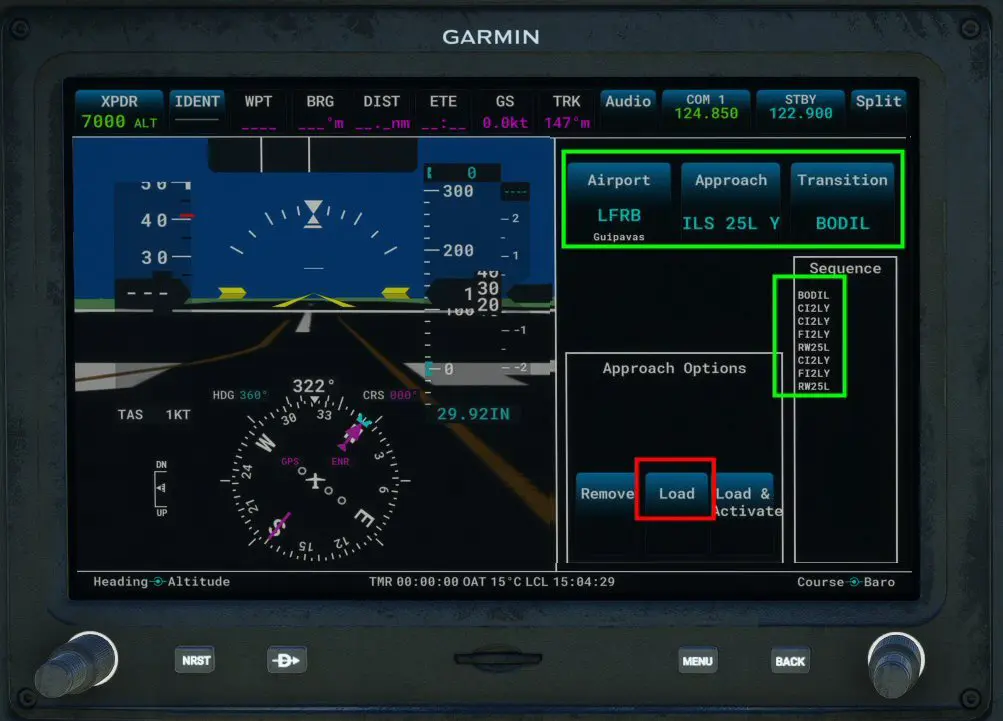
All that remains is to press the Load area to validate it, which brings us back to the procedure selection page:
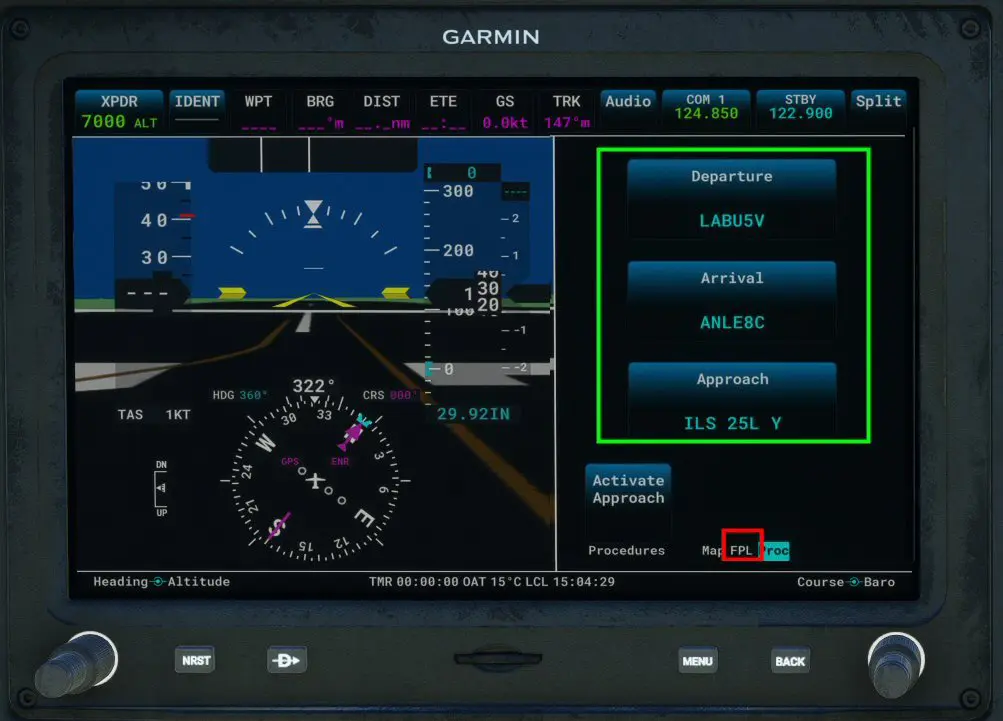
You return to the start screen by clicking on the MENU button (or on the Full area at the top right of the screen if it is displayed).
Note: if the aircraft has two G3Xs, in principle:
- the one on the left is dedicated to the conduct of the flight (horizon, runway diagram, speed, altitude, heading, etc.)
- the one on the right contains fixed engine parameters and is used to display the drop-down map and flight plan monitoring.
But the two GPS allow access to the navigation, communication and configuration functions.

Note: depending on the planes (to be checked), you can perfectly do all the actions of this tutorial (and others) in the UI window (popup) displayed by positioning the mouse on the GPS screen and clicking on the "Alt Gr" keyboard button (to the right of the spacebar).

Variant for "full touch" screens: as indicated at the beginning of the tutorial, these screens do not have a menu button (except remotely in another element of the central console).
To start the introduction of the flight plan it is necessary to follow the following sequence:
- startup screen
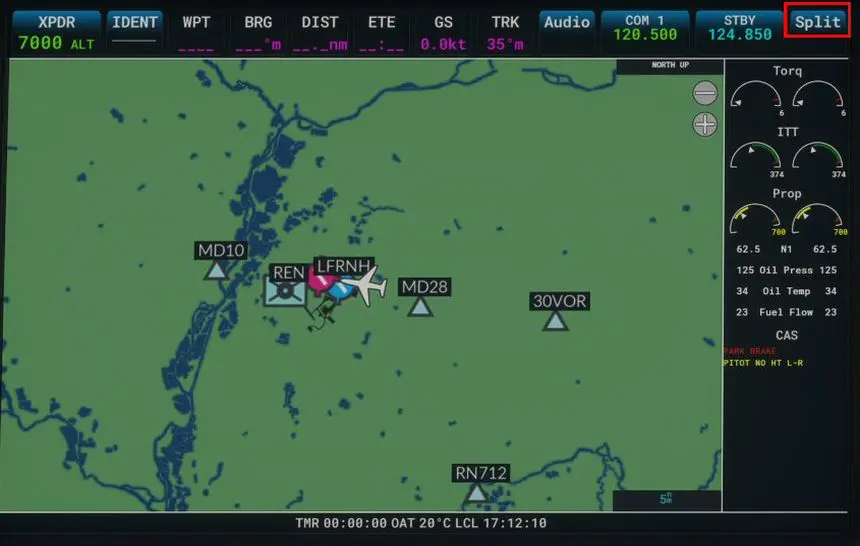
- after pressing the Split zone at the top right of the screen, you arrive on a 2-part screen with choice zones at the bottom of the right part.
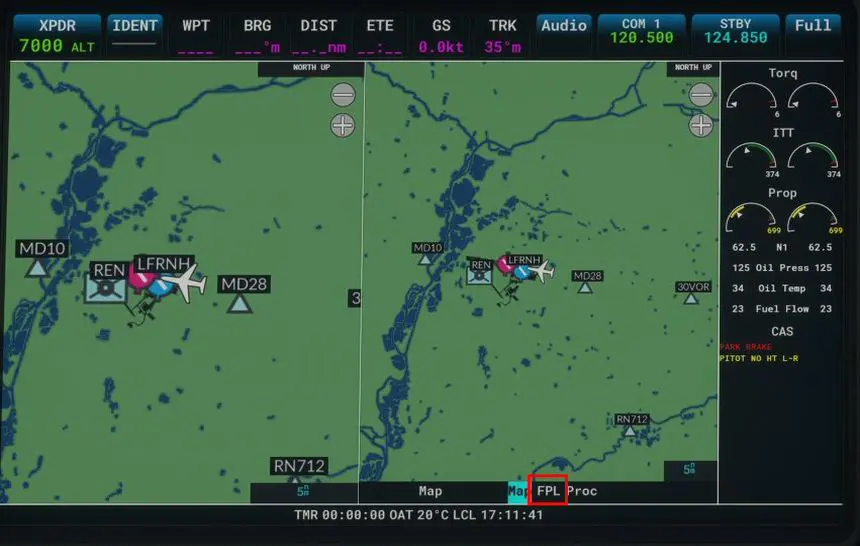
Pressing the FPL area brings you to the same screen as the one at the beginning of this tutorial.