GSX Pro: programming a pushback
Reminder
The GSX Pro software is an “add-on” which brings entertainment to airports. All phases on the ground of preparation for a flight or its arrival are represented in great detail, both in terms of equipment and personnel.
The technical staff perform their work exactly, the crew and passengers embark and disembark visually, etc.
Messages between ground personnel and the cockpit are transmitted (vocal and written). The software is paid for from the FSdreamteam website: https://www.fsdreamteam.com/products_gsxpro.html
For each airport, GSX Pro needs a "profile" which will provide it with all the necessary information for the movement of machines and people. GSX Pro provides the tools to create or modify these "profiles". Many "profiles" can be downloaded from "flightsim.to".
We will focus on the creation of a "pushback" function specific to a boarding station for a given airport, the aim being to automatically move the aircraft from its station to a taxiing position towards the runway.
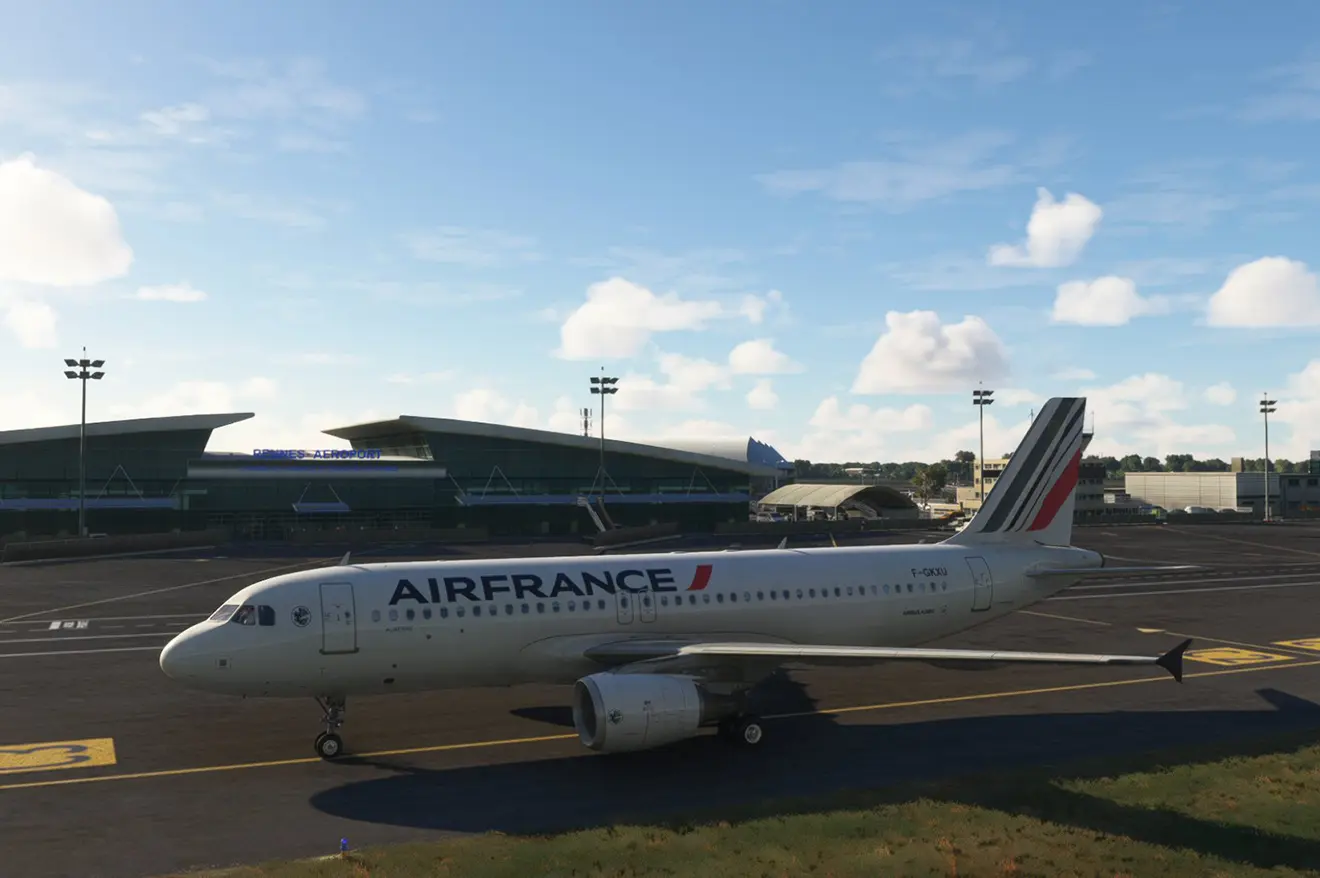
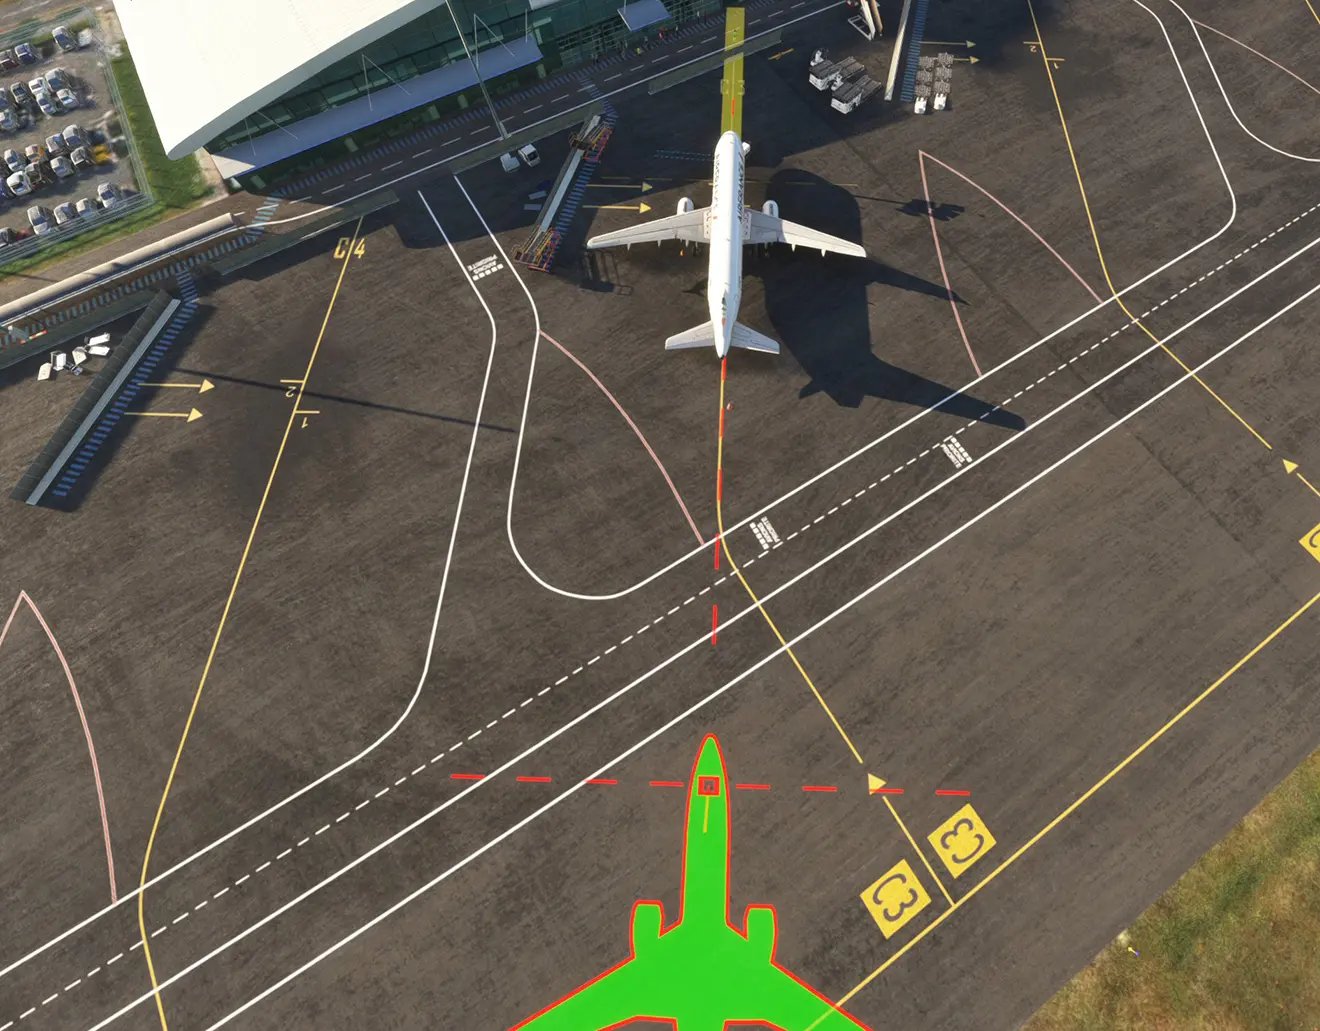
The aircraft must be placed on its departure station as in the example below: LFRN station C3.
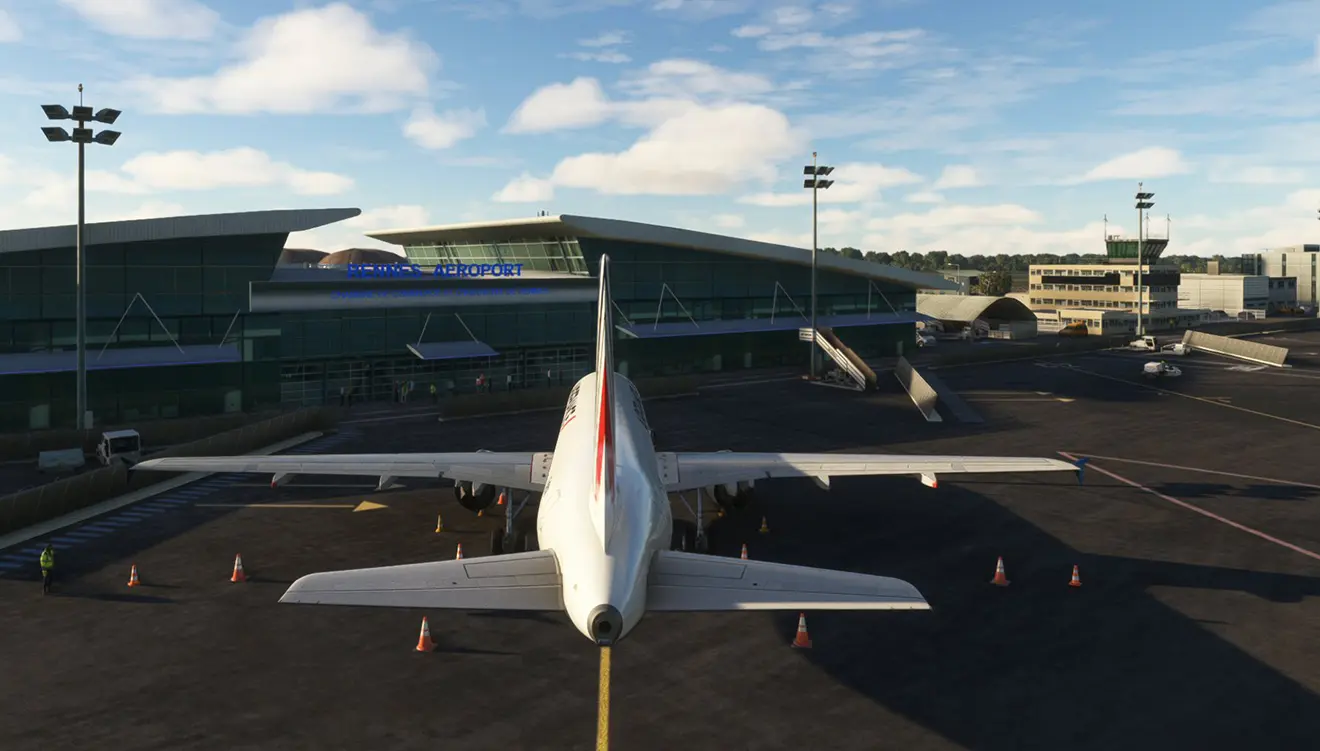
Important: to have an overview of the pushback trajectory, you must use a "drone" camera and adjust it accordingly (see image below for LFRN).
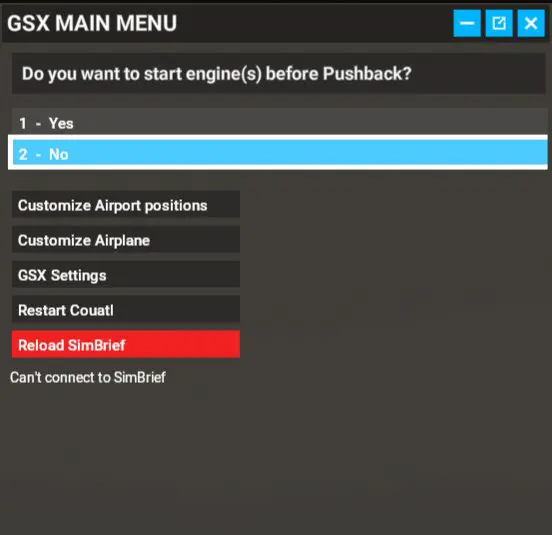
After clicking on the GSX icon, select the "9 - Customize this parking position" function.

The GSX work setup window opens, we check that the selected parking lot is where the plane is and we click on the "Pushback" tab.
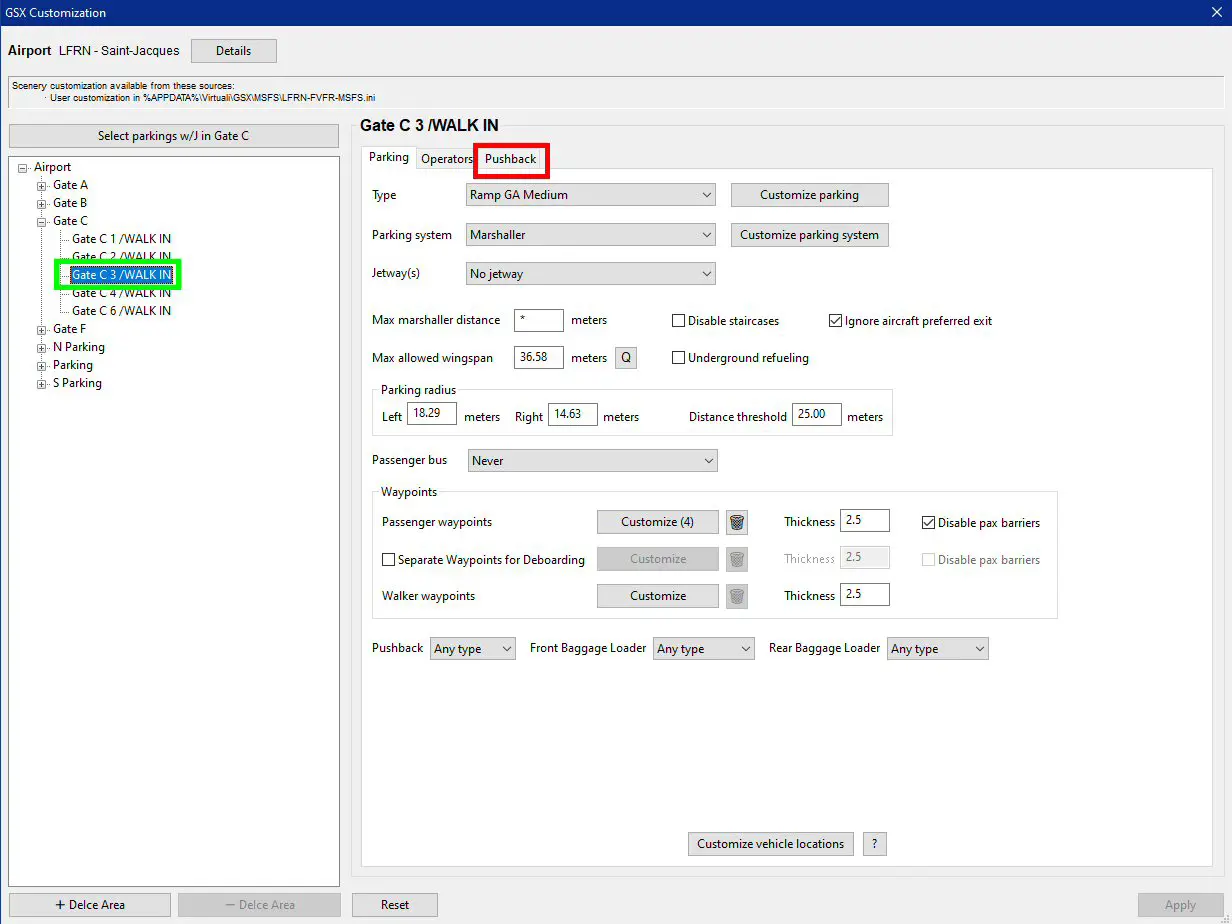
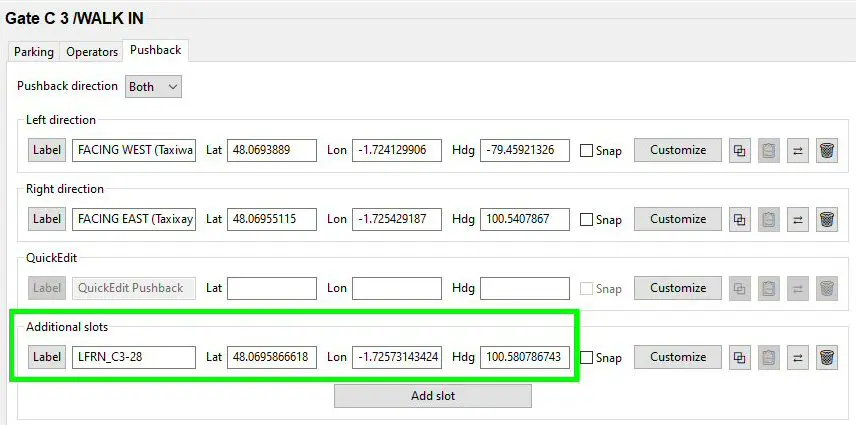
The interest being to be able to reuse this pushback, in the window, we click on the "Add slot" button.
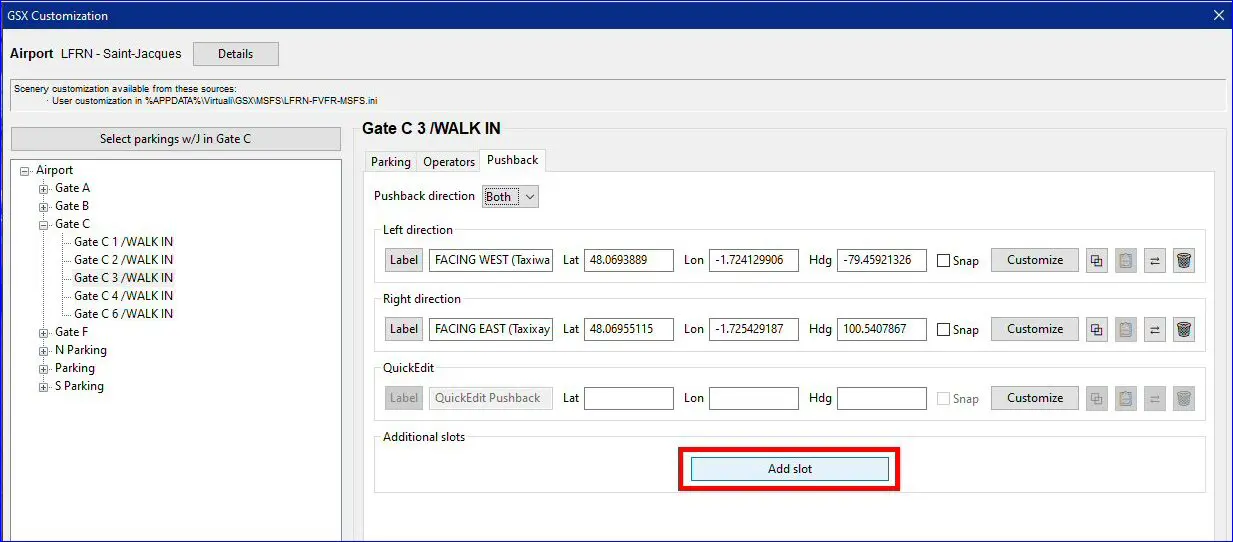
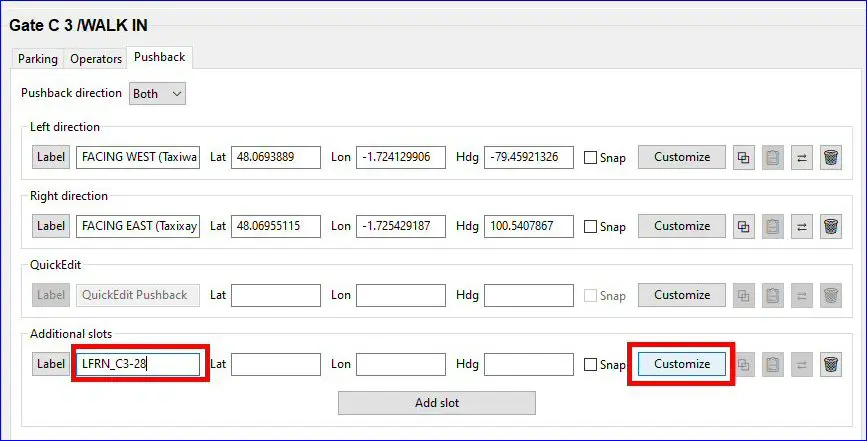
A new line is added in the window, we will give a name to the "pushback" procedure (LFRN_C3-28) and click on the "Customize" button.
The popup that appears provides the keyboard codes that will allow the "pushback" to be plotted. It is important to note them.
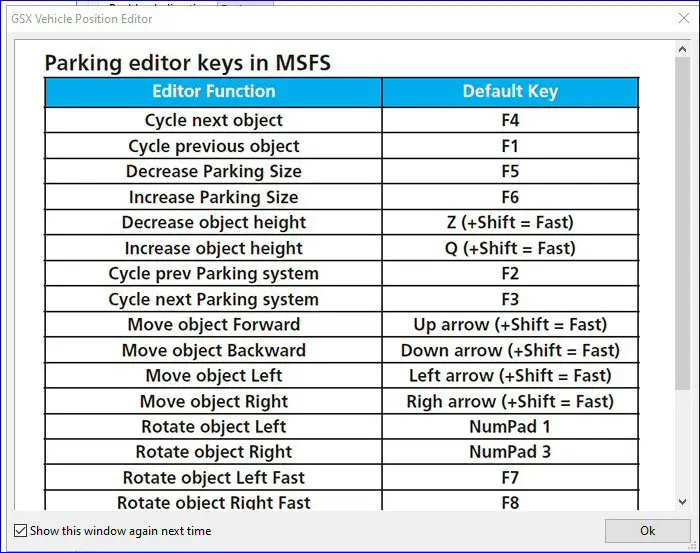
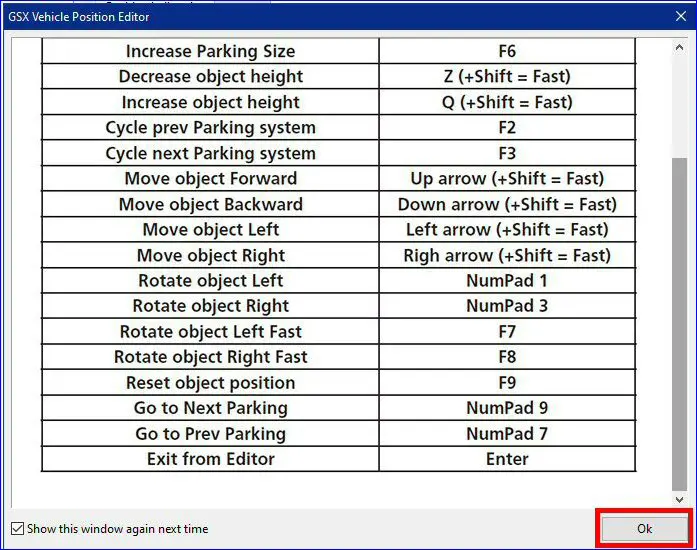
Click on the OK button to return to the simulator window which has pre-positioned a layout with, in green, the model of the aircraft that we are going to move.
NB: instructions in voice are provided, do not forget to turn on the sound on your PC.
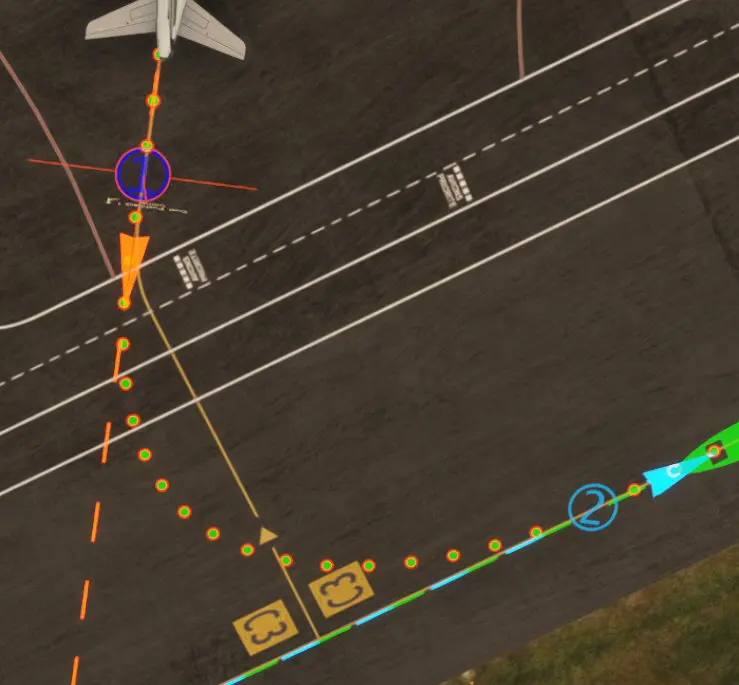
Case 1: basic trajectory
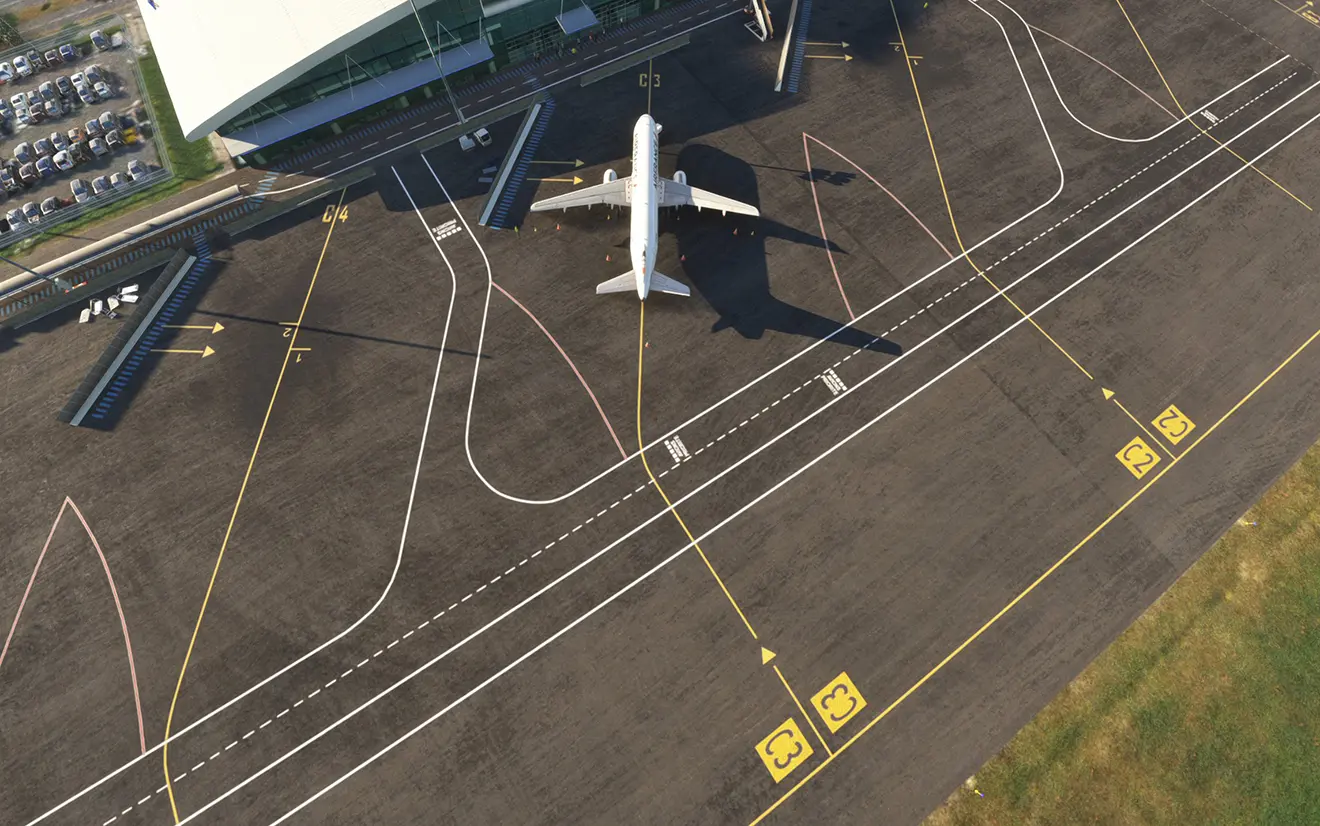
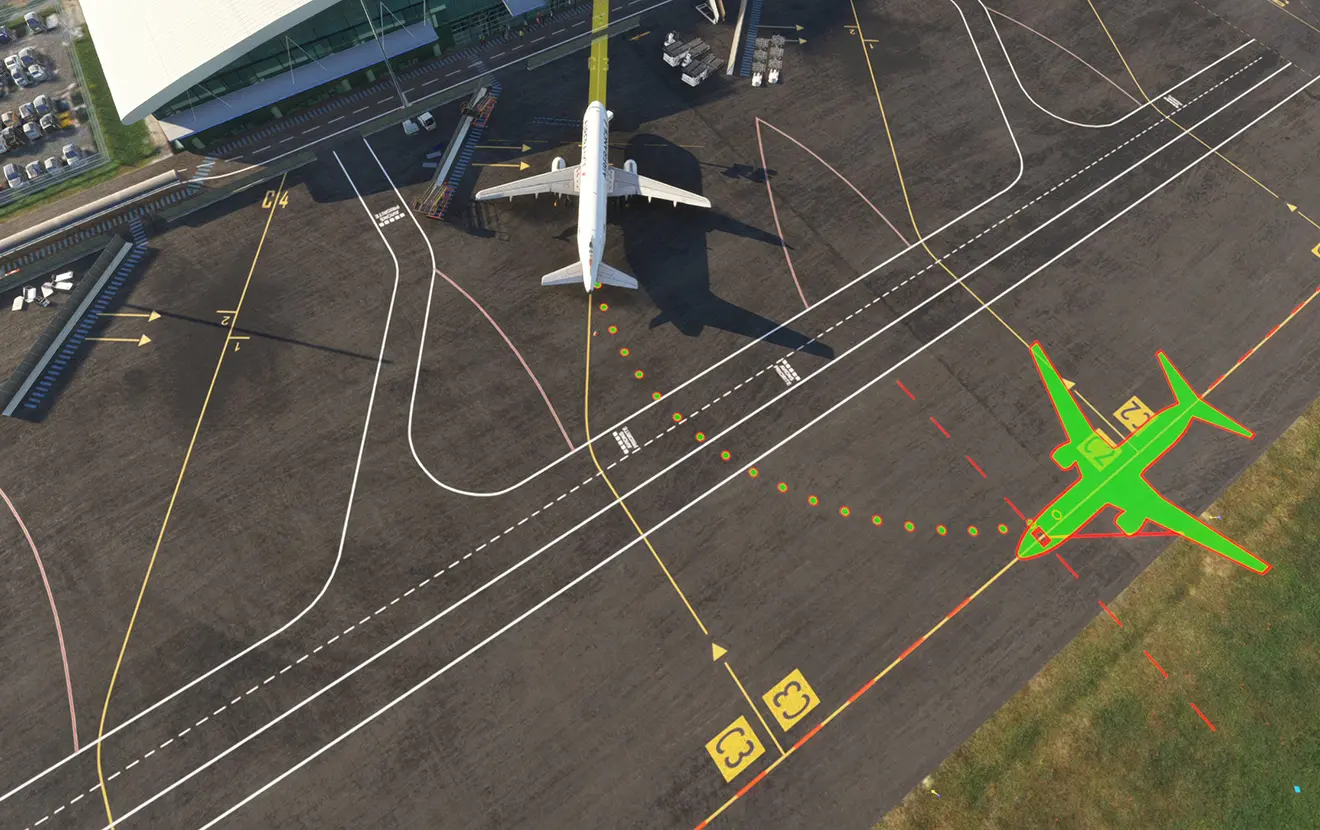
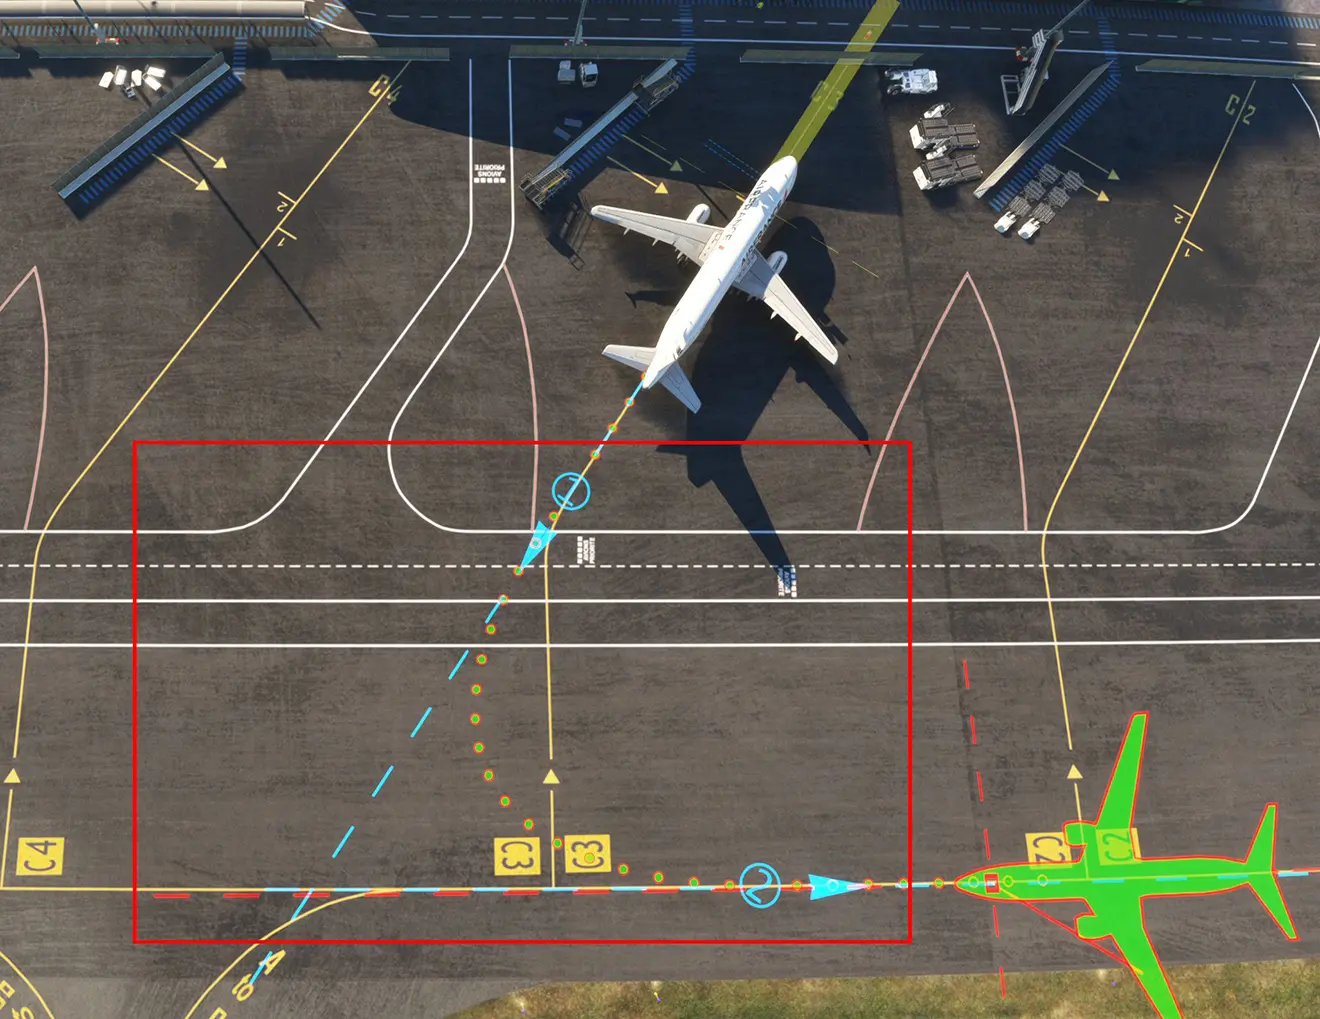
Movement is done with the keys indicated in the previous popup and mainly the "arrows", the "1" key and the "3" key ". Simultaneously pressing the "Shift" key allows you to make larger movements. The red dotted lines allow you to refine the placement of the plane. The green and red circles show the trajectory.
We arrive at this situation at the end of the "pushback": the plane is positioned for taxiing towards runway 28 of LFRN.
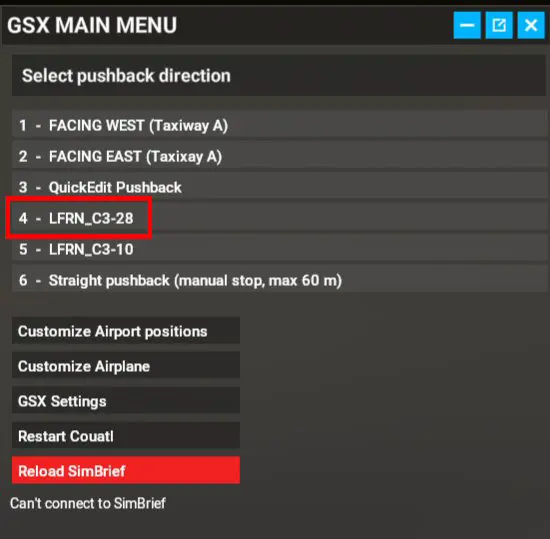
If suitable, pressing the "enter" key takes you back to the GSX input window, the coordinates of the movement have been added and you can select this "pushback" of the start of an aircraft positioned at this position for a takeoff in 28.
If you wish, you can completely start the operation again by adding a new "slot" for takeoff, still from this position, towards another runway (10 at LFRN for example):
We thus have the choice of departure on the two runway axes.
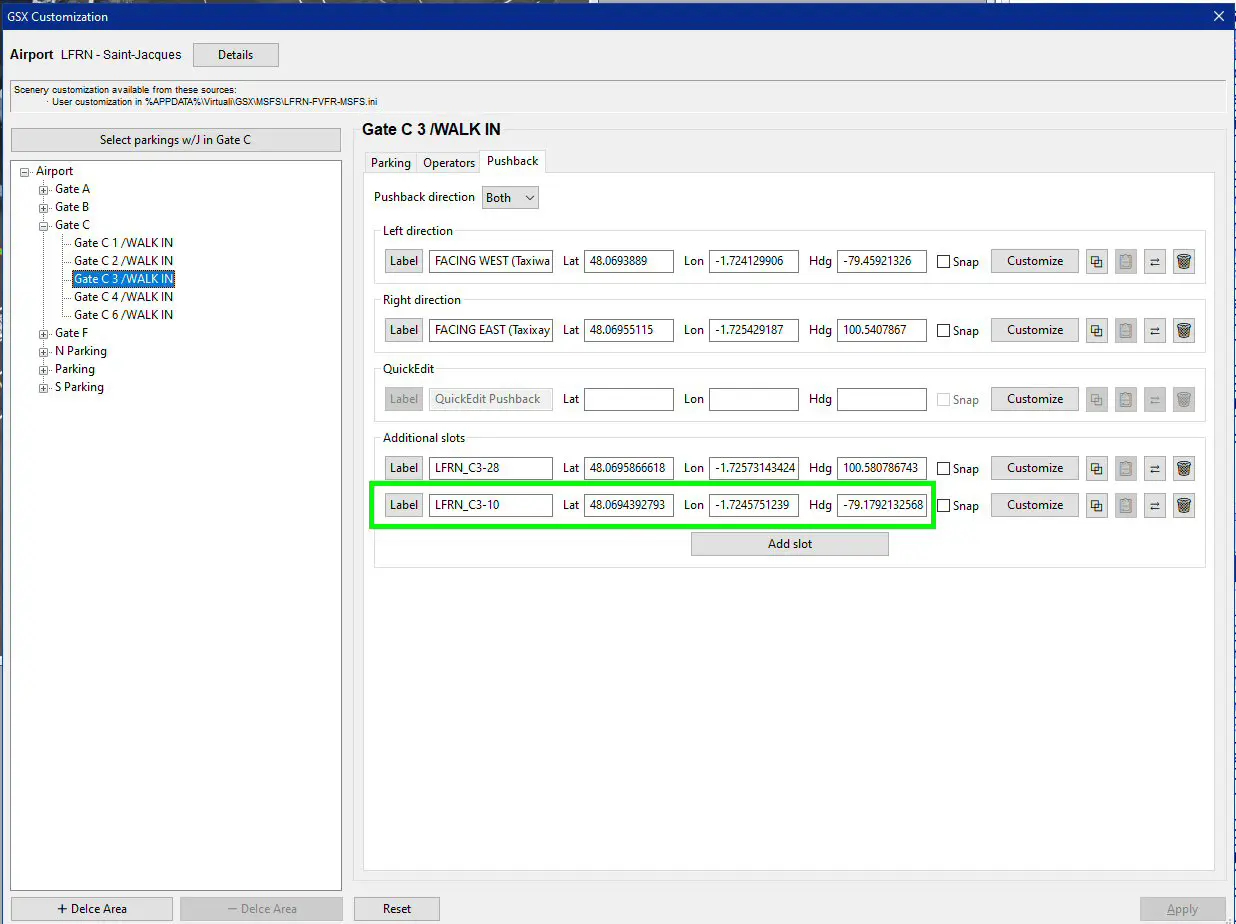
It is interesting to carefully codify the names of the procedures so that they are "meaningful".
Back in the simulator, pressing the GSX button offers the choice of the "pushback" procedure:
Case 2: "more realistic" trajectory
As seen in the simulator images, the turn begins from the starting position which is not very realistic, especially if another aircraft occupies the adjacent position. There is therefore a second method to create a trajectory more consistent with real movements.
Click on the GSX button to display the modification window. We can absolutely take an existing trajectory or create a new one.
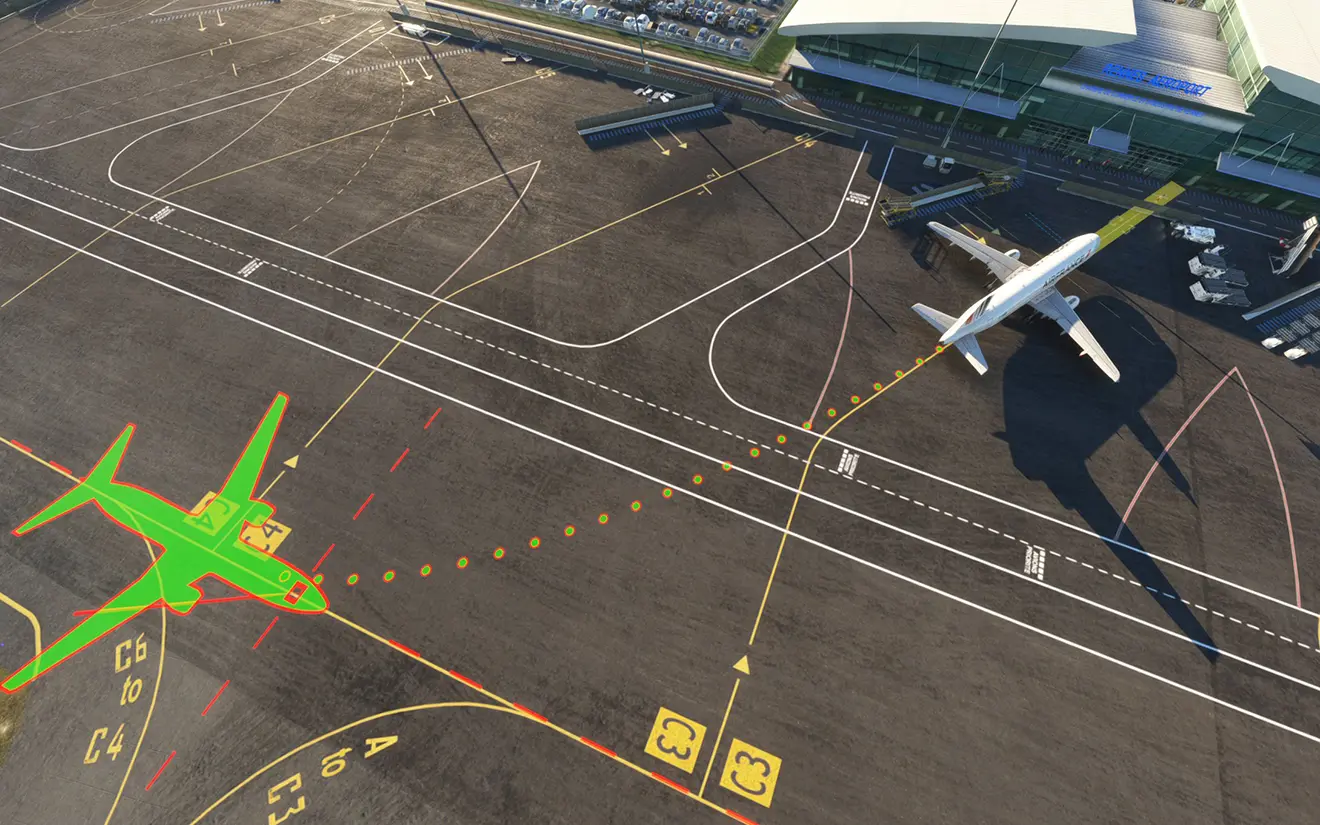
Let's take the departure procedure for runway 28: LFRN_C3-28. Pressing the "Customize" button displays in the simulation window (in drone mode, for greater clarity) the starting position and
arrival of the existing procedure.
Simultaneously pressing the "Shift" and "NumPad-5" keys adds:
- points "1" and "2"
- new directional axes
- a more realistic trajectory (departure in the axis of the plane).
With the "F1" key, you can select the point you want to move (to extend a straight line for example).
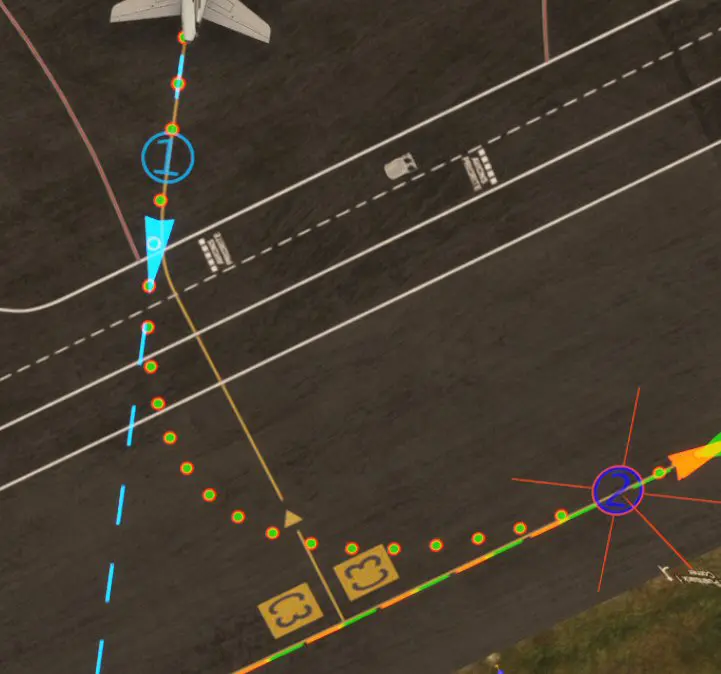
The points are moved as for the planes in case 1, with the "arrows", the "1", "2" keys. ", and "Shift". When the trajectory is deemed satisfactory, recording and returning are done using the “Enter” key.
It is possible, in the case of complex "pushback" trajectories, to add additional points (up to 9 in total). This will be seen in a complementary tutorial.